
Installing Android Studio for Apache Cordova
At work we’re looking at using Apache Cordova to create cross-platform applications. The idea of being able to use a single code base and yet still target Android, Windows and desktop systems (e.g. via Electron) is very enticing.
To get myself up to speed on the topic I read a few books about Cordova, one of which is a particularly good introduction to the topic: Apache Cordova in Action by Raymond K. Camden1. The book was published in 2016 which isn’t really that long ago, however it’s amazing how much has changed in the last three years. Most of the discussion in the book is still relevant, however the installation instructions for the Android SDK are now out of date.
Having recently worked out how to install the Android SDK (now part of Android Studio) in order to follow along with the examples in Apache Cordova in Action I thought I’d write up my experiences here; if nothing else, it will help me get up to speed faster the next time I have to set up Cordova for use with Android.
Getting Android Studio
As noted above, the Android SDK is now actually part of Android Studio. To get Android Studio, navigate to its download page and click on the “Download Android Studio” button. In my case this is the installer for Linux 64-bit; your mileage will probably vary.
After agreeing to the terms and conditions a rather large (~1 GB) zip archive will be downloaded. You will find that the pattern of downloading large files will repeat itself on the way to getting Cordova to handle starting the Android emulator.
The installation procedure will, by default, create several Android-related directories in your home directory. Unfortunately, one can’t really get around this, so we’ll just unpack the zip archive into the home directory. Once the zip archive has finished downloading, unpack it like so:
cd $HOME
unzip ~/Downloads/android-studio-ide-182.5314842-linux.zip
Installing Android Studio: the Gory Details
The Android Studio installation seems to be completely graphical (at least, I haven’t found a way to script this), so here are the steps I took to get it installed.
As the installation docs in the extracted zip archive mention, you need to
enter the android-studio/bin directory and run the studio.sh script.
cd android-studio/bin
./studio.sh
You will be greeted with a dialog asking you if you want to import settings from a previous installation.
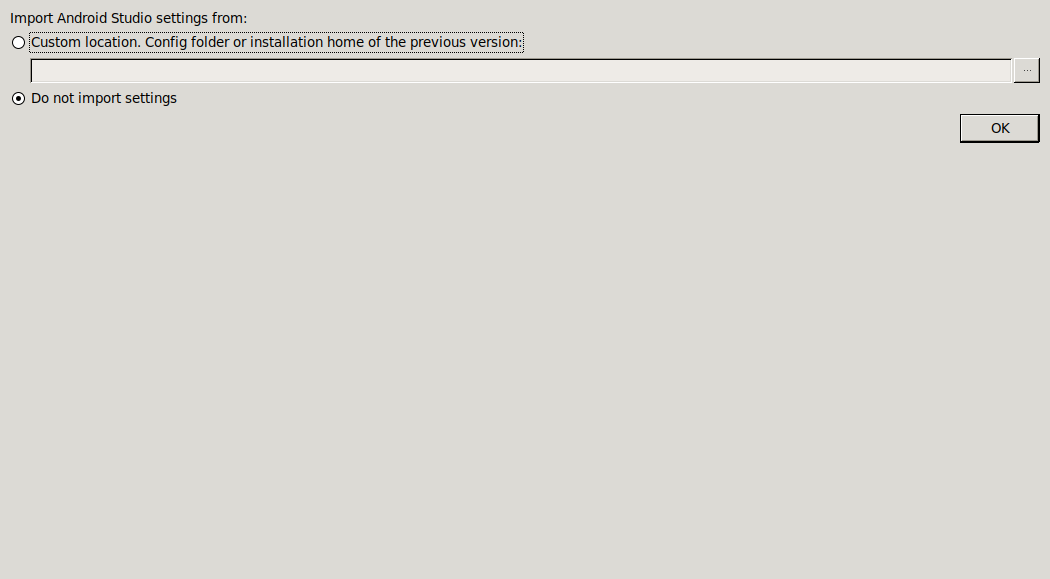
In my case I don’t have any such previous installation, so using the default option of “Do not import settings” is perfect and I just needed to click on “Ok”.
The welcome window for the the installation wizard should now appear
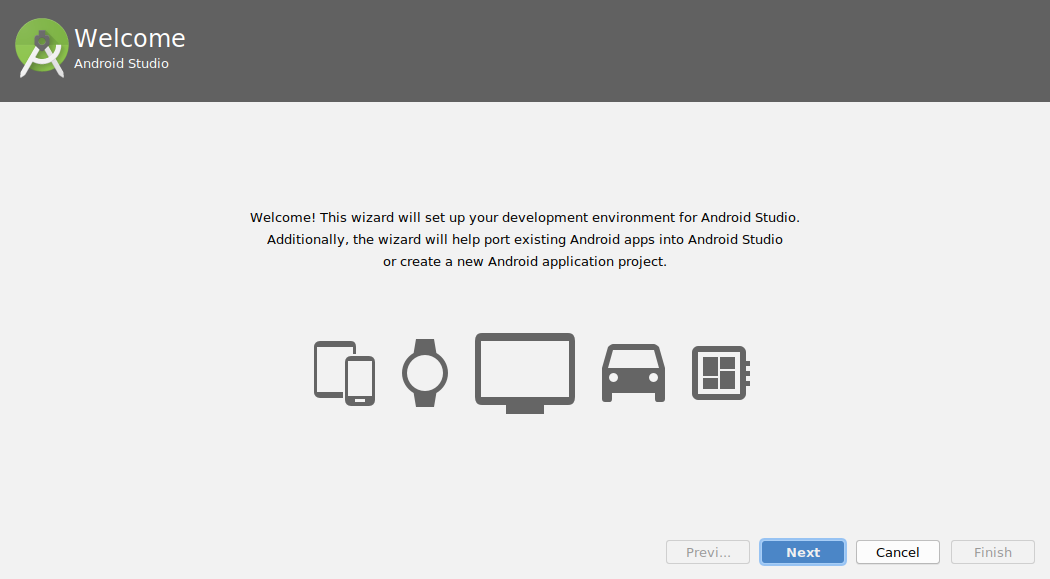
Simply click on “Next” to continue. You will now be asked what type of installation you would like to have (either Standard or Custom).
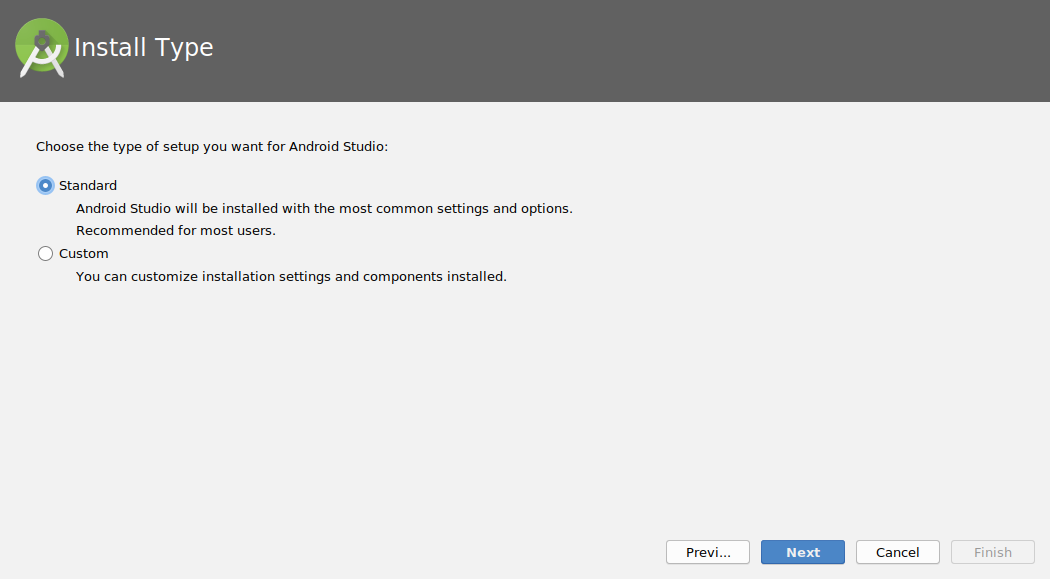
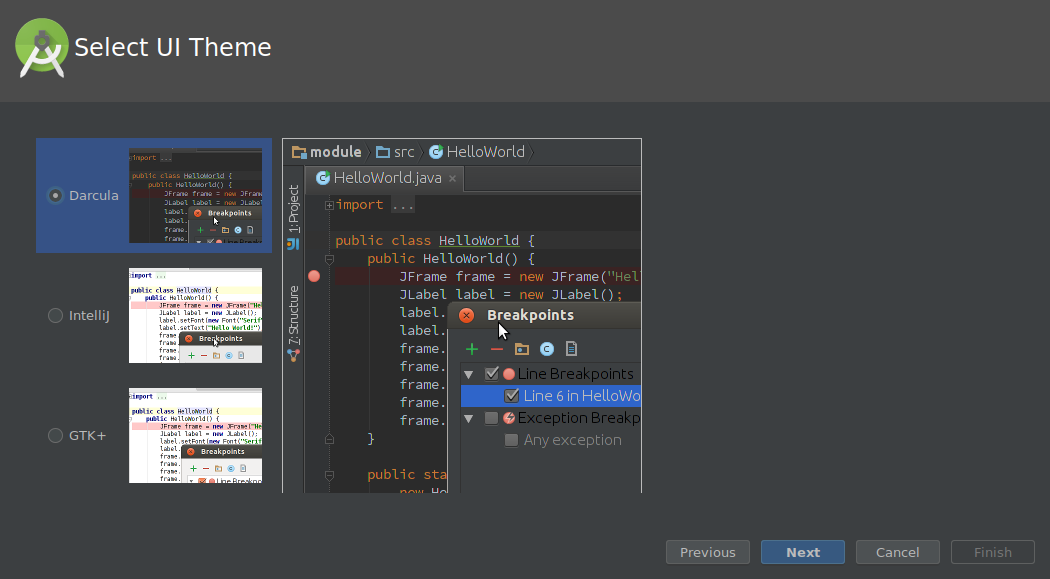
The default (Standard) is fine, so one can just click on “Next”. There
are a few user interface (UI) themes to choose from depending upon how you
would like your IDE to look. I chose “Darcula” here because I normally use
a black background in my “IDE” (i.e. tmux and vim) and because the name
is amusing.
As you guessed, just click on “Next” to go to the next step. Now you can check that the settings you’ve chosen are ok and can change them by going back to previous windows in the installation wizard.
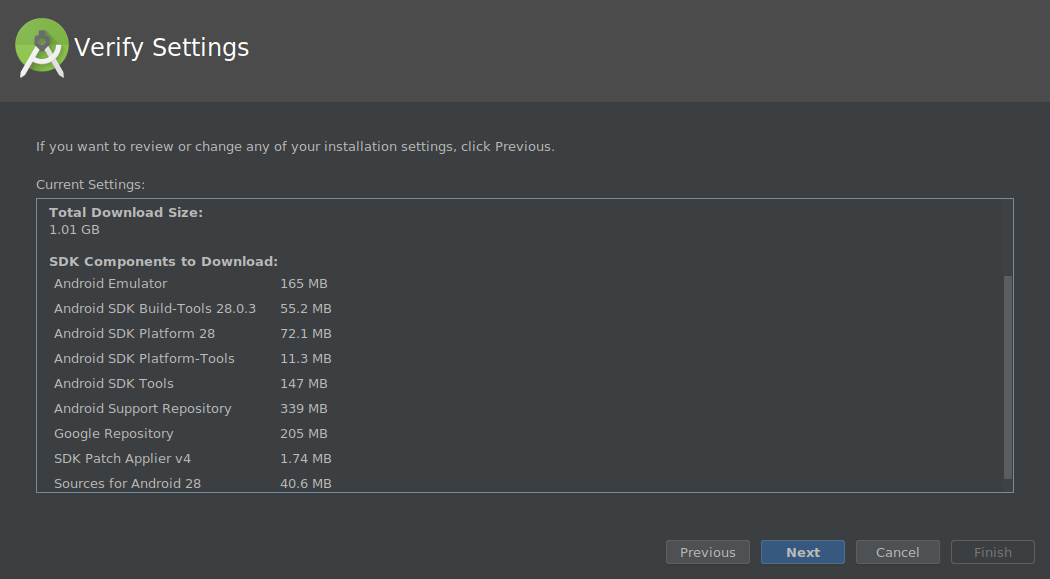
I’m quite happy with these settings so I click on “Next” to continue. I was now informed that I can run the Android emulator in an accelerated performance mode.
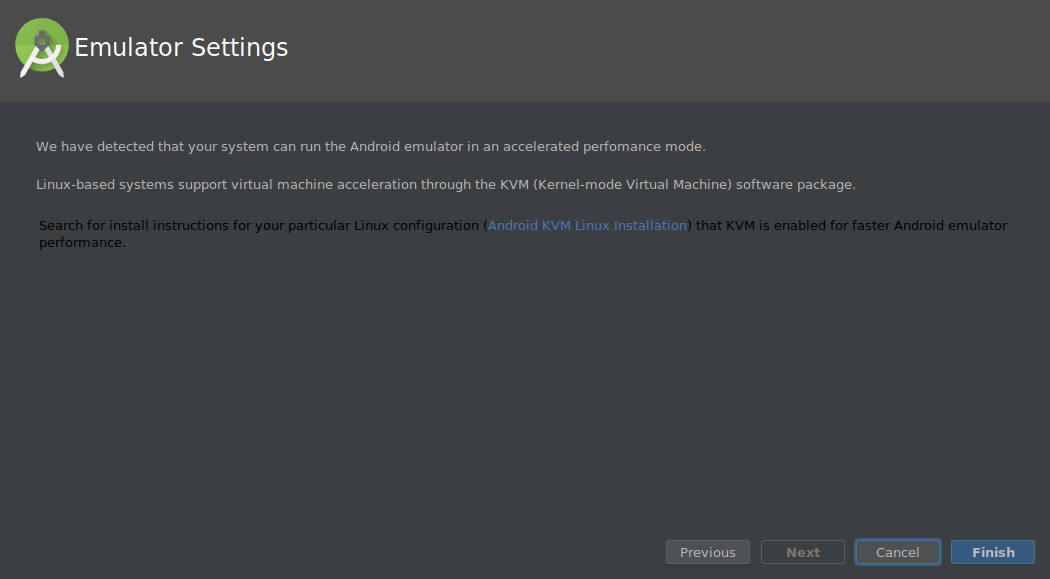
You might or might not be shown this depending upon your operating system and/or hardware. Click on “Finish” in order to complete the installation. We now find that even more needs to be downloaded (about another gigabyte; this is a bandwidth- and disk-space-hungry application).
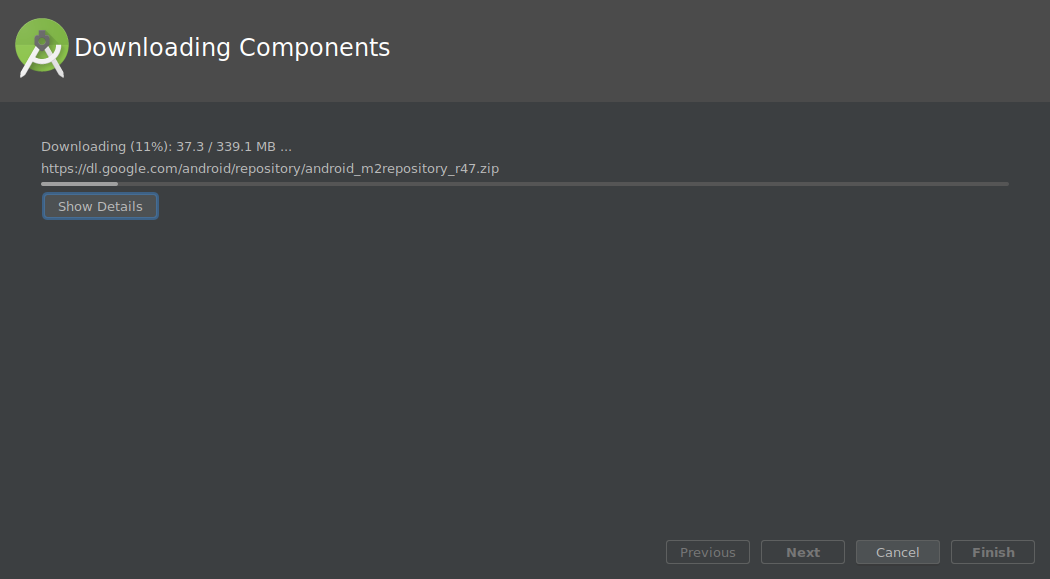
Eventually everything will have been downloaded
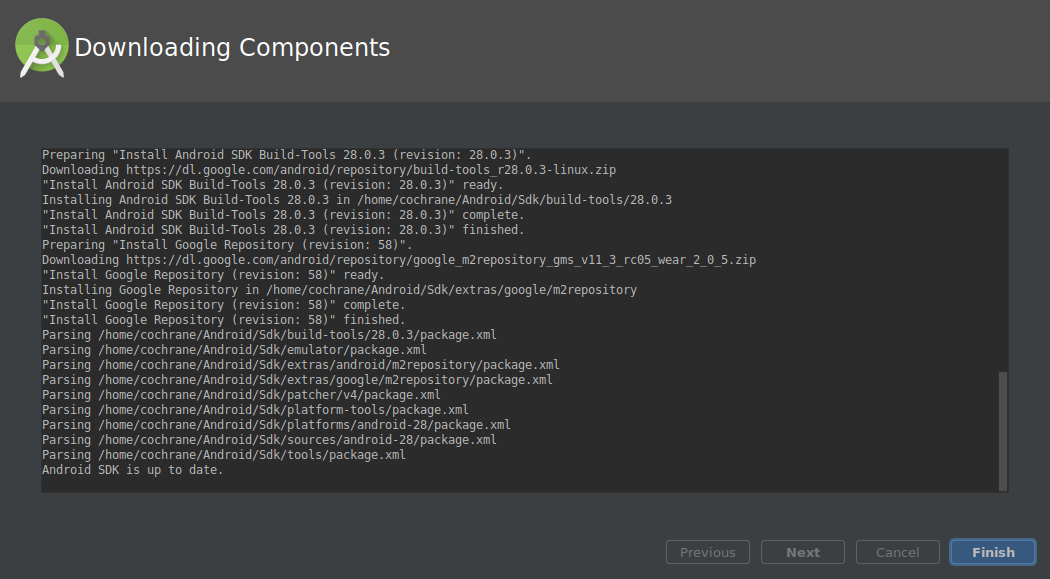
and you will be asked to start a new project.
You don’t have to start a new project to continue (we don’t actually want to run Android Studio directly), you can simply close this window. The remaining steps can be carried out from the command line; note that this diverges from the discussion in Apache Cordova in Action.
Setting up a healthy work environment
I prefer to work on the command line, which I find to be much faster than
clicking on buttons in a GUI just to get stuff done. This does have its
downsides. In this particular case, the developers of Android Studio have
put a lot of effort into making things inside Android Studio “just work”,
however not necessarily for the command line (at least, not that I could
find). Consequently, in order for the following sections to “just work” for
the command line, it’s necessary to set the JAVA_HOME environment variable
and to extend the PATH environment variable. Here is a summary:
- set
JAVA_HOMEto the path Android Studio’sjre/directory (so that the expected Java libraries are used). - add the path to the Android SDK
tools/bin/directory to thePATH(so that tools such assdkmanagerandavdmanagercan be found). - add the path to the Android SDK
emulator/directory to thePATH(so that theemulatorprogram can be found). - prepend the path to the JRE bin directory to the
PATH(since Android Studio’s version ofjavaneeds to be found before the systemjavais). - add the path to Android Studio’s
gradle/bin/directory (so that Cordova can findgradlewhen we use it later). - set the executable bit on the
gradlebinary. For some reason this isn’t set beforehand and if one doesn’t set the executable bit, then running the Android emulator from Cordova won’t work.
I don’t always want my shell environment to contain these changes
(especially not the prepended JRE bin path; that would break all of my
system packages which use Java), consequently I’ve created a small shell
script to activate the Android environment, called ~/bin/activate-android:
#!/bin/bash

SDK_PATH=$HOME/Android/Sdk
STUDIO_PATH=$HOME/android-studio

export JAVA_HOME=$STUDIO_PATH/jre

export PATH=$PATH:$SDK_PATH/tools:$SDK_PATH/tools/bin:$SDK_PATH/emulator:$STUDIO_PATH/gradle/gradle-4.10.1/bin
export PATH=$STUDIO_PATH/jre/bin:$PATH
export ANDROID_SDK_ROOT=$SDK_PATH

# make gradle executable if it isn't already
GRADLE_BIN=$STUDIO_PATH/gradle/gradle-4.10.1/bin/gradle
if [ -f "$GRADLE_BIN" -a ! -x "$GRADLE_BIN" ]
then
    chmod +x $GRADLE_BIN
fi
Now I just need to source this file and my environment is how I want it and the Gradle binary is executable (if it wasn’t already), i.e.:
source ~/bin/activate-androidEmulating an Android device
In order to check that everything works, we’d like to run the Android emulator, but before we can do that, we need to create an Android Virtual Device (a.k.a. AVD). However, before we can do that, we need to download a suitable system image.
To be consistent with the discussion in section 2.1 of Apache Cordova in Action, we’ll use the Android API version 19 (corresponding to Android version 4.4).
The order of operations wasn’t obvious to me when I was doing this (I tried
using the avdmanager to create the AVD first, but that didn’t work because
the system image was missing) and an answer on Stack Overflow to a question
about creating an Android
AVD helped me work out which
order to run the commands and what parameters one should give them.
A word of warning for those who have skimmed the internet for information
about creating AVDs: once upon a time, one used the android command to
install system images and manage AVDs, however this command (which is
nevertheless still delivered with the SDK) is now deprecated and one should
use sdkmanager for system images and avdmanager for AVDs instead.
Installing an appropriate system image
To find out what options sdkmanager takes, just use the --help option:
sdkmanager --helpTo find out which packages are available, one uses the --list option:
sdkmanager --listSince we want to use version 19 of the Android API, we should install the
system-images;android-19;default;x86 image:
sdkmanager "system-images;android-19;default;x86"This will download and install the requested system image. You will need to accept the license in order to continue with the download and installation. Also note that I chose the x86 image; this is supposedly about 10x faster than the armabi image (well, that’s what Android Studio told me when I tried to use the armabi image, and yeah, it’s definitely faster), so it’s a good idea to use the x86 image if possible.
Creating an Android Virtual Device
Now we’re ready to create the AVD! To do this we use the avdmanager, to
see what it can do, just pass it the --help option:
avdmanager --helpTo find out the available targets for and AVD or available virtual devices,
just pass the list command to avdmanager (yes, this is inconsistent with
the usage in sdkmanager, but let’s not worry about that).
avdmanager listSince version 19 of the Android API is fairly old, I chose to use a fairly old device, namely a “Nexus 5”, a phone I once owned.
To create the AVD, pass the create subcommand to avdmanager along with
the remaining required parameters (note that although the help for the
create subcommand only mentions that the --name option is required,
actually we have to specify a device and a system image, via the --device
and --package options respectively). The full command looks like this:
avdmanager create avd --name nexus5 --device "Nexus 5" \
    --package "system-images;android-19;default;x86"
Emulating the Android device
We’re now ready to emulate our newly-created Nexus 5. This step will tell
us if everything is wired up correctly inside Android Studio so that we can
later emulate devices from Cordova. To start the device, we use the
emulate command:
emulator -avd nexus5A note for VirtualBox users (and those using VirtualBox implicitly via Vagrant): if you have a VirtualBox VM running, you will get an error like this:
ioctl(KVM_CREATE_VM) failed: 16 Device or resource busy
qemu-system-i386: failed to initialize KVM: Device or resource busy
All this means is that VirtualBox VMs can’t run at the same time as an Android emulator. Turning off the VM will allow the emulator to run.
You should now see Android start and will be presented with a screen like this:
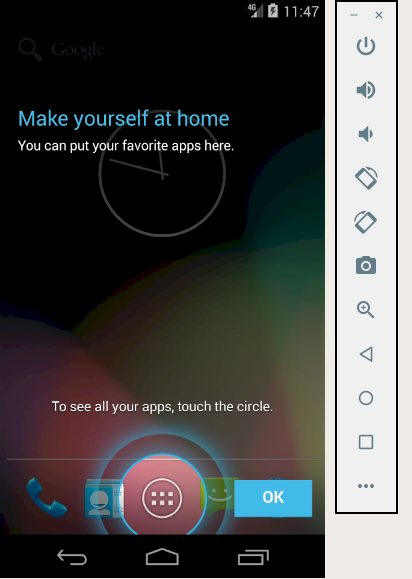
Click on “Ok” to get past the first screen and then long-click on the power button (at the top of the list of buttons at the right) to send the power-off signal to the emulated phone. Select the option to switch off the phone and wait for the emulator to shut everything down.
Now let’s get this to work in Cordova!
Emulating an Android app via Cordova
Installing Cordova
To install Cordova we don’t have to do as much work as was required for
Android Studio. Since Cordova is a NodeJS package, we need to make sure the
nodejs and npm packages are installed:
sudo apt install nodejs npmThe instructions used in Apache Cordova in Action install Cordova
globally (i.e. by adding the -g flag to npm; see section 2.6). I like
to keep my projects as separate from one another as I can and to let
Debian’s APT system manage my system packages where possible, hence I will
only install Cordova locally (i.e. within a given directory). The only
penalty here is that the path to Cordova’s bin/ directory has to be set
explicitly. I have a shell script for that too, but first, let’s create a
project directory and install Cordova into it:
mkdir cordova_project
cd cordova_project
npm install cordova
That’s it! Unfortunately, we can’t run the cordova command directly, but
by putting the following code into $HOME/bin/activate-cordova:
#!/bin/bash

export PATH=$PATH:$PWD/node_modules/cordova/bin
and sourcing the file
source ~/bin/activate-cordovawe can now run the cordova command within this shell, e.g.:
cordova --helpCreating a Cordova project
To get started with Cordova, one must first create a project (using the example project name used in Apache Cordova in Action:
cordova create myfirstprojectThis will create a directory called myfirstproject and populate it with a
set of default files and directories so that one can start a “Hello World”
application very quickly. Change into this directory
cd myfirstproject/and run
cordova platformsto see a list of platforms for which you can target your Cordova app development. We’re interested in developing for Android here, so we use
cordova platforms add androidto set up our app to target Android. It’s also possible to target a browser for a standard web application or even Windows if one wants to create an app for Windows 8 or Windows 10.
Running the default “Hello World” Cordova app in Android
Now we just need to run
cordova emulate androidto get Cordova to start the Android emulator and to start the “Hello World” app within it. Note that Gradle is likely to want to download itself in this step, so it can take a while to get going (I did mention that lots will be downloaded, didn’t I?) If all went well, you should see a screen like this:

Conclusion
Yay! We’ve got Android Studio and Cordova installed and have managed to get the default Cordova “Hello World” app to start. Now for the really hard work: actually developing the real application!
Appendix: Cleaning up
Should you ever want to completely remove everything that was changed/installed as part of the Android Studio installation and Cordova setup, you will need to remove these files and directories:
android-studio/
Android
.AndroidStudio3.3/
.android/
.gradle/
.emulator_console_auth_token
AndroidStudioProjects/
.npm/-
Please note that I’m not affiliated with Manning or with Raymond K. Camden; I simply found his book to be a good introduction to Cordova and have thus followed the flow of his installation instructions for this post. ↩
Support
If you liked this post and want to see more like this, please buy me a coffee!