
Resizing the disk on a Vagrant virtual machine
When creating a Vagrant VM, one gets a pre-determined VM disk size. While this is more than enough in most use cases, sometimes it isn’t enough for what one wants to do. If the VM needs to receive a lot of data, the disk will fill up sooner rather than later. Resizing a Vagrant VM, however, isn’t trivial. Here’s what I worked out when I needed to resize a Vagrant VM on Debian Linux.
Image credits: Seeklogo, KP Arts - Flaticon, Wikimedia Commons, Wikimedia Commons
While I was working at Drift+Noise,1 one way to replicate part of the production environment for QA testing in a development environment was to use a Vagrant VM. Because the system stored pre-processed satellite data (it was the backend which provided imagery to the visualisation frontend, IcySea) it received a lot of data. Eventually, our satellite coverage of the Arctic and Antarctic was so comprehensive that the Vagrant VM’s disk space was no longer sufficient for our storage needs. Not wanting to delete all the data and configuration and start over from scratch, I found out that it was possible to resize the VM’s disk to store the extra data. Here’s how.
Standing on the shoulders of giants
I wasn’t the first person to run into this issue or the first to find a solution. These blogs and StackOverflow questions were particularly helpful to me in finding my own path through this maze.
Resizing a Vagrant VM:
- How can I increase disk size on a Vagrant VM?
- Resize a Vagrant VMDK Drive
- A happy ending story with Vagrant [Resizing a Lucid32 vmdk box]
Resizing a Linux partition:
Resizing a VirtualBox disk image:
- Increase hard disk size in VirtualBox 4.x
- How do I increase the hard disk size of the virtual machine?
- How To Resize A VirtualBox 4+ Hard Disk (.VDI), The Easy Way [Quick Tip]
A worked example
The best way to show how to do this is via a worked example. The plan looks like this:
- Create a standard Vagrant VM.
- Use up most of its disk space with an example file.
- Convert the VMDK disk image to VDI format.
- Resize the VDI disk image.
- Detach the old disk image from the VM and attach the new one.
- Resize the filesystem.
- Profit! (Well, maybe not)
Creating the example VM
Let’s begin by creating a bare Debian bullseye system. Here’s the
Vagrantfile which will create such a VM:
VAGRANTFILE_API_VERSION = "2"
Vagrant.configure(VAGRANTFILE_API_VERSION) do |config|
  config.vm.define "bare-test-bullseye" do |bare_test_bullseye|
    bare_test_bullseye.vm.box = "debian/bullseye64"
    bare_test_bullseye.vm.network "private_network", ip: "192.168.23.116"
  end
end
This VM uses the official Debian VirtualBox image and sets a private network address explicitly so that the address doesn’t clash with any other Vagrant VMs running on my dev box.
To create this VM, we use vagrant up:
$ vagrant up bare-test-bullseye
SSH-ing into the machine, we see its initial disk usage via the df
command:
vagrant ssh bare-test-bullseye
vagrant@bullseye:~$ df -h
Filesystem      Size  Used Avail Use% Mounted on
udev            219M     0  219M   0% /dev
tmpfs            48M  428K   47M   1% /run
/dev/sda1        20G  833M   18G   5% /
tmpfs           237M     0  237M   0% /dev/shm
tmpfs           5.0M     0  5.0M   0% /run/lock
vagrant         437G  383G   54G  88% /vagrant
tmpfs            48M     0   48M   0% /run/user/1000
The VM’s main disk is mounted as /dev/sda1 onto / (i.e. “root”) and has
a size of 20GB, of which 833MB are already used by the operating system.
You can ignore the vagrant filesystem mounted on /vagrant; this is the
map from the guest image to the host system. Yes, I only have 54G of space
left on my laptop, why do you ask? ![]()
We’re only using 5% of the possible space on the VM’s disk image. Let’s simulate an almost-full system by creating a large file.
Creating a large file with dd
We want to simulate having filled the VM’s disk with lots of data. We can
do this by creating a large file of known size with the Linux dd
utility. For instance, to create
a file 1GB in size and filled only with zeroes, we could use this command:
$ dd if=/dev/zero of=smash bs=256M count=4
This tells dd to get its input (if: “input file”) from
/dev/zero, which is a special
file that produces a constant stream of null characters. It then directs
this stream of null characters to its output (of: “output file”),
which–purely out of nostalgia–I’ve decided to call
smash. We then tell dd to
grab data in 256MB chunks (bs: “bytes”/”buffer size”) and to use four such
chunks count=4. Thus the above command pipes four chunks of 256MB null
characters into a file called smash, creating a 1GB file.
However, we want to create a 17GB file, so you might think you could run
$ dd if=/dev/zero of=smash bs=1G count=17
but unfortunately, you’d be wrong. At least within a Vagrant VM, this isn’t
likely to work. I think this is because the amount of RAM is also
restricted within the VM, hence creating a 1GB buffer in RAM simply isn’t
possible. For example, creating a 1GB file with bs=1G produces this error
vagrant@bullseye:~$ dd if=/dev/zero of=smash bs=1G count=1
dd: memory exhausted by input buffer of size 1073741824 bytes (1.0 GiB)
Even using half a GB doesn’t work:
vagrant@bullseye:~$ dd if=/dev/zero of=smash bs=512M count=1
dd: memory exhausted by input buffer of size 536870912 bytes (512 MiB)
Fortunately, 256MB is possible. In that case, we can pipe 68 chunks of null data–each 256MB in size–to produce a 17GB file (in other words, 17GB/256MB = 68):
vagrant@bullseye:~$ dd if=/dev/zero of=smash bs=256M count=68
68+0 records in
68+0 records out
18253611008 bytes (18 GB, 17 GiB) copied, 37.5588 s, 486 MB/s
Now the VM’s disk is almost full
vagrant@bullseye:~$ df -h
Filesystem      Size  Used Avail Use% Mounted on
udev            219M     0  219M   0% /dev
tmpfs            48M  428K   47M   1% /run
/dev/sda1        20G   18G  706M  97% /
tmpfs           237M     0  237M   0% /dev/shm
tmpfs           5.0M     0  5.0M   0% /run/lock
vagrant         437G  384G   53G  88% /vagrant
tmpfs            48M     0   48M   0% /run/user/1000
with only 706MB of free space available in the root partition.
Shock! Horror! Our disk is almost full! What do we do? Let’s shut it down and resize the disk image.
Converting from VMDK to VDI
To convert the VMDK (Virtual Machine Disk; VMWare’s disk format) disk image to VDI (Virtual Disk Image; native to VirtualBox) format, the VM can’t be running, so we log out
# Ctrl-d
vagrant@bullseye:~$
logout
Connection to 127.0.0.1 closed.
and halt the VM:
$ vagrant halt bare-test-bullseye
==> bare-test-bullseye: Attempting graceful shutdown of VM...
To convert the disk image to the correct format, we need to find it first.
When using Vagrant on a Linux system, the default VM provider is VirtualBox,
hence you’ll likely find the VM disk images on the host system in the
~/VirtualBox VMs directory. In my case, this was:
~/VirtualBox VMs/vagrant_bare-test-bullseye_1724844829238_36188/
Changing into this directory and listing its contents you’ll see output like this:
$ cd ~/VirtualBox VMs/vagrant_bare-test-bullseye_1724844829238_36188/
$ ls
box.vmdk  vagrant_bare-test-bullseye_1724844829238_36188.vbox
Logs      vagrant_bare-test-bullseye_1724844829238_36188.vbox-prev
The file we’re interested in is box.vmdk. As we can see from the
filename, it’s a VMDK image. Unfortunately, it’s not possible to resize
VMDK images, hence we have to convert this to a VDI image (which is
resizable). We convert into VDI format via the --format option to the
clonehd subcommand of the vboxmanage utility, like so:
$ vboxmanage clonehd box.vmdk box.vdi --format VDI
0%...10%...20%...30%...40%...50%...60%...70%...80%...90%...100%
Clone medium created in format 'VDI'. UUID: dbb6e4dc-85f1-4608-a2f3-7539a8f99d48
You will also see the command written as VBoxManage in other articles
online. It doesn’t matter if you use vboxmanage or VBoxManage: they
both are symlinks to the same central command:
$ ls -la $(which vboxmanage)
lrwxrwxrwx 1 root root 27 Oct 19  2023 /usr/bin/vboxmanage -> ../share/virtualbox/VBox.sh
$ ls -la $(which VBoxManage)
lrwxrwxrwx 1 root root 27 Oct 19  2023 /usr/bin/VBoxManage -> ../share/virtualbox/VBox.sh
After cloning and converting to VDI format, you’ll find a file called
box.vdi in the VM’s VirtualBox directory. Now we’re in a position to
resize it.
Resizing the VDI disk image
To resize the image, we pass the --resize option to the modifyhd
subcommand of the vboxmanage utility:
$ vboxmanage modifyhd box.vdi --resize 40000
0%...10%...20%...30%...40%...50%...60%...70%...80%...90%...100%
where the --resize option takes a size in megabytes as its argument. In
other words, the invocation used here (--resize 40000) means to resize the
disk image to 40GB.
Our VDI disk image is now of the correct size. To continue, we need to detach the old image from the VM and attach the new image to it.
Here be dragons!
Do NOT try resizing the VMDK image by using modifyhd as we just did
above; this will break the disk image. Here’s what will happen if you try:
$ vboxmanage modifyhd box.vmdk --resize 40000
0%...
Progress object failure: NS_ERROR_CALL_FAILED
VBoxManage: error: Failed to resize medium
VBoxManage: error: Code NS_ERROR_CALL_FAILED (0x800706BE) - Call to remote object failed (extended info not available)
VBoxManage: error: Context: "RTEXITCODE handleModifyMedium(HandlerArg*)" at line 937 of file VBoxManageDisk.cpp
We see that the process failed. Unfortunately, it also wrote data to the disk image, hence if you now try to boot the VM, you’ll get an error like this:
└> vagrant up bare-test-bullseye
Bringing machine 'bare-test-bullseye' up with 'virtualbox' provider...
==> bare-test-bullseye: Checking if box 'debian/bullseye64' version '11.20221219.1' is up to date...
==> bare-test-bullseye: Clearing any previously set forwarded ports...
==> bare-test-bullseye: Clearing any previously set network interfaces...
==> bare-test-bullseye: Preparing network interfaces based on configuration...
    bare-test-bullseye: Adapter 1: nat
    bare-test-bullseye: Adapter 2: hostonly
==> bare-test-bullseye: Forwarding ports...
    bare-test-bullseye: 22 (guest) => 2216 (host) (adapter 1)
==> bare-test-bullseye: Booting VM...
There was an error while executing `VBoxManage`, a CLI used by Vagrant
for controlling VirtualBox. The command and stderr is shown below.

Command: ["startvm", "ab03d375-60cf-44ef-bf68-b85f83a807de", "--type", "headless"]

Stderr: VBoxManage: error: Could not open the medium '/home/cochrane/VirtualBox VMs/vagrant_bare-test-bullseye_1724844829238_36188/box.vmdk'.
VBoxManage: error: VMDK: inconsistent references to grain directory in '/home/cochrane/VirtualBox VMs/vagrant_bare-test-bullseye_1724844829238_36188/box.vmdk' (VERR_VD_VMDK_INVALID_HEADER).
VBoxManage: error: VD: error VERR_VD_VMDK_INVALID_HEADER opening image file '/home/cochrane/VirtualBox VMs/vagrant_bare-test-bullseye_1724844829238_36188/box.vmdk' (VERR_VD_VMDK_INVALID_HEADER)
VBoxManage: error: Details: code NS_ERROR_FAILURE (0x80004005), component MediumWrap, interface IMedium
Oopsie. Back up your data, kids!
Detaching VMDK and attaching VDI
Assuming that you didn’t try to resize the VMDK image (honestly, don’t do that), we’re now able to detach the VMDK image from the VM and replace it with the resized VDI image. There are two ways you could do this: either by using the GUI or by using the command line. Let’s see how to use the GUI first.
Detaching and attaching via the GUI
Start VirtualBox, e.g. from the command line:
$ virtualbox
The main VirtualBox window will appear, showing you a list of all available virtual machines. Click on the name of our example VM in the list of VMs; the item will appear highlighted.
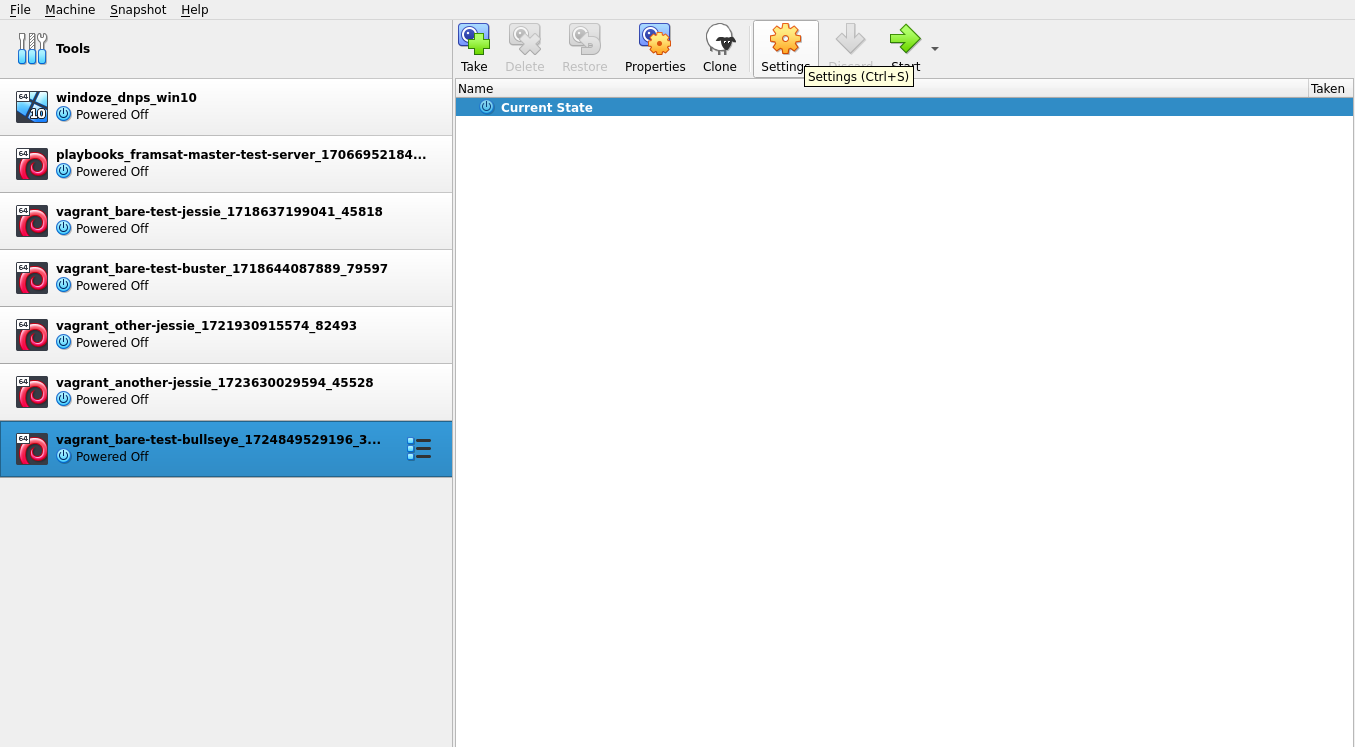
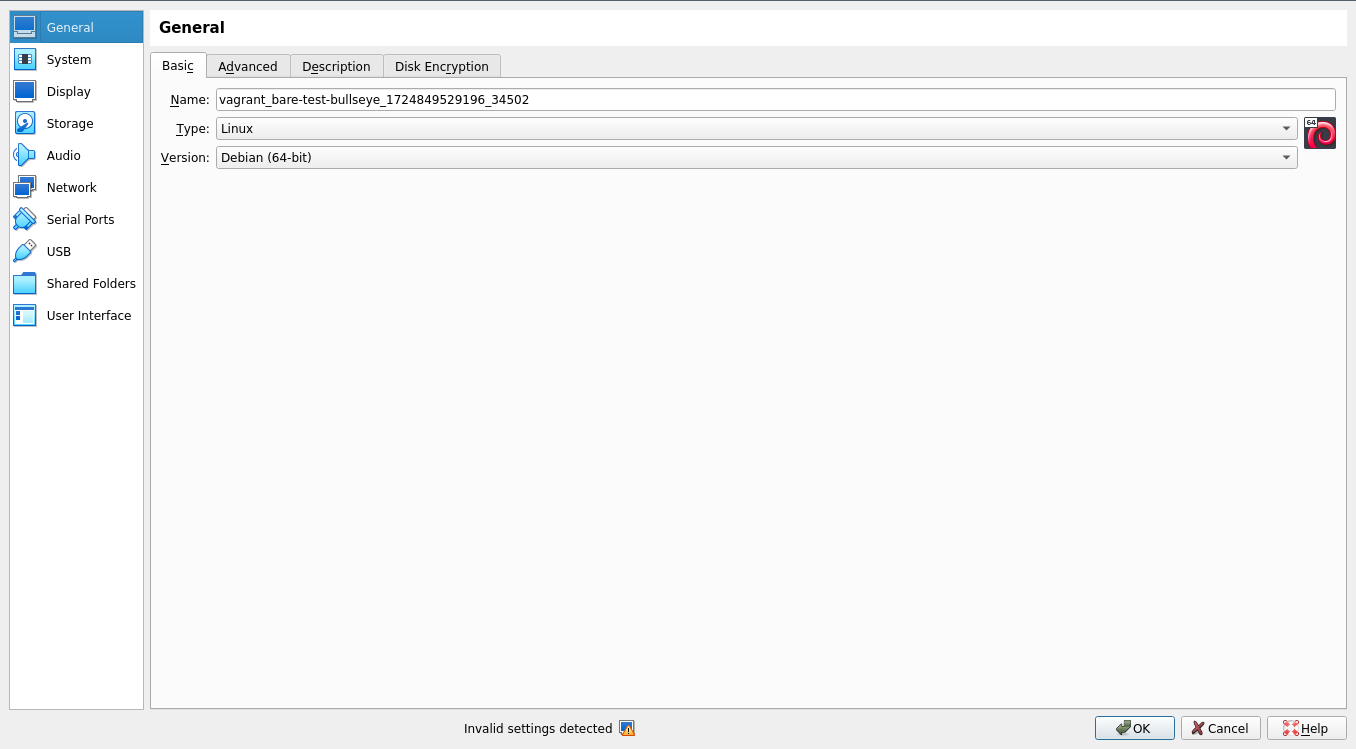
Click on the Settings button (the orange cog icon in the top middle of the screen). You’ll now see the General settings for the VM.
Click on the Storage item from the list in the left-hand panel. You’ll now see the storage devices associated with the VM.
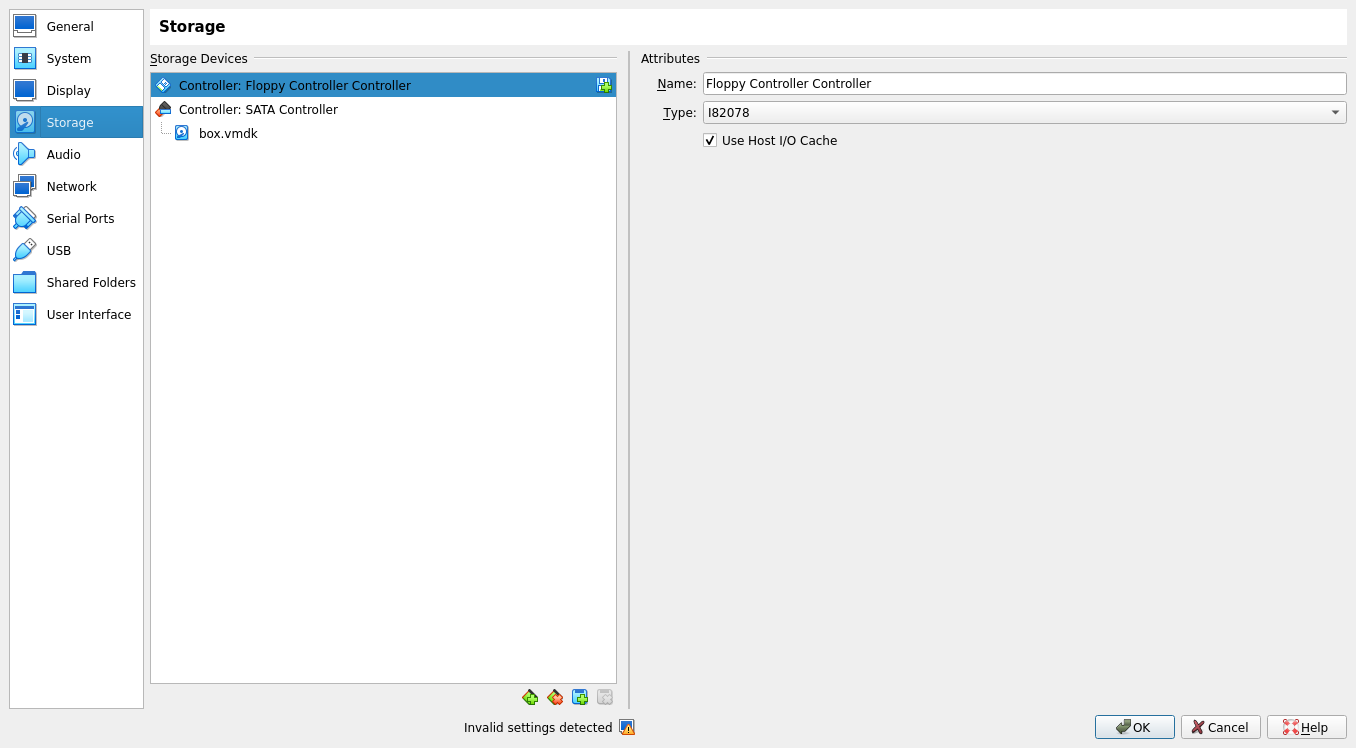
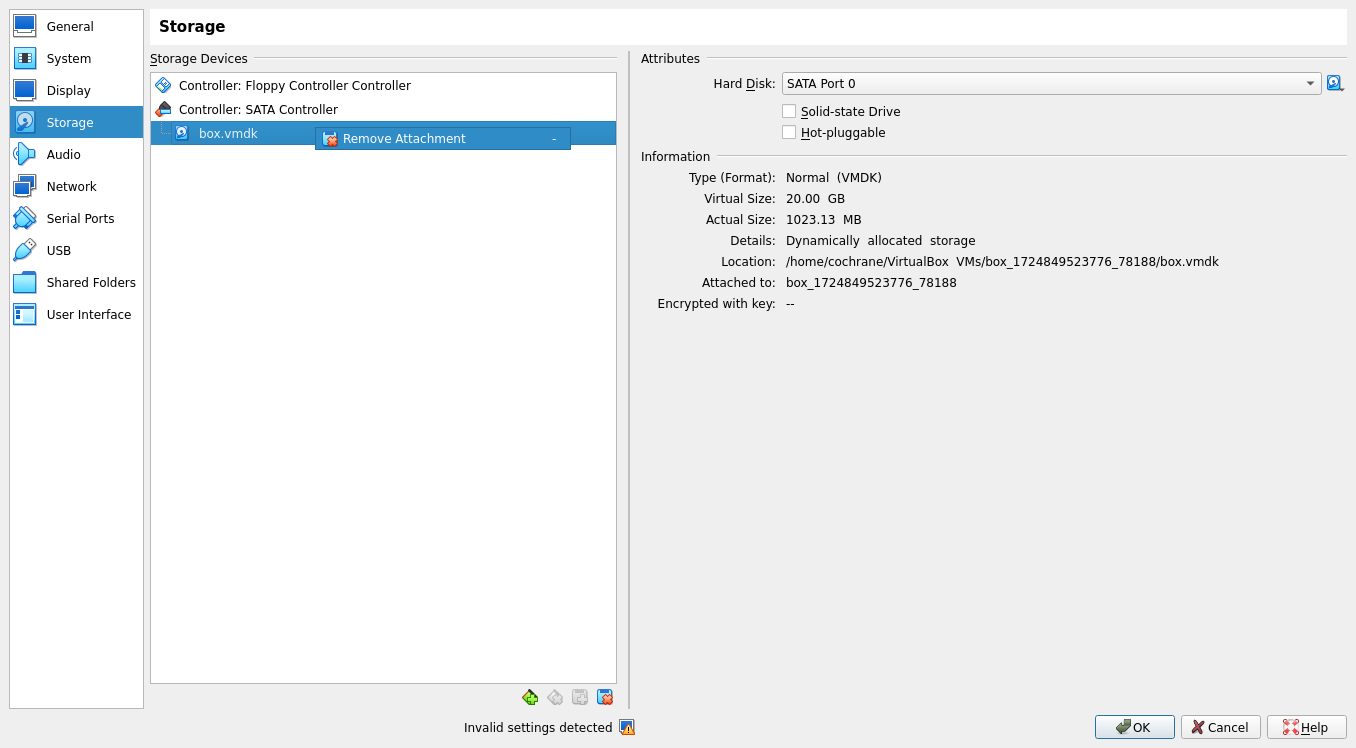
There are two controllers associated with the VM: the Floppy Controller Controller (why “Controller” appears twice, I don’t know) and the SATA Controller (i.e. the controller for the hard disk).
You’ll see that the box.vmdk disk image is associated with this
controller. We want to detach this image from the VM. To do this,
right-click on the box.vmdk item in the central pane. A context menu will
appear with a single item: Remove Attachment.
After selecting the Remove Attachment context menu item, you should now see that there is no disk image associated with the SATA controller. We’re now ready to attach the VDI image we created and resized earlier.
To attach the VDI disk image, right-click on the SATA Controller within the central pane. A context menu will appear with three options.
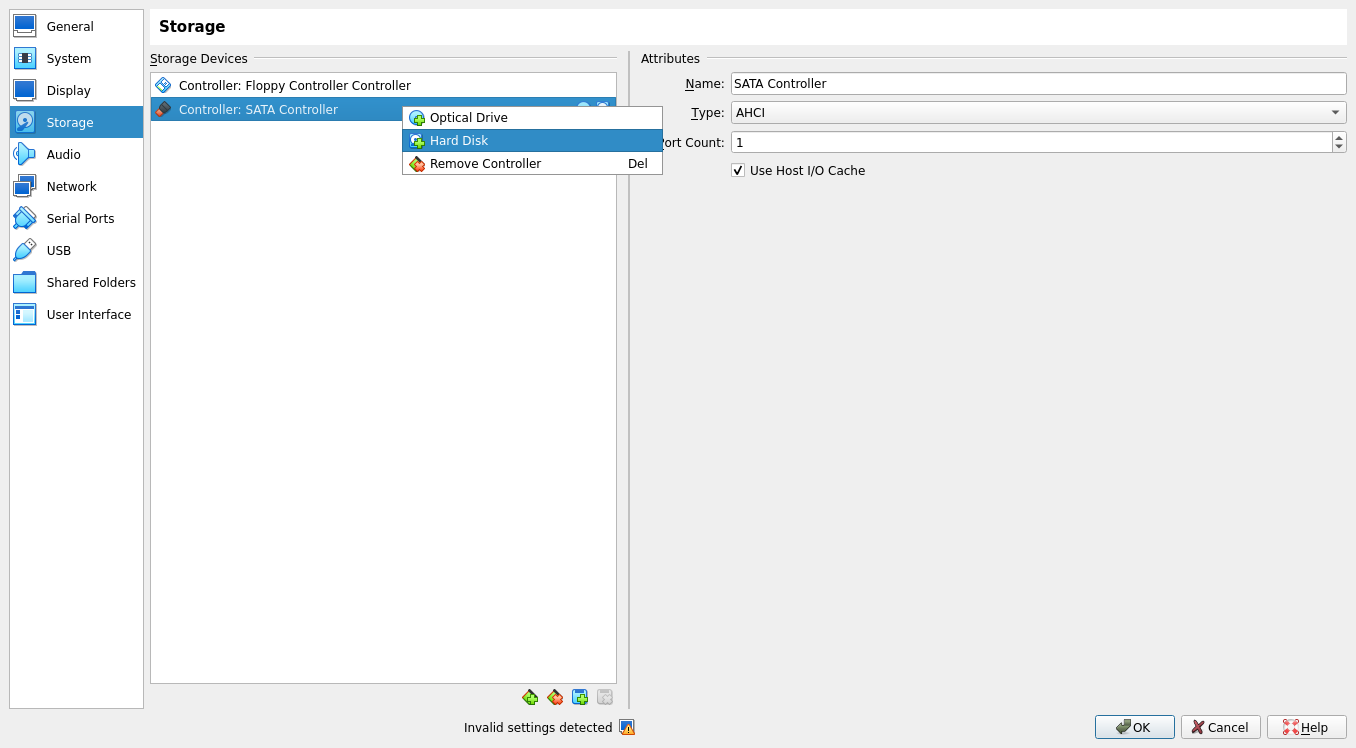
Select the Hard Disk option. Note that this option has a green plus symbol above the icon of a hard disk, so this implies that clicking on this option will add a hard disk. I think it would have been clearer if VirtualBox had called this option Add Hard Disk as that would have made the operation that this option performs much clearer. Oh well.
The Medium Selector window now appears, which allows you to select which medium (i.e. virtual hard disk a.k.a. disk image) to add to the SATA Controller. You’ll see the VDI image we created earlier listed under Not Attached.
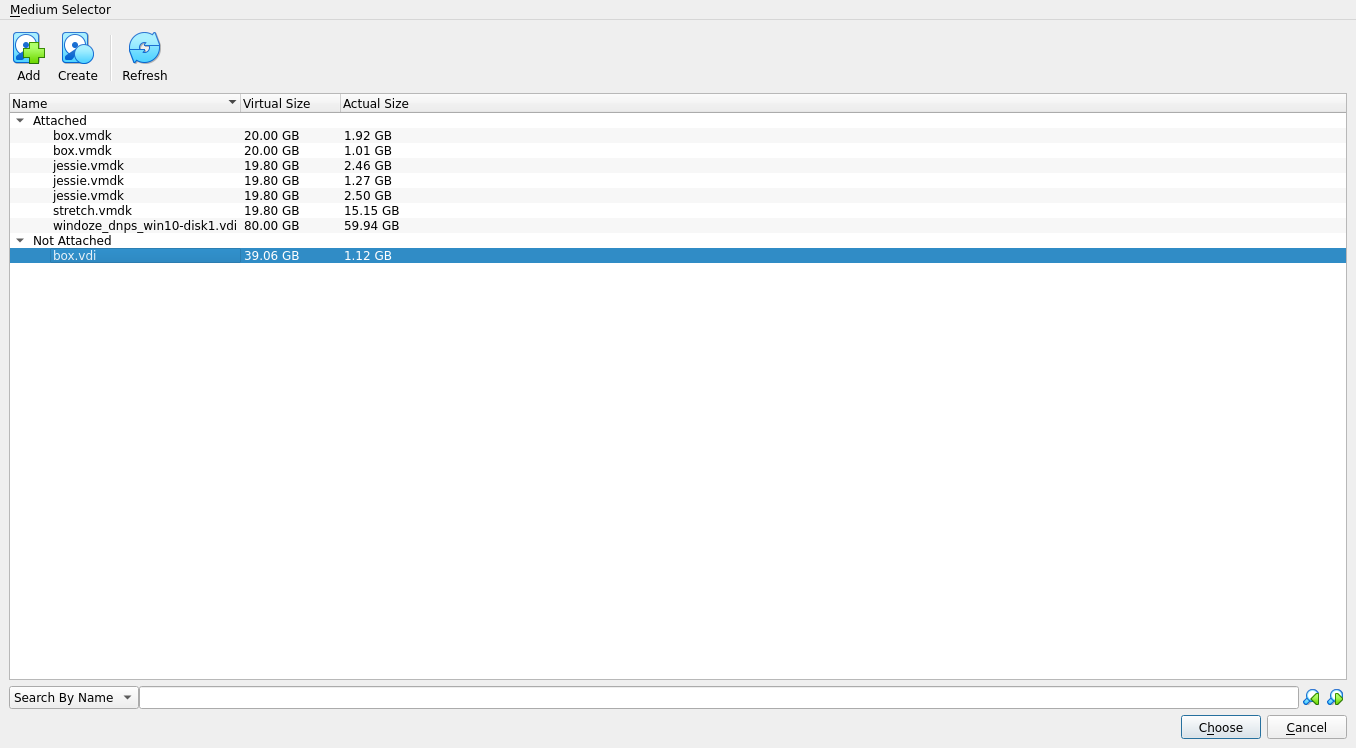
Select the box.vdi item and click on the Choose button at the bottom
right-hand corner of the window. You’ll now see the Storage settings
dialog again, where the VDI image has been added to the SATA Controller.
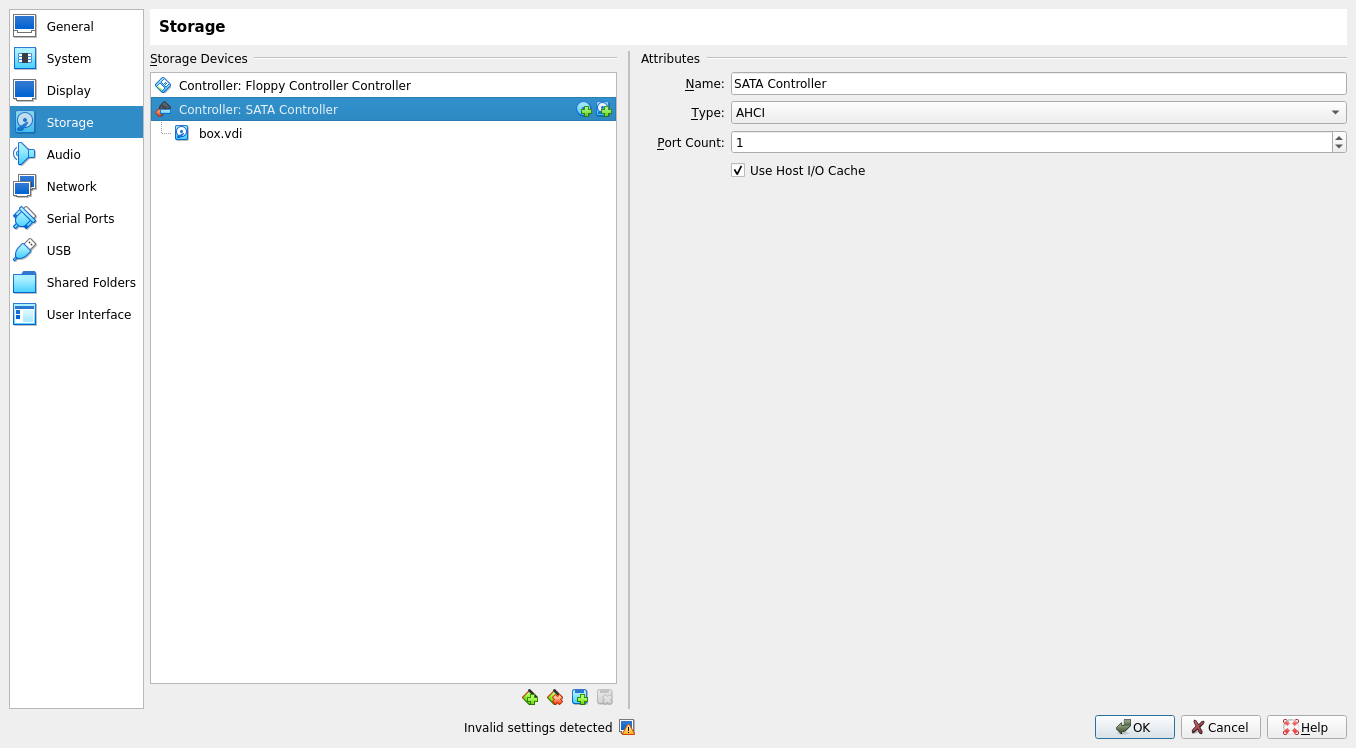
Congratulations! You’ve successfully attached your newly resized disk image to the example VM. Before we boot the VM again, let’s see how to do this via the command line.
Detaching and attaching via the command line
I’m a big fan of the command line as it’s often much easier to repeat processes consistently than it is by clicking around in a GUI. I’d not found any discussion online which uses only the command line, so I decided to work out how to do this. Here’s what I learned.
Before we can detach or attach a disk image, we need to collect a few bits
of information about the VM. To do this we use the showvminfo subcommand
of the vboxmanage utility. For instance, to see all info about our
example VM, we use this command:
$ vboxmanage showvminfo vagrant_bare-test-bullseye_1724851891664_74757
< far too much info to show >
The showvminfo subcommand produces a lot of output, hence we have to
filter the output for the things we need to know. One thing we need to know
is the name of the controller handling interactions between the VM and the
disk image. Thus, we grep for the word Controller in the showvminfo
output, e.g.:
$ vboxmanage showvminfo vagrant_bare-test-bullseye_1724851891664_74757 | grep -i controller
Graphics Controller:         VMSVGA
Storage Controllers:
#0: 'SATA Controller', Type: IntelAhci, Instance: 0, Ports: 1 (max 30), Bootable
#1: 'Floppy Controller Controller', Type: I82078, Instance: 0, Ports: 1 (max 1), Bootable
Here we see that we have two storage controllers, one called SATA
Controller and the other called Floppy Controller
Controller,2 which is the same situation we had in the
previous section. To detach the currently attached disk image, we need to
know the details about the disk image’s connection to the controller. We
can glean this information by asking grep for a couple of lines of context
after a match for SATA Controller via grep’s -A option:3
$ vboxmanage showvminfo vagrant_bare-test-bullseye_1724851891664_74757 | grep -A 2 'SATA Controller'
#0: 'SATA Controller', Type: IntelAhci, Instance: 0, Ports: 1 (max 30), Bootable
  Port 0, Unit 0: UUID: 85c10a71-a459-4731-b587-609d16c4ef83
    Location: "/home/cochrane/VirtualBox VMs/vagrant_bare-test-bullseye_1724851891664_74757/box.vmdk"
The important pieces of information to note here are the name of the VM
(embedded in the Location: string), the path to the currently attached
disk image (this will be useful when attaching a new image), the name of the
controller (which we’ve already worked out) and the port number upon which
the disk image is attached to the controller.
Confusingly, to remove a disk (a “medium” in the VirtualBox parlance), one
needs to use the storageattach subcommand. Thus, to remove the VMDK image
from the VM, we use this command:
$ vboxmanage storageattach vagrant_bare-test-bullseye_1724851891664_74757 \
    --storagectl 'SATA Controller' --port 0 --medium none
where I’ve split the command across multiple lines for readability.
If you’ve had problems trying to work out how to detach a VirtualBox image
before, don’t worry, it’s not obvious from the (extensive) VBoxManage
documentation
that one has to use the storageattach subcommand. I only managed to learn
the solution after I found an answer on StackOverflow to the question “How
to detach vmdk using vboxmanage
cli?”.
The --medium none part is important here. This is the bit that detaches
the storage medium. Effectively, we replace the storage medium attached to
port 0 of the SATA Controller on the VM called
vagrant_bare-test-bullseye_1724851891664_74757 with “nothing”. One can
use the mnemonic “attach nothing to the occupied port” to try to remember to
use storageattach --medium none to detach an image.
In some sense, using storageattach to detach a storage device is like
going to the “Start” menu on Windows to stop the computer. Oh well.
Now that we’ve detached the VMDK image, we can attach the VDI image in its place:
$ vboxmanage storageattach vagrant_bare-test-bullseye_1724851891664_74757 \
    --storagectl 'SATA Controller' --port 0 --type hdd \
    --medium /home/cochrane/VirtualBox\ VMs/vagrant_bare-test-bullseye_1724851891664_74757/box.vdi
where, again, I’ve split the command across multiple lines for readability.
Note that the --port, and --type options are mandatory. We use --port
0 again here because that’s where the previous disk image was attached.
It’s also necessary to use the full path to the new disk image.
Filtering the showvminfo output, looking for the SATA Controller text
and displaying two lines of context we see the new disk image attached to
the controller:
$ vboxmanage showvminfo vagrant_bare-test-bullseye_1724851891664_74757 | grep -C 2 'SATA Controller'
VM process priority:         default
Storage Controllers:
#0: 'SATA Controller', Type: IntelAhci, Instance: 0, Ports: 1 (max 30), Bootable
  Port 0, Unit 0: UUID: 5bcc2277-3ee2-4dd5-a7c7-c90d70023281
    Location: "/home/cochrane/VirtualBox VMs/vagrant_bare-test-bullseye_1724851891664_74757/box.vdi"
Resizing the filesystem
Now that we’ve expanded the disk image to its new size, the final thing we
need to do is resize the filesystem. We do this within the VM via the
resize2fs command.
First, let’s boot the system and SSH into it:
$ vagrant up bare-test-bullseye
$ vagrant ssh bare-test-bullseye
Having a look around, we can see that the large file we created earlier is still there:
vagrant@bullseye:~$ ls -l
total 17825796
-rw-r--r-- 1 vagrant vagrant 18253611008 Aug 28 12:55 smash
What you’ll also notice is that the disk still seems to be only 20GB in size:
vagrant@bullseye:~$ df -h
Filesystem      Size  Used Avail Use% Mounted on
udev            219M     0  219M   0% /dev
tmpfs            48M  428K   47M   1% /run
/dev/sda1        20G   18G  706M  97% /
tmpfs           237M     0  237M   0% /dev/shm
tmpfs           5.0M     0  5.0M   0% /run/lock
vagrant         437G  385G   53G  88% /vagrant
tmpfs            48M     0   48M   0% /run/user/1000
What’s happened? Well, we’ve increased the disk size, but we haven’t resized the filesystem to match it.
Usually, we’d need to fix the partition table with fdisk to match the new
disk size, yet you’ll find that it will show the correct size:
vagrant@bullseye:~$ sudo fdisk /dev/sda

Welcome to fdisk (util-linux 2.36.1).
Changes will remain in memory only, until you decide to write them.
Be careful before using the write command.


Command (m for help): p
Disk /dev/sda: 39.06 GiB, 41943040000 bytes, 81920000 sectors
Disk model: VBOX HARDDISK
Units: sectors of 1 * 512 = 512 bytes
Sector size (logical/physical): 512 bytes / 512 bytes
I/O size (minimum/optimal): 512 bytes / 512 bytes
Disklabel type: dos
Disk identifier: 0x1175070d

Device     Boot Start      End  Sectors  Size Id Type
/dev/sda1  *     2048 81919966 81917919 39.1G 83 Linux
I found this surprising. My previous experience (with real hardware and
admittedly with RAID systems) has been that we need to match the partition
table to the new disk geometry before being able to resize the filesystem.
It seems that VirtualBox has done this work for us. Perhaps this happens
as part of using the --resize option to vboxmanage? No idea.
Leaving the partition table as-is (I’ll show how to set the partition table soon) and resizing the filesystem, we get the expected size:
vagrant@bullseye:~$ sudo resize2fs /dev/sda1
resize2fs 1.46.2 (28-Feb-2021)
Filesystem at /dev/sda1 is mounted on /; on-line resizing required
old_desc_blocks = 3, new_desc_blocks = 5
The filesystem on /dev/sda1 is now 10239739 (4k) blocks long.

vagrant@bullseye:~$ df -h
Filesystem      Size  Used Avail Use% Mounted on
udev            219M     0  219M   0% /dev
tmpfs            48M  428K   47M   1% /run
/dev/sda1        39G   18G   19G  49% /
tmpfs           237M     0  237M   0% /dev/shm
tmpfs           5.0M     0  5.0M   0% /run/lock
vagrant         437G  385G   53G  88% /vagrant
tmpfs            48M     0   48M   0% /run/user/1000
We’ve resized the disk and its filesystem and the data is still intact. We’ve completed what we set out to do! Yay!
Fixing the partition table (if one needs to)
As I mentioned above, I thought it would be necessary to create a new
partition table with the new disk geometry before resizing the filesystem.
For instance, the resize2fs man
page mentions fixing the partition
size before resizing:
The resize2fs program does not manipulate the size of partitions. If you wish to enlarge a filesystem, you must make sure you can expand the size of the underlying partition first.
So, if you want to (or need to) fix up the partition table, here is how you’d do it.
Start fdisk and display the current situation by using the p command
(for print):
vagrant@bullseye:~$ sudo fdisk /dev/sda

Welcome to fdisk (util-linux 2.36.1).
Changes will remain in memory only, until you decide to write them.
Be careful before using the write command.


Command (m for help): p
Disk /dev/sda: 39.06 GiB, 41943040000 bytes, 81920000 sectors
Disk model: VBOX HARDDISK
Units: sectors of 1 * 512 = 512 bytes
Sector size (logical/physical): 512 bytes / 512 bytes
I/O size (minimum/optimal): 512 bytes / 512 bytes
Disklabel type: dos
Disk identifier: 0x1175070d

Device     Boot Start      End  Sectors  Size Id Type
/dev/sda1  *     2048 81919966 81917919 39.1G 83 Linux
To fix the partition size, we have to delete the old partition entry (note
that changes are only kept in memory until one chooses to write the changes
to disk). To delete a partition entry, we use the d command (delete):
Command (m for help): d
Selected partition 1
Partition 1 has been deleted.
Since there’s only one partition, it’s obvious which partition to select.
Displaying the partition table with p again, we can see that the partition
is gone:
Command (m for help): p
Disk /dev/sda: 39.06 GiB, 41943040000 bytes, 81920000 sectors
Disk model: VBOX HARDDISK
Units: sectors of 1 * 512 = 512 bytes
Sector size (logical/physical): 512 bytes / 512 bytes
I/O size (minimum/optimal): 512 bytes / 512 bytes
Disklabel type: dos
Disk identifier: 0x1175070d
We create a new partition with the n command (new) and choose the
default values.
Command (m for help): n
Partition type
   p   primary (0 primary, 0 extended, 4 free)
   e   extended (container for logical partitions)
Select (default p):

Using default response p.
Partition number (1-4, default 1):
First sector (2048-81919999, default 2048):
Last sector, +/-sectors or +/-size{K,M,G,T,P} (2048-81919999, default
81919999):

Created a new partition 1 of type 'Linux' and of size 39.1 GiB.
Partition #1 contains a ext4 signature.

Do you want to remove the signature? [Y]es/[N]o:
Do you want to remove the signature? [Y]es/[N]o: N
I chose to keep the signature here because I was unsure if deleting it was a good idea; deleting things is usually a bad idea. Keeping the signature didn’t cause any later problems in my test steup.
To make the change to the partition table permanent, we write the changes
with the w command (write):
Command (m for help): w

The partition table has been altered.
Syncing disks.
Ok, that looks good. We can now resize the filesystem with resize2fs as
we did in the previous section:
vagrant@bullseye:~$ sudo resize2fs /dev/sda1
resize2fs 1.46.2 (28-Feb-2021)
Filesystem at /dev/sda1 is mounted on /; on-line resizing required
old_desc_blocks = 3, new_desc_blocks = 5
The filesystem on /dev/sda1 is now 10239744 (4k) blocks long.
Checking the size of the filesystem with df, we see that it has the
correct size:
vagrant@bullseye:~$ df -h
Filesystem      Size  Used Avail Use% Mounted on
udev            219M     0  219M   0% /dev
tmpfs            48M  428K   47M   1% /run
/dev/sda1        39G   18G   19G  49% /
tmpfs           237M     0  237M   0% /dev/shm
tmpfs           5.0M     0  5.0M   0% /run/lock
vagrant         437G  385G   53G  88% /vagrant
tmpfs            48M     0   48M   0% /run/user/1000
Fortunately, the disk doesn’t have any swap space associated with it, otherwise we’d have had to move it as well. For details about how to move swap space after resizing a partition, check out this post: Howto – Resize linux partition and move swap space.
Our disk has been resized! Great!
Setting the Vagrant VM’s disk size at creation time
If you have a good idea of how large your disk needs to be before creating
the VM (and you use VirtualBox as the VM provider), you can set the value
yourself via the vagrant-disksize
plugin.
To install the plugin use the vagrant plugin command:
$ vagrant plugin install vagrant-disksize
Then use the disksize.size configuration setting in your Vagrantfile,
e.g.:
VAGRANTFILE_API_VERSION = "2"
Vagrant.configure(VAGRANTFILE_API_VERSION) do |config|
  config.vm.define "xenial" do |xenial|
    xenial.vm.box = 'ubuntu/xenial64'
    xenial.disksize.size = '50GB'
  end
end
In some cases, this might only stave off the inevitable and the resizing discussion above should be of use. In other cases, this will keep your VM chugging along happily for a long time.
Between when I needed to do this and now, it seems that setting the disk
size is now possible in Vagrant
natively. The
new functionality also seems to handle resizing for you. Here’s an example
Vagrantfile configuration from the Vagrant disk
documentation:
Vagrant.configure("2") do |config|
  config.vm.define "hashicorp" do |h|
    h.vm.box = "hashicorp/bionic64"
    h.vm.provider :virtualbox

    h.vm.disk :disk, size: "100GB", primary: true
  end
end
Note that the primary: true setting is important so that Vagrant doesn’t
create a new drive of this specific size but uses the main drive already
attached to the VM.
It’s not mentioned explicitly in the docs, but my guess is that Vagrant (with the help of VirtualBox) reisizes the disk image upon restarting the VM.
Wrapping up
So there ya go. If you ever happen to have the same problem and need to know how to resize your Vagrant VM’s disk, hopefully, the information in this post will be useful!
-
I’m available for freelance Python/Perl backend development and maintenance work. Contact me at paul@peateasea.de and let’s discuss how I can help solve your business’ hairiest problems. ↩
-
Again, I’ve got no idea why the word “Controller” appears here twice. ↩
-
grepcan show a specified number of lines of context close to a matching line. For instance, to show two lines after a match, use-A 2. To display three lines before a match use-B 3. To show five lines of context before and after a matching line, use-C 5. ↩
Support
If you liked this post and want to see more like this, please buy me a coffee!
