
Using a Garmin Edge 530 head unit with Linux
As a Linux user, getting commodity devices like GPS head units to play nicely can be hard. This is why I was particularly happy to find out that Garmin devices generally work well with Linux. For me, Linux compatibility was a must, along with good battery life and navigational ability. After several years of use, I thought I’d share my workflow so that it may be of use to others.
Image credits: Wikimedia Commons, Garmin, Wikimedia Commons
Introduction
One of the ironies of the pandemic was that I got fitter and healthier than I’d been in years. This was because instead of commuting an hour each way to work every day, I had to stay at home and away from people. Riding my bike was one way to isolate and yet still stay sane.
This was also the first time I’d really gotten into using a head unit when I was out riding. I’d had a GPS unit once before, but it was hard to use and only talked to Windows. Back then I had to rebuild one of my old laptops to run an outdated version of Windows so I could upload routes or update the GPS navigation unit. That was a serious PITA.
When I finally got serious about head units, one main requirement was that the head unit had to play well with Linux. After lots of searching, I found reports that Garmin head units worked with Linux. I then settled on a Garmin Edge 530, with which I’ve been very happy for several years.
Note: this is not an endorsement of Garmin’s products: I’m just stoked to have found a system which works nicely with my setup. Finding commercial products that work with Linux isn’t always easy and it’s nice to finally find one that is. It turns out that using my Garmin Edge 530 with Linux is very easy, hence I thought I’d share my setup and how I use the unit.
Set up the device-computer connection
To copy GPS routes to the device before a ride and then copy GPS tracks from it after a ride, you’ll need to set up a connection to your computer.1 To do this, connect the head unit to your computer via its USB cable. Wait until you see the symbol of a head unit attached to a computer tower before continuing.

The head unit will appear as a USB device within Linux, which you can see in
the output from dmesg:
[456303.671608] usb 1-9: new high-speed USB device number 44 using xhci_hcd
[456303.871842] usb 1-9: New USB device found, idVendor=091e, idProduct=0003, bcdDevice= 0.01
[456303.871854] usb 1-9: New USB device strings: Mfr=0, Product=0, SerialNumber=0
[456303.873657] usb 1-9: can't set config #1, error -71
[456303.873820] usb 1-9: USB disconnect, device number 44
[456316.687698] usb 1-9: new high-speed USB device number 45 using xhci_hcd
[456316.843931] usb 1-9: New USB device found, idVendor=091e, idProduct=2c31, bcdDevice= 5.09
[456316.843943] usb 1-9: New USB device strings: Mfr=0, Product=0, SerialNumber=0
[456316.845532] usb-storage 1-9:1.0: USB Mass Storage device detected
[456316.850690] scsi host3: usb-storage 1-9:1.0
[456317.856135] scsi 3:0:0:0: Direct-Access     Garmin   GARMIN Flash     1.00 PQ: 0 ANSI: 5
[456317.856874] sd 3:0:0:0: Attached scsi generic sg1 type 0
[456317.857114] sd 3:0:0:0: Power-on or device reset occurred
[456317.857447] sd 3:0:0:0: [sdb] 30416896 512-byte logical blocks: (15.6 GB/14.5 GiB)
[456317.857647] sd 3:0:0:0: [sdb] Write Protect is off
[456317.857655] sd 3:0:0:0: [sdb] Mode Sense: 23 00 00 00
[456317.857853] sd 3:0:0:0: [sdb] Write cache: enabled, read cache: enabled, doesn't support DPO or FUA
[456317.875734]  sdb:
[456317.900621] sd 3:0:0:0: [sdb] Attached SCSI removable disk
As you can see from the above information, the head unit is now available as
/dev/sdb on my system. You could mount the device right now, but since
mounting it is something you’ll want to do often, it’s better to create a
mount point for it and an entry in /etc/fstab. This way it’ll be much
easier to transfer data to or from the head unit.
My system of choice is Debian where external mounts are usually placed under
/media. Thus, I recommend creatiing an empty directory for your device’s
mount point in that directory.
$ sudo mkdir /media/edge530
The last pieces of information you need to know before you can create the
fstab entry are the device’s UUID and its filesystem type. The UUID
uniquely identifies the device and allows the operating system to recognise
the head unit the next time you connect it to your computer. You also need
to know the kind of filesystem on the device so that mount uses the
correct subsystem when attaching the it.
To find out a device’s UUID and filesystem type, use the blkid command:
$ sudo blkid /dev/sdb
/dev/sdb: LABEL_FATBOOT="GARMIN" LABEL="GARMIN" UUID="961E-AA0E" BLOCK_SIZE="512" TYPE="vfat"
where you can see that the UUID is the string 961E-AA0E and the filesystem
is vfat. Now can create the fstab entry:
# <file system> <mount point>   <type>  <options>       <dump>  <pass>
UUID=961E-AA0E  /media/edge530  vfat    rw,user,noauto  0       0
where I’ve included the field descriptions for clarity; there’s no need to
add the uncommented line to /etc/fstab.
Note that I’ve also set things up for the attached device to be available in
read-write mode (rw) so that you can copy files to and from it. Also,
I’ve specified the user option to allow non-root users to mount the device
(so you don’t have to use sudo) as well as noauto which means that it
doesn’t get automatically mounted when it’s plugged in (I like to do the
mount myself).
Using your favourite editor (mine’s vim), it’s a simple matter of opening
/etc/fstab and adding the line mentioned above:
$ sudo vim /etc/fstab
# => add fstab entry from above for edge530
Mounting the head unit is now very simple:
$ mount /media/edge530
You’ll now see that the directory under /media/edge530 is no longer empty:
$ ls /media/edge530/
autorun.inf   fs_image.ver   Garmin  'Get Started with Garmin Connect.url'   JOURNAL
You’ll be most interested in the Garmin/ directory, which has several
files in it.
$ ls /media/edge530/Garmin/
0933146799.gma  Device.fit             gmapprom1.img  gmaptz.sum  RemoteSW      startup.txt   WIFI
Activities      GarminDevice.xml       gmapprom1.sum  HMD         Schedules     Summary       Workouts
Apps            Garmintriangletm.icon  gmapprom2.img  Locations   Segment_List  TempFIT
ChngLog         gmapbmap.img           gmapprom2.sum  MapThemes   Segments      Text
Courses         gmapbmap.sum           gmapprom.img   Metrics     Settings      Totals
CustomMaps      gmapdem.img            gmapprom.sum   NewFiles    Sports        unl_bckp.bin
Debugging       gmapdem.sum            gmaptz.img     Records     SQL           Weight
Although there’s a lot in here, don’t worry about the details: only
the Activities/ and Courses/ directories are of interest. These
directories are where one downloads GPS tracks (and associated metadata)
from bike rides (Activities/) and where one uploads GPS routes for
on-the-bike navigation (Courses/).
Now that things are set up, let’s plan a ride, so you can get out on the road!
Plan a ride
When I plan a ride, I use komoot. I’m not affiliated with them or anything, I just find it works really well for me. I particularly like the way that route segments are recommended by other users. For instance, if the road surface is particularly good (or bad), or if the road is quiet, or if the view is nice, users will leave comments letting others know about such things and this influences route selection. I’ve used this recommendation feature many times to take more scenic routes, finding great alternatives to what would normally be the most direct route. This feature makes the ride a much more pleasurable experience.
For instance, here’s a route I planned four years ago:
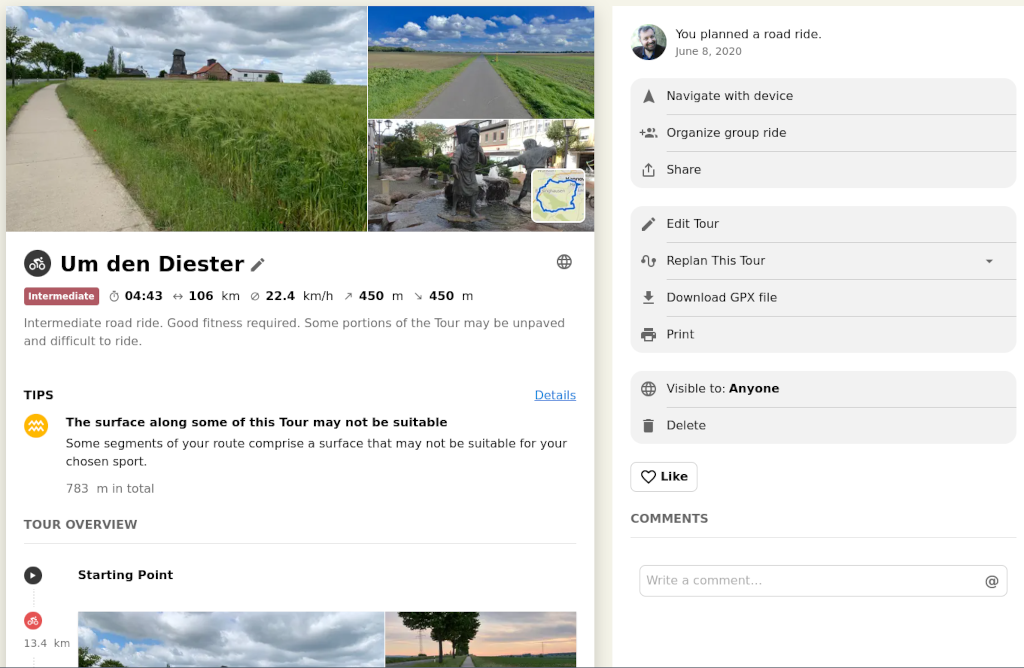
The photos in the top left of the image were supplied by other komoot users. Such photos are very helpful when planning a route: not only does one have textual information about the quality of a route segment, but also complementary visual information. The route itself is shown as the blue squiggle in the small inset in the lower right-hand photo.
To transfer this route onto your head unit, download the GPX
file for the route to
your computer (see the “Download GPX file” button on the right-hand side; in
my case I saved it as Um-den-Deister.gpx). If you’ve not already done so,
connect the head unit to the computer via its supplied USB cable and then
mount the device with
$ mount /media/edge530
To add the planned route to the head unit it’s as simple as copying the file
into the Garmin/Courses/ directory:
$ cp Um-den-Deister.gpx /media/edge530/Garmin/Courses/
Now that you’ve copied the GPX track to the head unit, you can unmount it and disconnect the cable.
$ sync
$ umount /media/edge530
I’m a bit old-fashioned and still like to sync my devices before unmounting,
hence why there’s a sync command mentioned above.
Removing the cable from the head unit will make it restart. Upon starting, the head unit will automatically search for any new “Courses” and will convert any GPX files it finds into the FIT format common on Garmin devices.
After restarting, if you then navigate to the relevant navigation section for your device, you will see that the route has been added to the head unit.
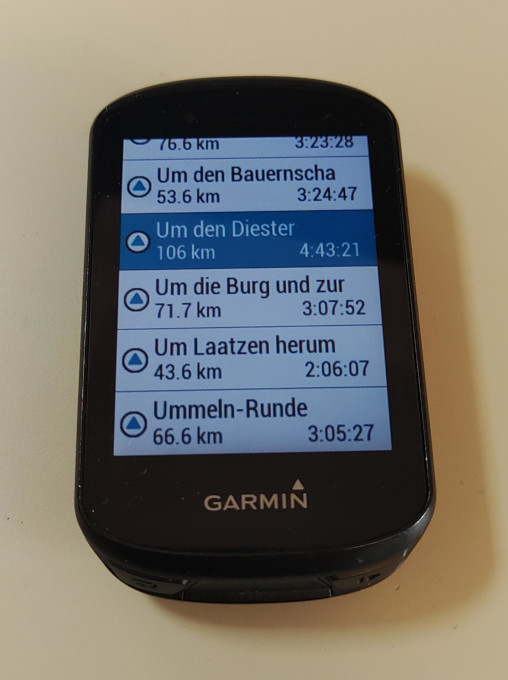
Armed with your new route, you can now use it to navigate around unfamiliar territory. Sweet!
Save data post-ride
Obviously, the first thing you want to do after having saved a route to your head unit will be to head out and go for a bike ride. Go on! I’ll wait.
Good, that was fun, wasn’t it? Now go and have a shower and afterwards you can save the GPS data you collected from your ride to file. You did record your ride and saved the data at the end, right? Of course you did.
As mentioned above, Garmin uses the FIT file format for its planned routes (“Courses”) as well as its collected GPS (and other) data recorded on rides (“Activities”). Plug your head unit back into the computer with its USB cable and mount it again:
$ mount /media/edge530
If you look in the Garmin/Activities directory, you should find a .fit
file with the date and time that you started recording your activity.
Assuming that this was the 20th of August 2024 at 09:46:02 am, you will see
something like this:
$ ls /media/edge530/Garmin/Activities/
2024-08-20-09-46-02.fit
If you want to save this file for posterity, you can copy it somewhere sensible onto your computer:
$ cp /media/edge530/Garmin/Activities/2024-08-20-09-46-02.fit /home/<username>/somewhere-sensible
Once you’re finished copying things, unmount the device:
$ sync
$ umount /media/edge530
You might want to leave the head unit plugged in to your computer for a while so that it can fully recharge.
As an optional extra, you can also upload your ride to Strava. Again, I’m not affiliated with them, I simply find it fun to see what my best times for different route segments are. For instance, here’s the Strava-generated summary of the route planned earlier.
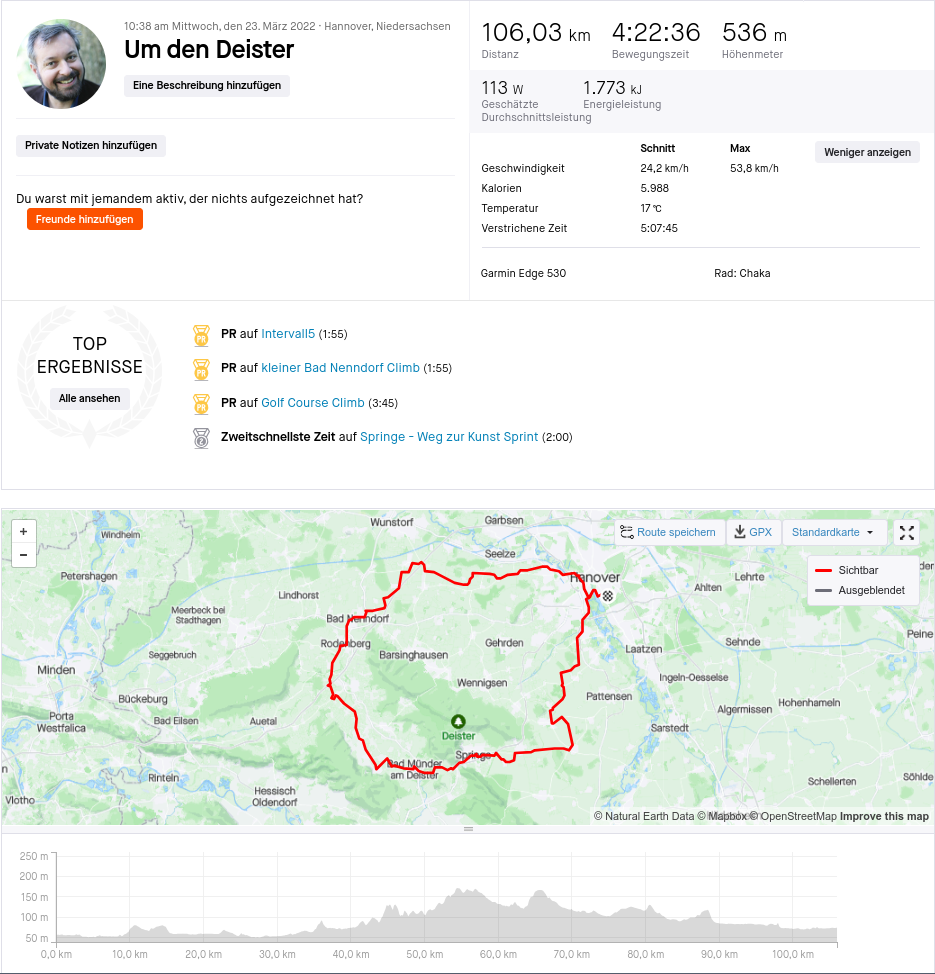
Once, I was the 13th fastest on a particular segment! There is a lot of competition for the best times on Strava segments, so to get into the top 13 was a bit of an achievement for me. Admittedly, I had a stiff tailwind, but I was stoked nevertheless.
Get on yer bike!
Now you’ve seen a functional workflow for using Garmin head units with Linux
computers, it’s time to get out and ride your bike! ![]()
-
Note that I’m not using the Garmin Connect online service. Not only did I not want to have yet another service to connect to, but data breaches happen. This turned out to be a good idea as there was a high-profile ransomware attack on Garmin not long after I purchased my device. ↩
Support
If you liked this post and want to see more like this, please buy me a coffee!


