Developing an OpenLayers app from scratch in ES6 using Mocha, Webpack and Karma: Initial app
… where we create a simple OpenLayers map and modularise our code for later use.
A basic OpenLayers map in a web page
Getting an OpenLayers map up and running is rather simple: create a file
called index.html with the following content (adapted from the OpenLayers
Quick Start guide):
<!doctype html>
<html lang="en">
  <head>
    <link rel="stylesheet" href="https://cdn.jsdelivr.net/gh/openlayers/openlayers.github.io@master/en/v6.3.1/css/ol.css" type="text/css">
    <style>
      .map {
        height: 800px;
        width: 100%;
      }
    </style>
    <script src="https://cdn.jsdelivr.net/gh/openlayers/openlayers.github.io@master/en/v6.3.1/build/ol.js"></script>
    <title>OpenLayers example</title>
  </head>
  <body>
    <h2>My Map</h2>
    <div id="map" class="map"></div>
    <script type="text/javascript">
      var map = new ol.Map({
          target: 'map',
          layers: [
              new ol.layer.Tile({
                  source: new ol.source.OSM()
              })
          ],
          view: new ol.View({
              center: ol.proj.fromLonLat([14.44, 50.07]),
              zoom: 4
          })
      });
    </script>
  </body>
</html>
To view the map, just open the index.html file in a browser, e.g.:
$ firefox index.html
You should now see a map with data loaded from the OpenStreetMap project and centred roughly over central Europe (over Prague, to be exact).
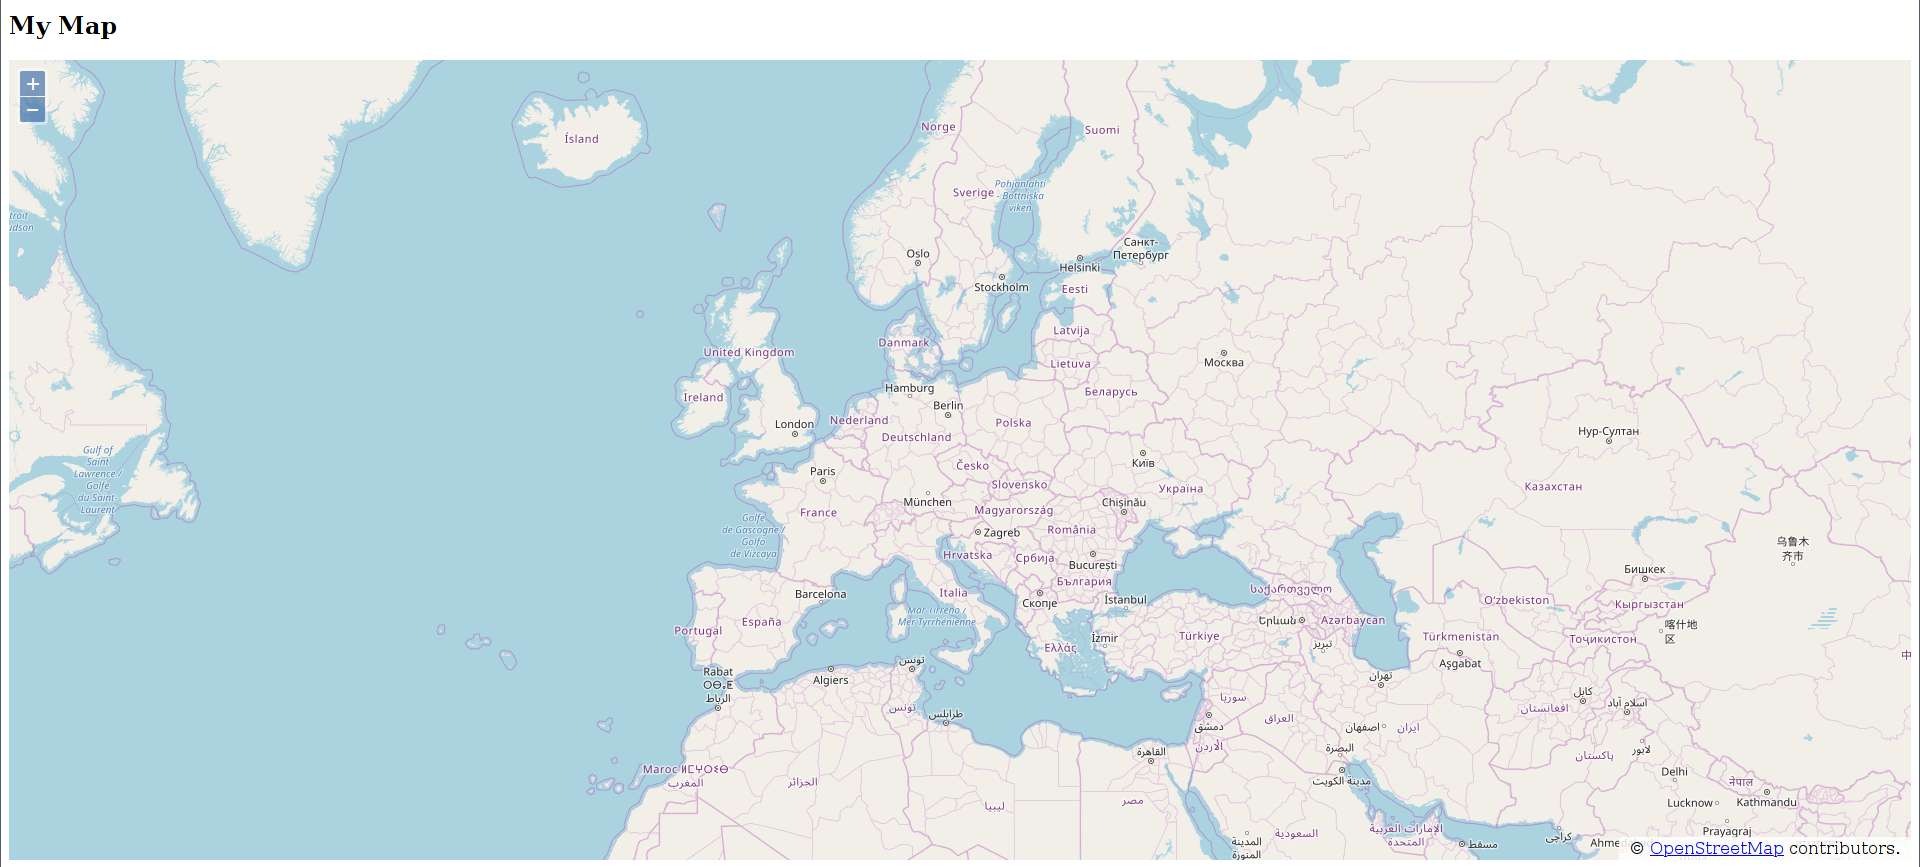
The only differences between this map and the one from the OpenLayers Quick Start guide are that the map is higher (800 pixels as opposed to 400 pixels) and the map is centred over a different location.
Becoming a bit more organised
We probably don’t want to deploy a single HTML file to our users in the
future, and the JavaScript code is going to get more involved as well, so we
don’t want that embedded directly in the HTML long-term either. Therefore,
let’s get a bit more organised and put our code into a project folder.
Create the directory arctic-sea-ice-map somewhere sensible for you and
move the index.html file into there:
$ mkdir arctic-sea-ice-map
$ mv index.html arctic-sea-ice-map/
We’d like to keep track of the changes we make to this project by using a
version control system. To
do this, change into the arctic-sea-ice-map/ directory, initialise it as a
Git repository, add the index.html file to the
staging area and commit the staged state to the repository.
$ cd arctic-sea-ice-map
$ git init
$ git add index.html
# mention that we've added a simple OpenLayers map in the commit message
$ git commit
Let’s now extract the JavaScript code into its own file. Create a
subdirectory called src/js (this will contain all our JavaScript code in
the project).
$ mkdir -p src/js
Create a file called src/js/index.js using your favourite editor and move
the JavaScript code from the index.html file into it. Make sure that you
point the <script> tag in index.html to the new file.
index.html:
<!doctype html>
<html lang="en">
  <head>
    <link rel="stylesheet" href="https://cdn.jsdelivr.net/gh/openlayers/openlayers.github.io@master/en/v6.3.1/css/ol.css" type="text/css">
    <style>
      .map {
        height: 800px;
        width: 100%;
      }
    </style>
    <script src="https://cdn.jsdelivr.net/gh/openlayers/openlayers.github.io@master/en/v6.3.1/build/ol.js"></script>
    <title>OpenLayers example</title>
  </head>
  <body>
    <h2>My Map</h2>
    <div id="map" class="map"></div>
    <script type="text/javascript" src="src/js/index.js"></script>
  </body>
</html>src/js/index.js:
var map = new ol.Map({
    target: 'map',
    layers: [
        new ol.layer.Tile({
            source: new ol.source.OSM()
        })
    ],
    view: new ol.View({
        center: ol.proj.fromLonLat([14.44, 50.07]),
        zoom: 4
    })
});
Reloading the file index.html in your browser shows that the code still
works.
Let’s commit this change:
$ git add index.html src/js/index.js
$ git commit  # mention that we extracted the js code into its own file in commit message
Hrm, the HTML code is also source code, so let’s move that into the src/
directory:
$ git mv index.html src/
Note that the app will stop working after this change (the map won’t be
displayed), because the path to the JavaScript code is no longer correct.
Update the <script> to use the correct path:
<script type="text/javascript" src="js/index.js"></script>And everything will be working again. This is a sensible point to save the state of the project, so commit the change to the repository.
$ git commit # mention why the code was moved in the commit message
That’s a bit better: we’ve separated the dynamic from the static code and can now work on each separately.
Fast-forward to the 21st century
JavaScript has moved a long way since I first played with it in the late
90’s; so let’s fast-forward to 2015, which is when the ECMAScript 2015
standard–a.k.a. ES6–was published. For some reason, this is what seems to
be talked about when people talk of “Modern JavaScript” these days, even
though it’s now 5 years old 1. Semantics aside, what we really
want to do is to use some of the cleaner and more modular features of
JavaScript in the app we’re building. Therefore, we’ll import the
OpenLayers functionality into the code that uses it rather than defining
one, big, global OpenLayers namespace (which is what we’re doing by loading
ol.js inside the HTML). Let’s make these changes to index.js:
import 'ol/ol.css';
import {Map, View} from 'ol';
import TileLayer from 'ol/layer/Tile';
import OSM from 'ol/source/OSM';
import {fromLonLat} from 'ol/proj';

const map = new Map({
    target: 'map',
    layers: [
        new TileLayer({
            source: new OSM()
        })
    ],
    view: new View({
        center: fromLonLat([14.44, 50.07]),
        zoom: 4
    })
});
This code is effectively an adaptation of that presented in the Basic Project Setup tutorial on the OpenLayers website.
But wait! This code doesn’t work! The map doesn’t appear and we get an error message on the browser console
SyntaxError: import declarations may only appear at top level of a module
What do we do? The trick is to bundle the libraries we import along with our own code, that way the user has all code necessary to run the application that we’re delivering. It turns out there are many ways to do this; the OpenLayers project uses parcel but we’re going to use webpack because that’s the one I’m most familiar with.
However, before we can get started with setting up webpack, we need to take a step back and turn our project into a nodejs (a.k.a. “node”) project. Why? Well, we need to install the dependencies into our development environment so that they can be bundled into a file that we can ultimately deliver to our users, and the best way to do this currently is via npm (the node package manager) and for that we need, well, node.
Node project initialisation
There might be an npm package for your operating system and you could use
that for the remainder of this post (that is, if you’re following along),
however it could be that your version of node and npm are outdated, even
if you’re using the most up to date operating system version. It’s common
in many programming languages to use a virtual environment to allow
different programming language versions and different library versions to
exist independently of one another. Examples include
perlbrew for Perl,
virtualenv for
Python, or rvm for
Ruby. For nodejs one can use
nvm.
To install nvm, run the following command:
$ wget -qO- https://raw.githubusercontent.com/nvm-sh/nvm/v0.35.3/install.sh | bash
As the help text printed as part of the installation process recommends, run
the following to activate nvm in your console now:
$ export NVM_DIR="$HOME/.nvm"
[ -s "$NVM_DIR/nvm.sh" ] && \. "$NVM_DIR/nvm.sh"  # This loads nvm
[ -s "$NVM_DIR/bash_completion" ] && \. "$NVM_DIR/bash_completion"  # This loads nvm bash_completion
Running
$ nvm --version
shows that nvm has been successfully installed. To get a list of the
nodejs versions available for installation, use the ls-remote command in
nvm
$ nvm ls-remote
This is a very long list; we can restrict it a bit by passing the --lts
option to ls-remote, which will give us a list of the Long Term Support
(LTS) nodejs versions:
$ nvm ls-remote --lts
To install the most recent LTS version, use the install command to nvm
and pass the --lts option:
$ nvm install --lts
If you look at the paths of the npm and node binaries by using the
which bash command, you will see that they are installed in the .nvm
directory in your home directory, e.g.:
$ which npm
$HOME/.nvm/versions/node/v12.16.3/bin/npm
$ which node
$HOME/.nvm/versions/node/v12.16.3/bin/node
We’re now ready to turn our project into an npm package. To initialise
the package, run the command
$ npm init
from the project’s base directory.
You’ll now be prompted for various pieces of information pertaining to the
project, such as the package name, version, description, license, etc. You
should just need to hit enter to accept the default values, except for the
entry point, which you should set to src/js/index.js. When you’re asked
if the config is ok, just hit enter to accept the default answer (yes).
For me, this process looked like this:
$ npm init
This utility will walk you through creating a package.json file.
It only covers the most common items, and tries to guess sensible defaults.

See `npm help json` for definitive documentation on these fields
and exactly what they do.

Use `npm install <pkg>` afterwards to install a package and
save it as a dependency in the package.json file.

Press ^C at any time to quit.
package name: (arctic-sea-ice-map)
version: (1.0.0)
description:
entry point: (index.js) src/js/index.js
test command:
git repository:
keywords:
author:
license: (ISC)
About to write to /path/to/arctic-sea-ice-map/package.json:

{
  "name": "arctic-sea-ice-map",
  "version": "1.0.0",
  "description": "",
  "main": "src/js/index.js",
  "scripts": {
    "test": "echo \"Error: no test specified\" && exit 1"
  },
  "author": "",
  "license": "ISC"
}


Is this OK? (yes)
You’ll note that you were asked to enter what the test command should be and that we haven’t got any tests yet. Don’t worry about this, we’ll get to that later, we first want to get the app back up and running again before we can start adding tests.
What did this step give us? Admittedly not much, because the app still isn’t running, but we’re one small step closer to getting this working again.
The npm init created the file package.json in the project’s base
directory; now would be a good time to add the file to the repo and to
commit that change:
$ git add package.json
$ git commit  # mention that we're turning the project into an npm package in commit message
Now we’re ready to install webpack.
Packaging for the web
To install webpack use the command:
$ npm install --save-dev webpack webpack-cli
Why the --save-dev option? Why can’t we just install the package? Well,
npm has the nice feature that it separates development dependencies (i.e.
dependencies only used for developing an application) from those
dependencies required in the final application. Since we don’t want our
users to have to install webpack (or have webpack delivered in the bundle),
we install webpack within the devDependencies part of the package.json
file.
If you run git diff you’ll now see that webpack appears under the
devDependencies section of your package.json file, e.g.:
$ git diff package.json
diff --git a/package.json b/package.json
index 99b1ad2..553a9bc 100644
--- a/package.json
+++ b/package.json
@@ -7,5 +7,8 @@
     "test": "echo \"Error: no test specified\" && exit 1"
   },
   "author": "",
-  "license": "ISC"
+  "license": "ISC",
+  "devDependencies": {
+    "webpack": "^4.42.1"
+    "webpack-cli": "^3.3.11"
+  }
 }
For those wondering, webpack-cli adds a command line interface to the
webpack software so that we can just run webpack from the shell.
Now we need to configure webpack so that it can bundle our application. The
usual way to do this is by creating a file called webpack.config.js in the
project base directory. Using your favourite editor, create a file with
this name and put this content into it:
const path = require('path');

module.exports = {
    entry: './src/js/index.js',
    output: {
        path: path.resolve(__dirname, 'dist'),
        filename: 'bundle.js',
    }
};
When webpack runs, it will create a file called bundle.js inside the
dist directory (which it will create if it doesn’t already exist).
Therefore, we need to change the <script> tag in our index.html file to:
<script src="dist/bundle.js"></script>and we can remove the <link> tag (pointing to the OpenLayers CSS file) as
well as the <script> tag within the file’s <head> (pointing to the
OpenLayers main JavaScript file).
Now we can try to bundle our JavaScript together by using the webpack
command (via npx; “npm execute”):
$ npx webpack
You should see that this dies horribly. Don’t panic! This was expected! Believe it or not, we’re actually getting closer to having a running application again.
My output looked like this:
$ npx webpack
Hash: 935d8e029cbf54663075
Version: webpack 4.42.1
Time: 118ms
Built at: 08/04/2020 5:10:23 PM
 1 asset
Entrypoint main = bundle.js
[0] ./src/js/index.js 346 bytes {0} [built]

WARNING in configuration
The 'mode' option has not been set, webpack will fallback to 'production'
for this value. Set 'mode' option to 'development' or 'production' to enable
defaults for each environment.
You can also set it to 'none' to disable any default behavior. Learn more:
https://webpack.js.org/configuration/mode/

ERROR in ./src/js/index.js
Module not found: Error: Can't resolve 'ol' in '/path/to/arctic-sea-ice-map/src/js'
 @ ./src/js/index.js 2:0-29 7:16-19 14:12-16

ERROR in ./src/js/index.js
Module not found: Error: Can't resolve 'ol/layer/Tile' in '/path/to/arctic-sea-ice-map/src/js'
 @ ./src/js/index.js 3:0-38 10:8-17

ERROR in ./src/js/index.js
Module not found: Error: Can't resolve 'ol/ol.css' in '/path/to/arctic-sea-ice-map/src/js'
 @ ./src/js/index.js 1:0-19

ERROR in ./src/js/index.js
Module not found: Error: Can't resolve 'ol/proj' in '/path/to/arctic-sea-ice-map/src/js'
 @ ./src/js/index.js 5:0-35 15:12-22

ERROR in ./src/js/index.js
Module not found: Error: Can't resolve 'ol/source/OSM' in '/path/to/arctic-sea-ice-map/src/js'
 @ ./src/js/index.js 4:0-32 11:18-21

ERROR in bundle.js from Terser
Unexpected token: operator (!) [bundle.js:104,16]
Let’s go through these issues one at a time. The first one is that we
haven’t set mode for webpack to use. Webpack usually wants either
development or production for the mode value and since we’re currently
in the development stage, let’s use that. Add the line
mode: 'development',at the top of the module.exports object definition. I.e. the webpack
config file should now look like this:
const path = require('path');

module.exports = {
    mode: 'development',
    entry: './src/js/index.js',
    output: {
        path: path.resolve(__dirname, 'dist'),
        filename: 'bundle.js',
    }
};
Running npx webpack again, you’ll notice that the warning has now gone.
Phew!
Let’s now attack the first error we get to:
ERROR in ./src/js/index.js
Module not found: Error: Can't resolve 'ol' in '/path/to/arctic-sea-ice-map/src/js'
 @ ./src/js/index.js 2:0-29 7:16-19 14:12-16
This is trying to tell us that OpenLayers hasn’t been installed yet. So let’s install that:
$ npm install ol
Note that we do want our users to have access to this library and hence we
don’t use the --save-dev option here.
Running npx webpack again shows us that all of the previous errors have
gone! Yay! However, we’ve got a new error. Boo!
$ npx webpack
Hash: bca6a04c37010cde1096
Version: webpack 4.42.1
Time: 943ms
Built at: 08/04/2020 5:19:19 PM
    Asset      Size  Chunks             Chunk Names
bundle.js  1.98 MiB    main  [emitted]  main
Entrypoint main = bundle.js
[./src/js/index.js] 346 bytes {main} [built]
    + 214 hidden modules

ERROR in ./node_modules/ol/ol.css 1:0
Module parse failed: Unexpected token (1:0)
You may need an appropriate loader to handle this file type, currently no loaders are configured to process this file. See
https://webpack.js.org/concepts#loaders
> .ol-box {
|   box-sizing: border-box;
|   border-radius: 2px;
 @ ./src/js/index.js 1:0-19
The error message mentions ol.css and gives us a big hint to the solution
to the problem: we need to use an appropriate loader to handle this file
type. What we need to do is install the style and css webpack
loaders and update the
webpack config appropriately. First, install the loaders:
$ npm install --save-dev style-loader css-loader
and then add the following code to webpack.config.js (after e.g. after the
output option):
    module: {
        rules: [
            {
                test: /\.css$/,
                use: [
                    'style-loader',
                    'css-loader',
                ],
            },
        ],
    },
Running npx webpack again, you should find that there aren’t any errors,
and that a file dist/bundle.js has been created. That’s cool, but you’ll
find that the app still doesn’t work. Don’t despair, we’re getting there.
You’ll notice that the browser console in your browser gives a warning like this:
Loading failed for the <script> with source “file:///path/to/arctic-sea-ice-map/src/dist/bundle.js”.
in which you’ll hopefully notice that the path is incorrect: it should be
just dist/bundle.js and not src/dist/bundle.js. What’s going wrong?
Well, the index.html file we’re trying to load is in the src/ directory
and it’s looking for a file called dist/bundle.js from within the src/
directory, however the dist/ directory is one level above the src/
directory. What to do? Let’s hack and get the app back running and then we
implement a cleaner solution. Copy the index.html file into the project
root directory:
$ cp src/index.html .
and open this file in your browser.
Hey! The app works again! Woohoo!
Unfortunately, this solution is rather ugly. Fortunately, there’s a better
way: we can get webpack to create an index.html file automatically. For
this, we need to use the
HtmlWebpackPlugin,
which we install via npm like so:
$ npm install --save-dev html-webpack-plugin
The plugin needs to be required at the top of the webpack config:
const HtmlWebpackPlugin = require('html-webpack-plugin');and specified as a plugin within the module.exports:
    plugins: [
        new HtmlWebpackPlugin({
            template: 'src/index.html',
        })
    ],
where we specify our own index.html file as a template for the
HtmlWebpackPlugin to use when creating the automatically generated
dist/index.html file.
Running npx webpack will create the file dist/index.html. If you look
at this file you’ll notice that bundle.js turns up twice. This is because
we’ve referenced it in the template HTML file and then the HtmlWebpackPlugin
added it again for us. Therefore, we no longer need the <script> tag in
src/index.html and we can remove it.
Now if we run npx webpack and then load the resulting dist/index.html
file in our browser, we should see map centred on central Europe and hence a
working app.
Now is a good time to save the project state by committing these changes to the repository.
$ git add package.json src/index.html src/js/index.js package-lock.json webpack.config.js
$ git commit  # mention use of webpack to bundle app and why we did this in the commit message
Practicing good project hygiene
If you now run git status in the project root directory, you’ll find a few
untracked files:
$ git status
On branch master
Untracked files:
  (use "git add <file>..." to include in what will be committed)

        dist/
        index.html
        node_modules/

nothing added to commit but untracked files present (use "git add" to track)
The two directories (dist/ and node_modules/) are both automatically
generated, and our hack index.html file is still floating around. Let’s
clean up a bit by removing the hacky file:
$ rm index.html
and by adding the dist/ and node_modules/ names to a file called
.gitignore:
$ echo "dist/" >> .gitignore
$ echo "node_modules/" >> .gitignore
Now we add the .gitignore file to the repository and commit
$ git add .gitignore
$ git commit  # mention that we're ignoring automatically generated files in commit message
Your git status output should now be clean.
You might also have noticed that the browser console shows an error message
that the character encoding of the HTML document hasn’t been defined, so
let’s define that. Add the following <meta> tag to the <head> section
of src/index.html:
<meta charset="utf-8">Now the error message will disappear, yay!
Have you wondered if we really need to run npx webpack? We’re trying to
build the bundle, right? So couldn’t we make some kind of “build” command?
Yes, we can! Open package.json in your favourite editor and add the
following to the scripts section:
"build": "webpack"If you put this command after the already-present test command, then
make sure you add the trailing comma on the test command line, otherwise
the package.json file will no longer be valid JSON and things won’t work
anymore.
Now you can run
$ npm run build
to build the bundle. That might not seem like a big win (or no win at all), but it has allowed us to describe the process we want to take place (i.e. building) rather than the details of how that happens. For instance, we’re now free to use something other than webpack to build the bundle if we should want to do so in the future. Also, if the webpack command gets more complicated or needs more options, we only need to remember “build” and we can build the project. This is something that will pay off long term.
I’m a big fan of the make tool for running various commands in all of the
software projects I, erm, make. Whether it’s Fortran, C, Perl, Python,
JavaScript, LaTeX, or whatever, it’s nice to abstract away common commands
behind a familiar and consistent interface. Therefore, open a file called
Makefile in your favourite editor and enter the following code:
.PHONY: build

build:
	npm run build
Note that there is a tab character before the npm command. This is not
allowed to be any kind of space, it has to be a tab character. This is a
quirk of Makefile syntax which we just have to live with.
Now it should be possible to build the project with:
$ make build
Let’s commit our changes before we move on:
$ git commit src/index.html   # mention charset specification in commit message
$ git add Makefile package.json
$ git commit  # mention creation of build commands in commit message
Recap
We’ve achieved quite a lot in creating the initial application: it shows a
map of the world, it’s a modular npm package which is automatically
bundled via webpack, and we’re keeping track of the changes to the code in
Git. It’s probably time to have a wee break before we continue on to
testing the application with mocha.
-
Side note: ES versions 7, 8, 9 and 10 already exist, but noone seems to talk about them. Admittedly, ES10 came out in 2019 and one can’t really expect the browsers to implement all features natively yet. ↩
Support
If you liked this post and want to see more like this, please buy me a coffee!