
Installation, setup and basic use of the SourceTree Git client
Recently I’ve been investing more time in documentation at work to try and make it easier for new staff members to come up to speed. The following HOWTO has been adapted from this documentation effort and shows how to download, install and set up the Git GUI client SourceTree as well as discusses some basic use cases.
SourceTree is one of many GUI frontends for Git. Git is a source code management system (also called version control system) used to manage changes to digital files, most often these files are the source code files of software projects, however Git can also be used to track changes in any document or file.
Note that this HOWTO was developed with the Windows version of SourceTree; only the description of how to use the GUI itself is likely to be useful information for users of other systems such as MacOS X.
Installation prerequisite: PuTTY
Before we can begin to install SourceTree we need to install
PuTTY which is an SSH client for Windows. Although
SourceTree does install some parts of PuTTY, we need the PuTTY program in
particular which isn’t installed with SourceTree, hence we need to install
it first. Visit the PuTTY website
(https://www.putty.org) in a web browser.
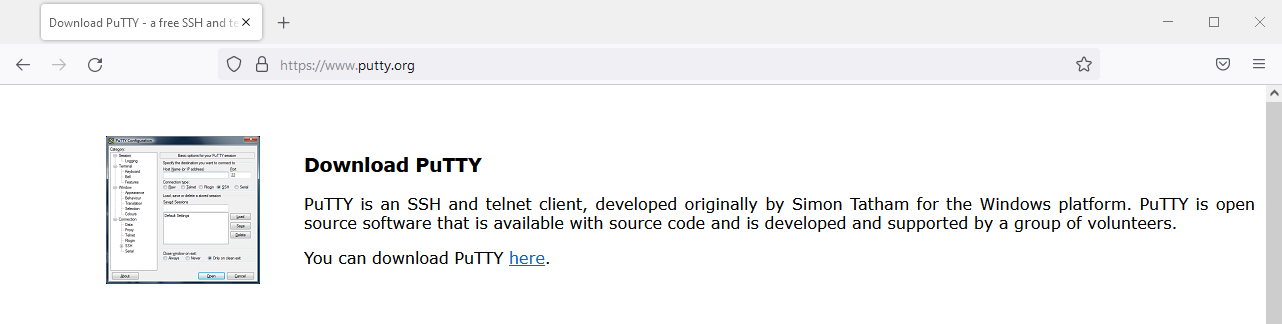
You will see a section pointing you to the page where you can download PuTTY. Click on the link to go to the PuTTY download page.
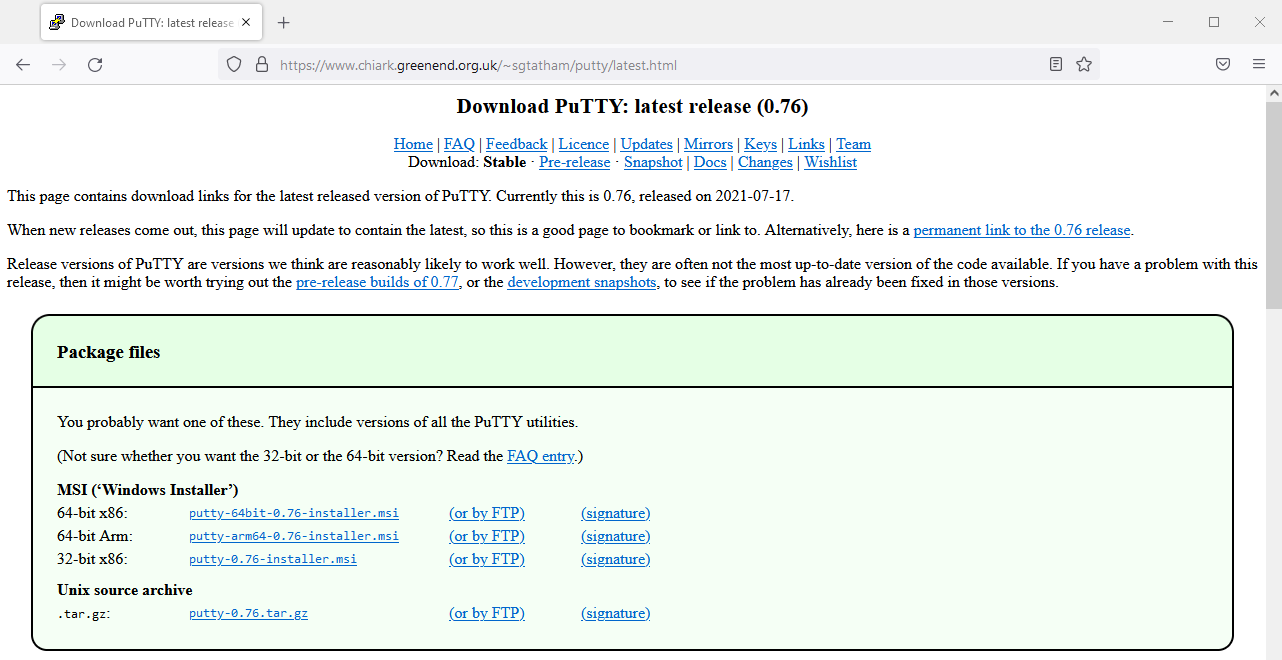
It’s best to download the MSI (“Windows Installer”) file because this will
install all PuTTY components and they’re handy to have around. Your system
is most likely a 64-bit x86 system, so download the .msi file for 64-bit
x86. If you’re unsure about what system you have and want to check, have a
look at the PuTTY FAQ entry about 32-bit and 64-bit
systems
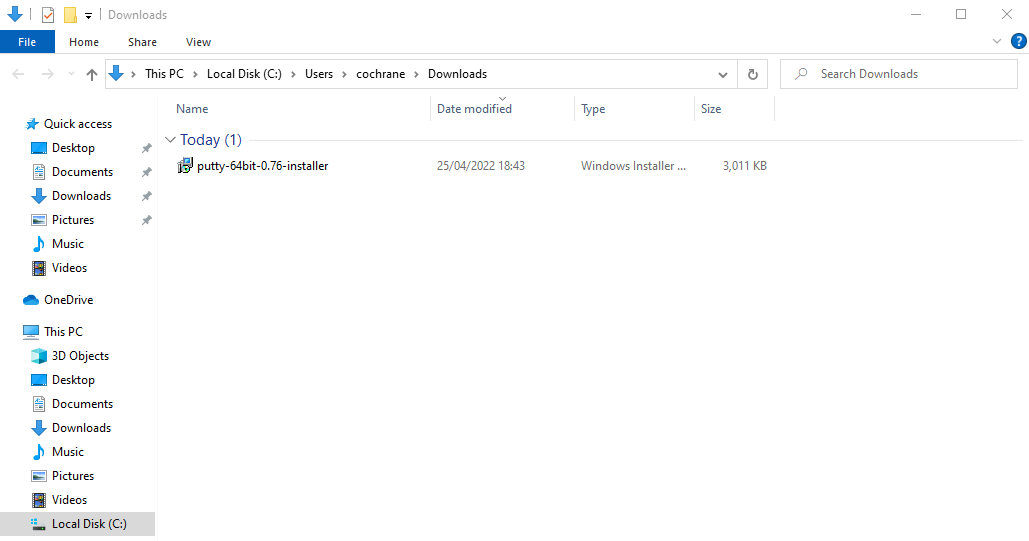
Once the file has downloaded, navigate to the “Downloads” folder on your computer.
Double click on the installer file to start the installation process. You should now see the Setup Wizard start page.
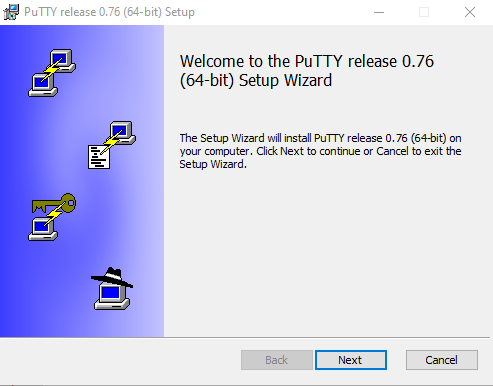
Click on “Next” to continue. You will now be asked to select the destination folder for your PuTTY installation.
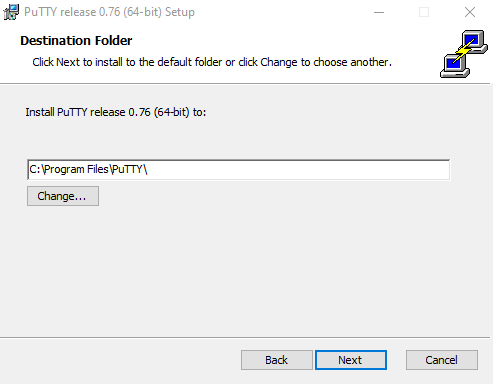
The default option is usually sufficient, so simply click on “Next” to continue. Now you can select which product features to install.
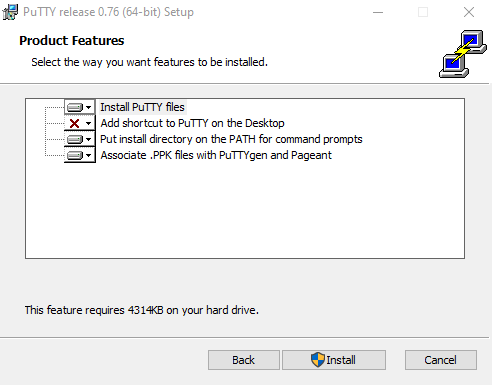
Again, the defaults are sufficient for most purposes, so click on the “Install” button to finally install the software.
Once the installation is complete, you will see a dialog box allowing you to finish the Setup Wizard.
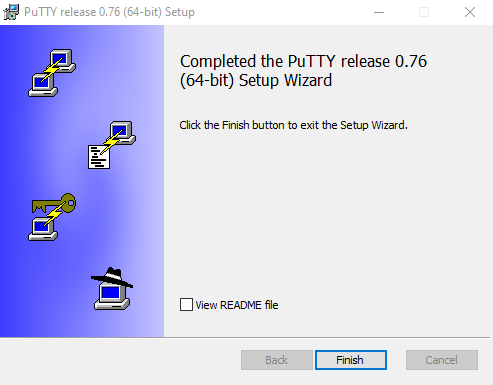
Untick the box next to “View README file” because we don’t want to open the README file in this case and just click “Finish”. The PuTTY installation has now finished and we’re now ready to download and install the SourceTree application.
Download SourceTree
To download SourceTree, visit the SourceTree website. The site seems to automatically determine your operating system so, assuming you are using Windows, you will see the download button for Windows already highlighted for you:
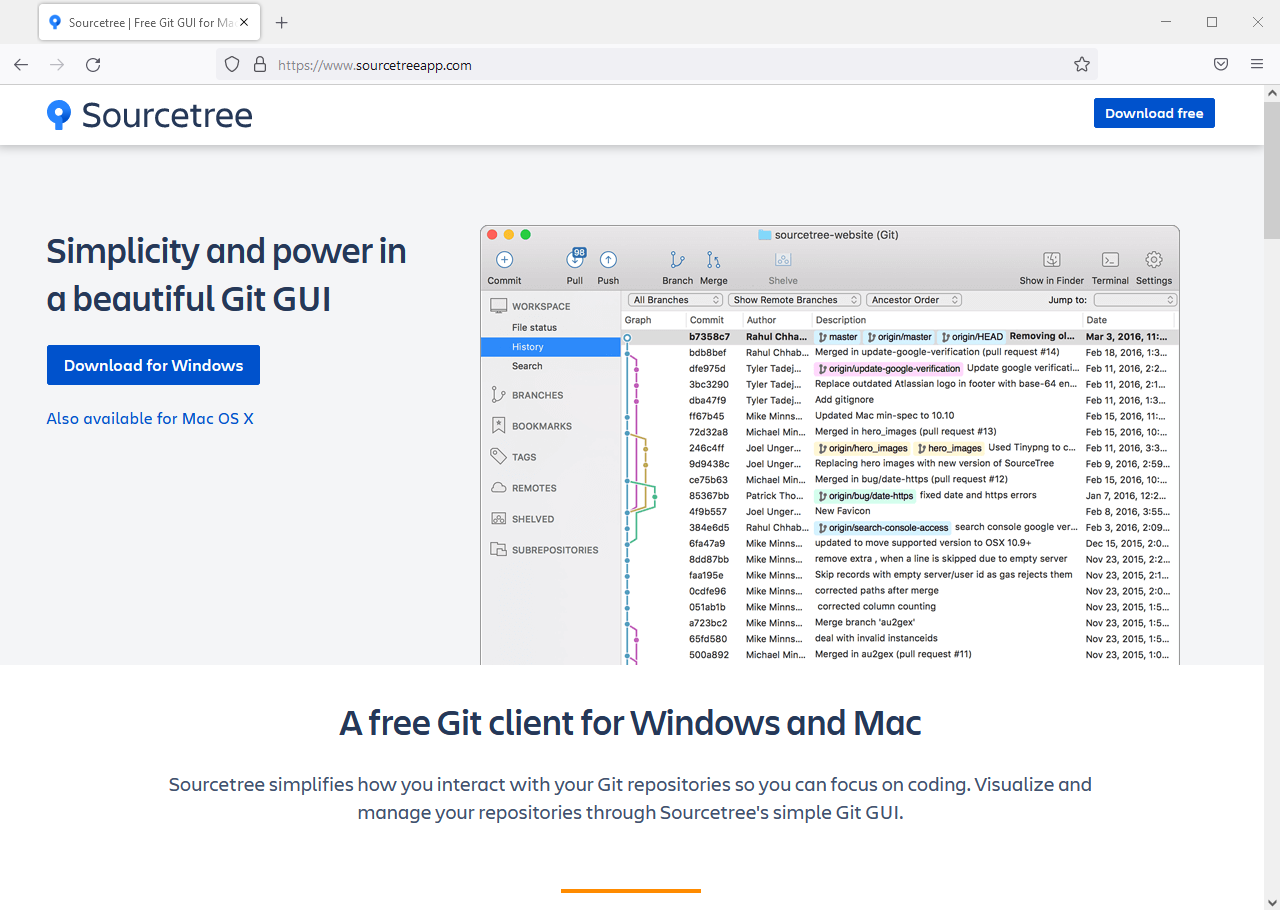
To download the SourceTree setup program, click on “Download for Windows”. Before the download can start, it’s necessary to agree to the Atlassian Software License Agreement

Click on the checkbox to agree to the terms and then you will be able to download the setup program by clicking on the “Download” button.
Install SourceTree
To install SourceTree you will need to start the setup program that we just downloaded. Open the Windows File Explorer and navigate to your “Downloads” folder.
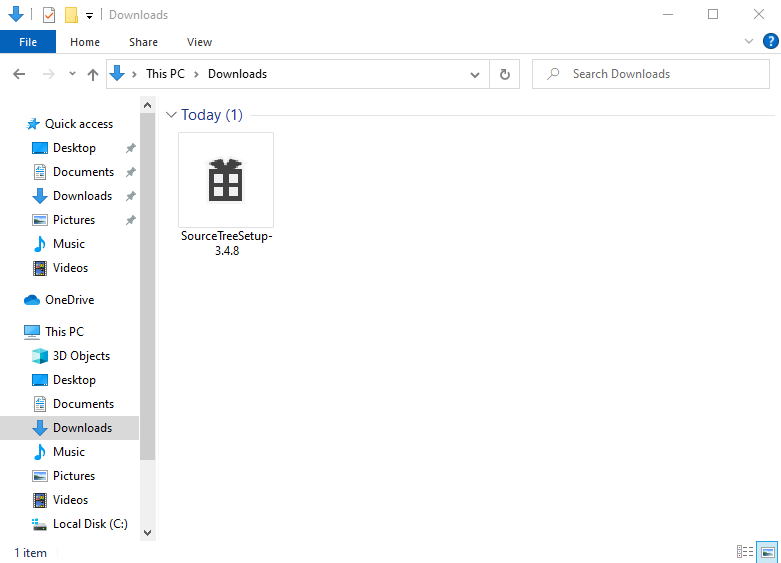
Double click on the SourceTreeSetup-3.4.8 file to start the installation
process. You will now be presented with the opportunity to register for
an Atlassian Bitbucket account.
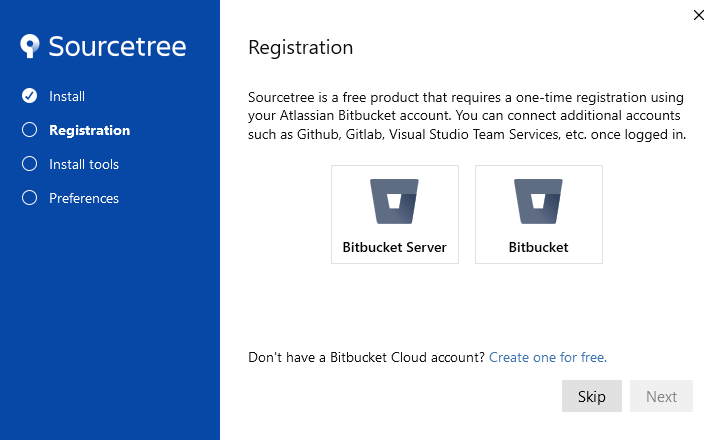
This step isn’t necessary in order to use SourceTree, so simply click on “Skip” to continue. You will now be asked to decide which tools to download and install.
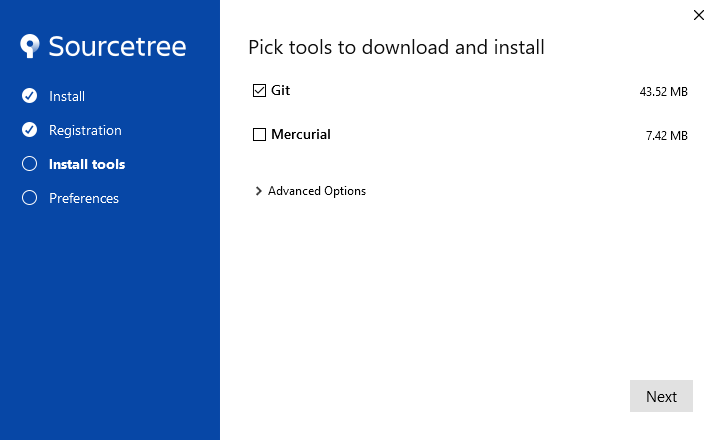
Since we only want to use Git, uncheck the Mercurial option and then click on “Next”. Git will now be downloaded and installed automatically.
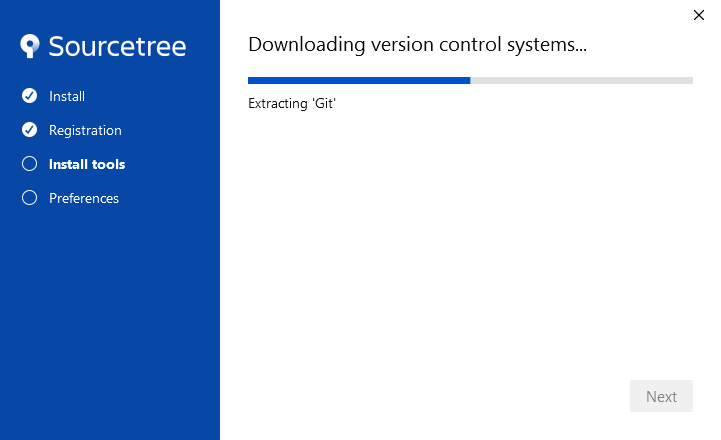
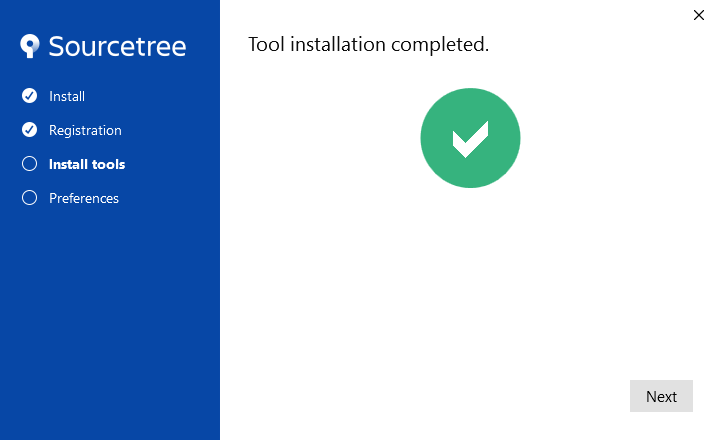
If the installation worked correctly, you will see the “Tool installation completed” dialog box.
Click on “Next” to continue, where you will be asked to configure the name and email address you will use later when making Git commits.
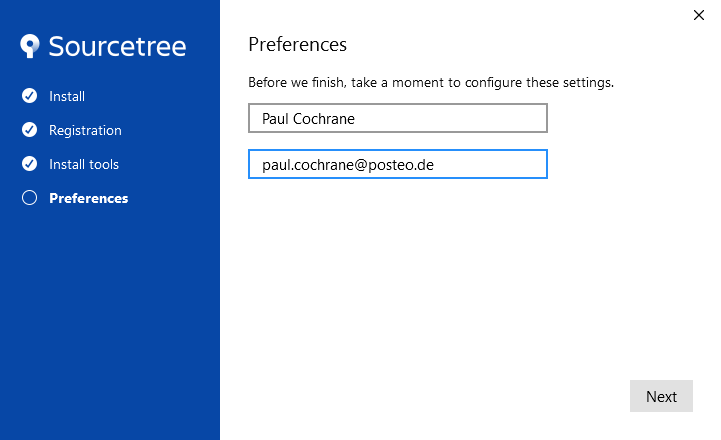
Enter your name and email address into the relevant fields and then click on “Next” to continue.
You will now be asked if you have an SSH key you would like to load.
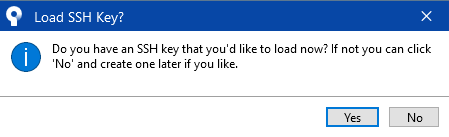
If you are new to Git, you’re probably also new to using SSH, so we’ll assume you don’t have a pre-existing SSH key, so just click “No” to continue so that we can create one from within SourceTree later.
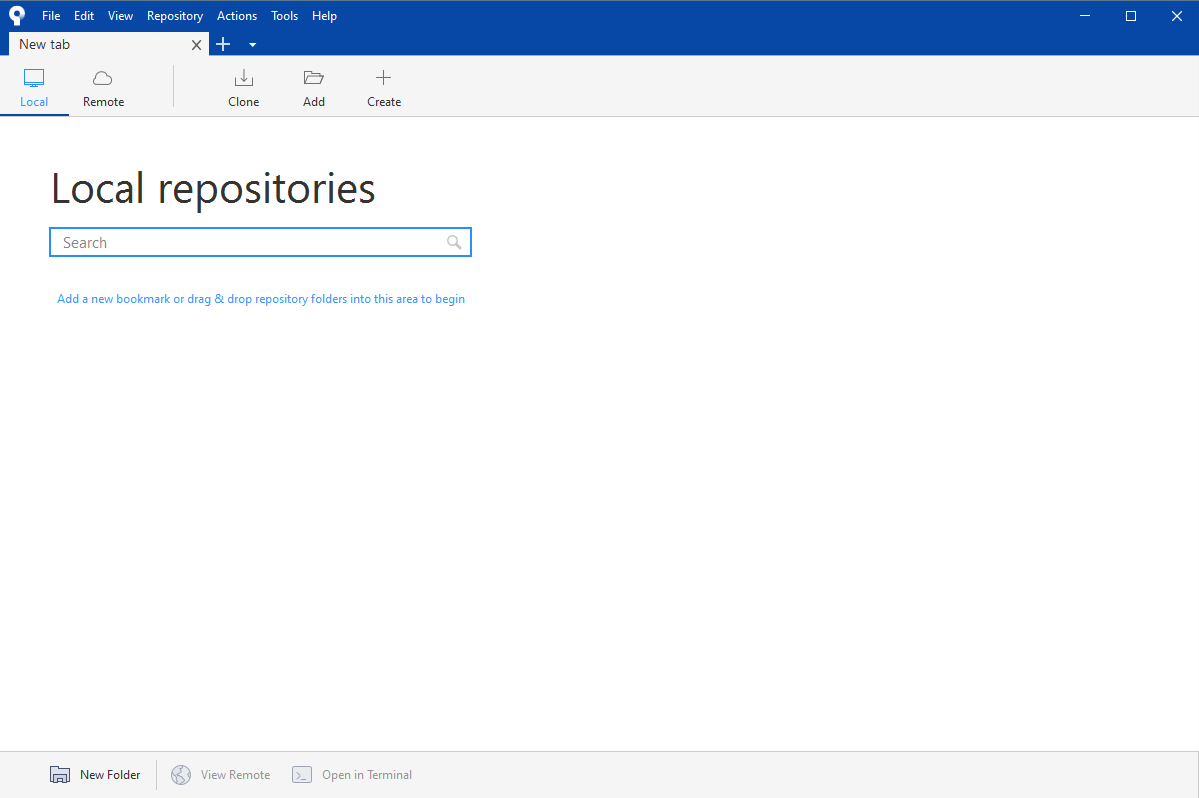
The SourceTree program will now start with a window showing local repositories (of which there will be none at present).
Workaround: add SourceTree item to Windows Start Menu
There seems to be a bug in the SourceTree setup program which sometimes fails to install a Windows Start Menu item, or a desktop shortcut, or a taskbar item. On my test system, there was no Start Menu item added; on a colleague’s computer it was. Therefore, please check if there is a Start Menu item for SourceTree (it might be in a folder called “Atlassian” in the Start Menu, hence it will be listed under “A” (for Atlassian) and not under “S” (for SourceTree)). If you don’t find a Start Menu item, then you will need to add one yourself so that you can start SourceTree easily (the actual installed program is contained in a hidden folder, so it’s rather difficult to start if one doesn’t know where to look).
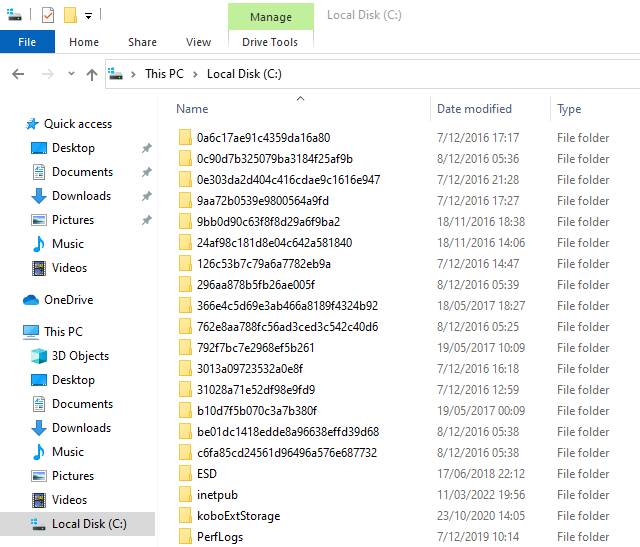
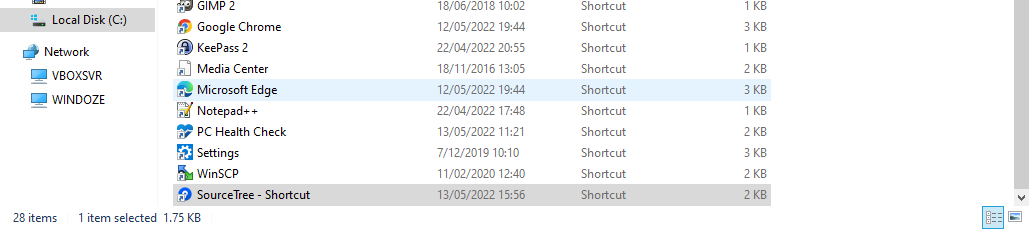
To find where the SourceTree program was installed, open the Windows File Explorer and click on the “Local Disk (C:)” item under “This PC” in the sidebar.
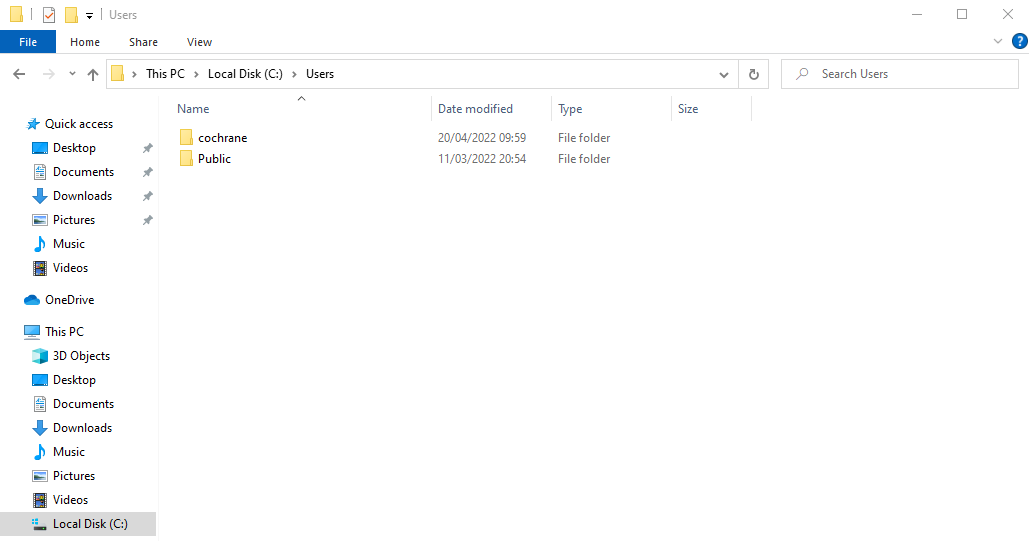
Now open the “Users” folder, where you will now see your home folder (this might be your last name or it could be your first and last name separated by a space; it depends how you set up your Windows installation) as well as the “Public” folder.
Now open the folder for your user account (also called your home folder) and click on the location bar (which just under the menu bar):

You should now see the text C:\Users\<username> in the location bar. The
folder we need to access now is actually hidden, however we can still access
it by adding \AppData to the path in the in the location bar, i.e. it will
be something like C:\Users\<username>\AppData. Now hit the enter key to
open the AppData directory. You should now see a folder called Local;
double click on it to open it. This directory contains all kinds of
interesting settings for the various programs you’ve installed and that you
use, however all that interests us right now is the SourceTree folder.
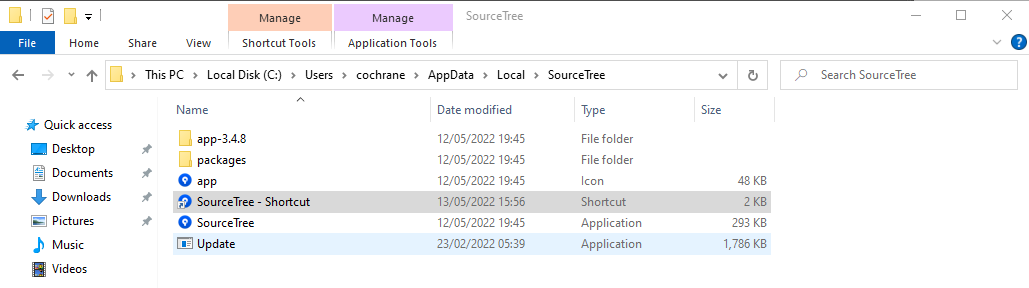
Scroll down to find the SourceTree folder and open it, you should see
something like this:
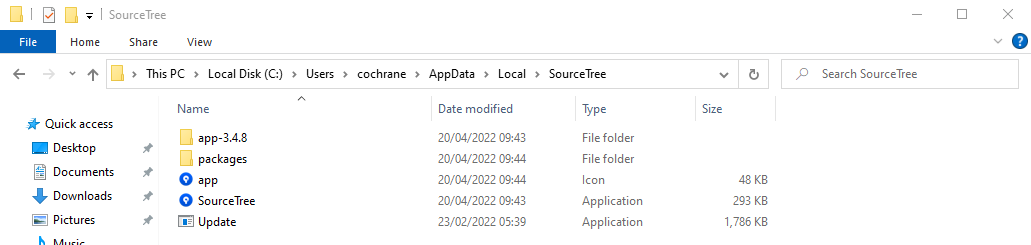
in which you can see the SourceTree application. We now wish to add this
application to the Windows Start Menu so that we can start SourceTree
easily whenever we want to use Git. To make this happen, we need to create
a shortcut of the SourceTree application and copy this shortcut into the
folder containing the Windows Start Menu items.
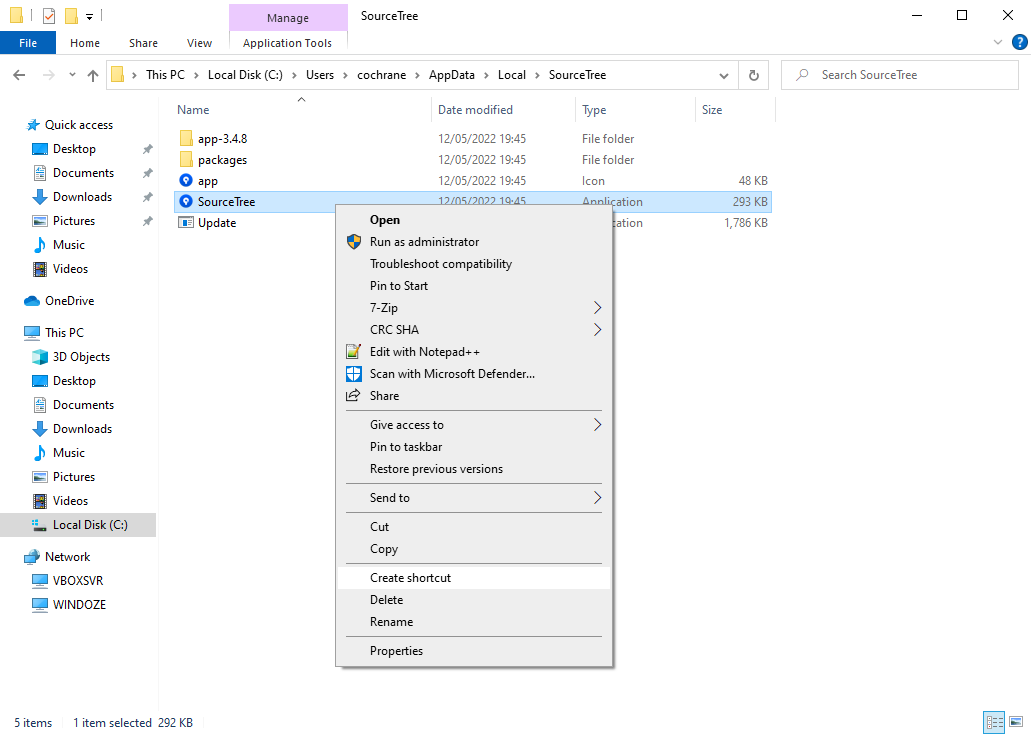
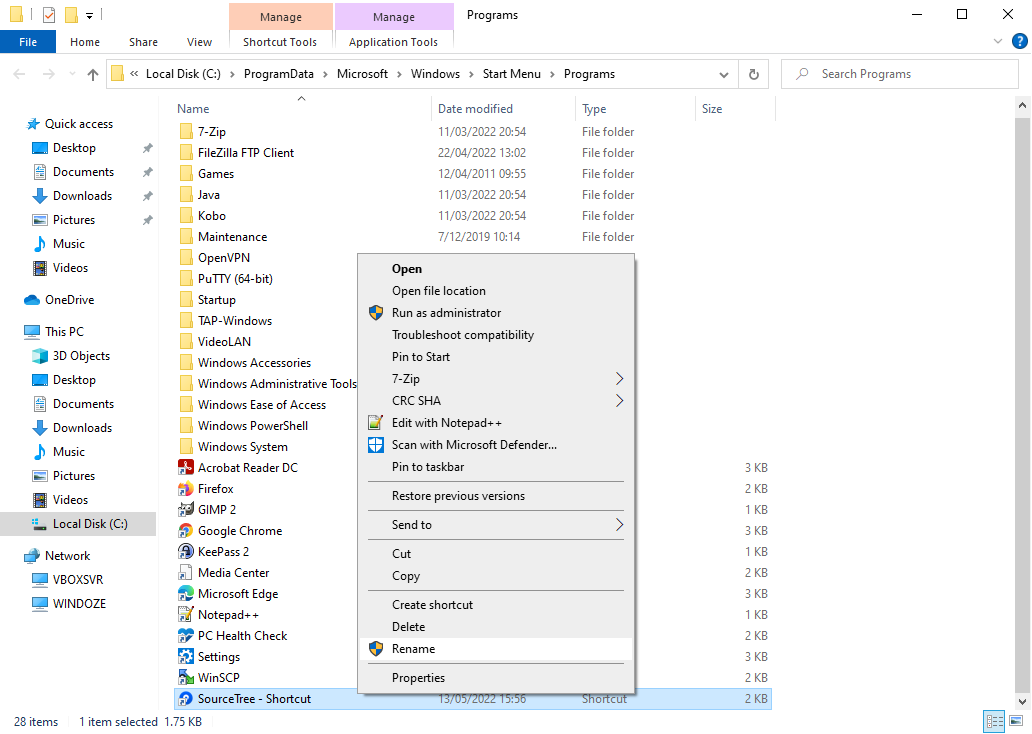
Now that we know where the SourceTree application is, let’s create a shortcut by right-clicking on the application icon and selecting “Create shortcut” from the context menu that appears.
You will now see a Shortcut entry in the AppData\Local\SourceTree folder
called “SourceTree - Shortcut”.
We need to copy this newly-created file into the folder containing the Windows Start Menu items and rename it so that it no longer contains the “ - Shortcut” part. But how do we find out where the Windows Start Menu items are stored? One way is to find out the file location of one of the pre-existing Start Menu items. For example, open the Start Menu and right-click on one of the non-Microsoft applications listed in the Start Menu that you have probably installed previously. In the example I’m using here, I’ve chosen “Firefox” as the application whose location I’m trying to find.1 Right-clicking on the “Firefox” entry brings up a context menu containing a “More” item.
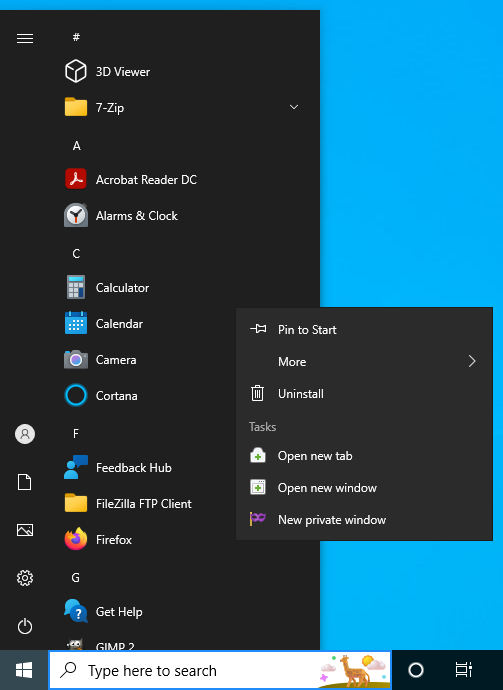
Moving the mouse over the “More” item leads to a submenu of this context menu which contains the option “Open file location”.

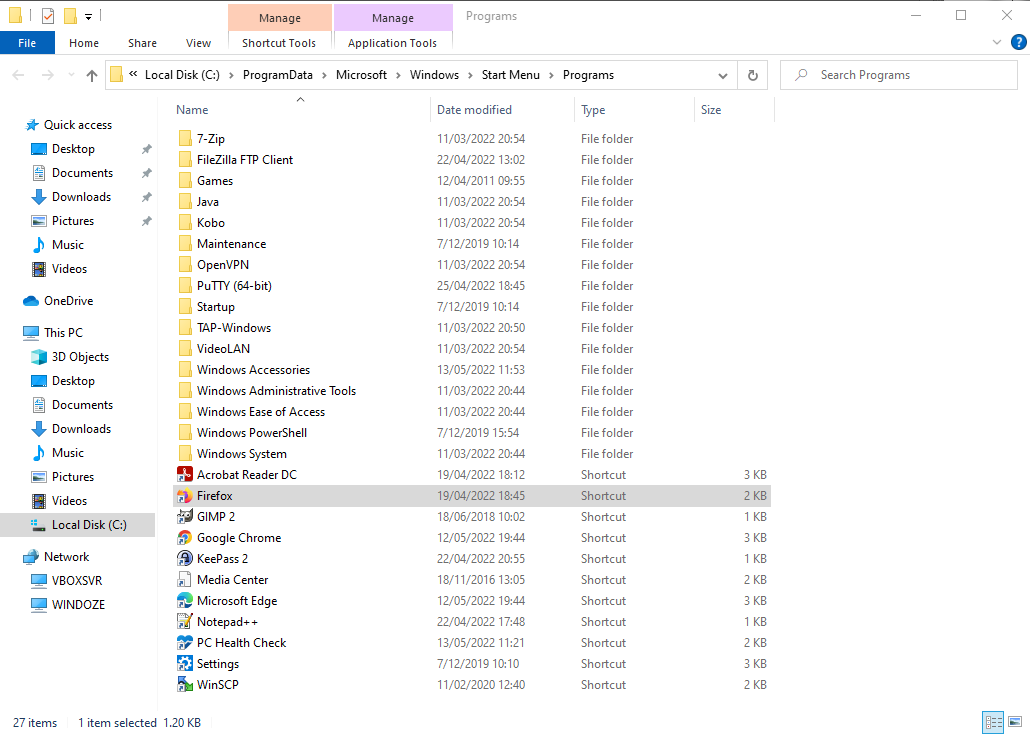
Clicking on this option will open the Windows Start Menu items folder within the File Explorer.
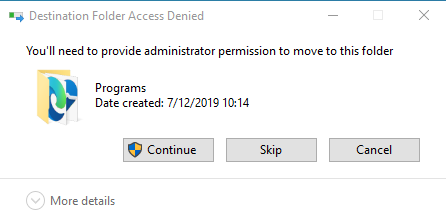
Move the “SourceTree - Shortcut” file from the SourceTree AppData folder into the Start Menu folder we just opened. This operation requires administrative privileges, hence you will be shown a dialog box asking you if you want to continue as an administrator.
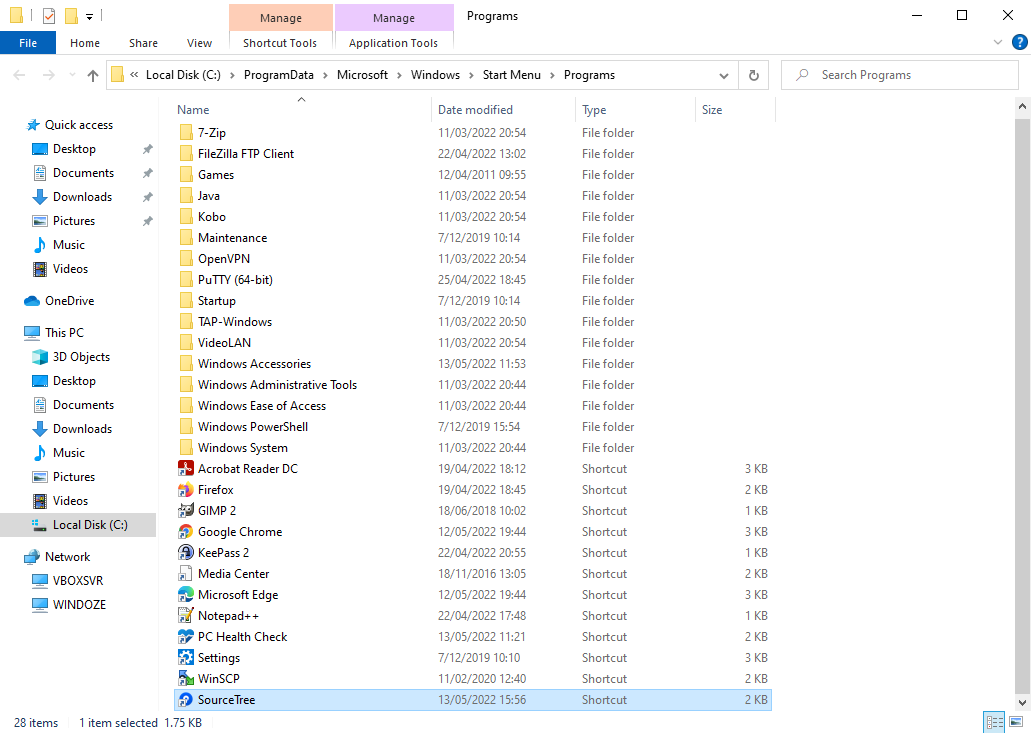
Once copied you will see the Shortcut file “SourceTree - Shortcut” in the Start Menu items folder.
Having the text “ - Shortcut” in the name of a Shortcut file isn’t very helpful in this context, hence right-click on the Shortcut file and select the “Rename” option.
The Shortcut file pointing to the SourceTree application should now have a simple name, appropriate for use within the Windows Start Menu.
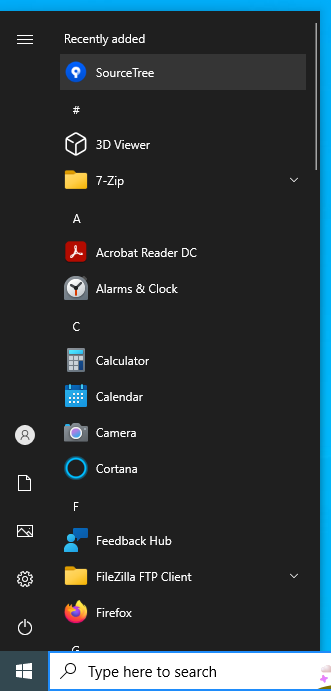
An item for SourceTree will now appear in the Windows Start Menu under “S”, and (since it’s been recently added) also under the “Recently added” section.
Now you will be able to start SourceTree whenever you want to interact with a Git repository!
Configuring SSH within SourceTree
Access via Git to the GitLab server usually takes place via a network protocol called SSH. It’s therefore necessary to create an SSH key so that you can connect to it. It’s possible to create an SSH key from within SourceTree (it actually uses a program called “PuTTY” in the background to do this) and then get SourceTree to use this key when communicating with the GitLab server.
Creating an SSH key
To create an SSH key, click on the “Tools” menu and select the “Create or Import SSH Keys” option. The “PuTTY Key Generator” dialog box will appear.

Within the “Parameters” section at the bottom of this dialog box, change the “Number of bits in a generated key” field to 4096 to make a key which is a bit harder to crack (the number to change is in the bottom right-hand corner and is set to 2048 by default).
Now click on the button “Generate” and move your mouse around to within the large blank area to create some randomness which is necessary for the key generation.
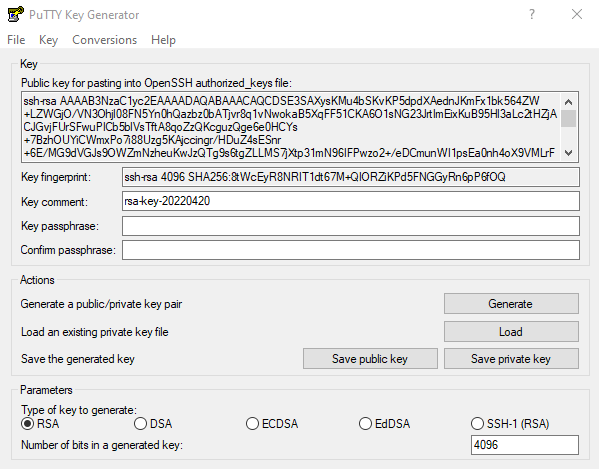
You should now see that the “Key” field has been filled with lots of random text; you will need this text later when setting up the connection to GitLab.
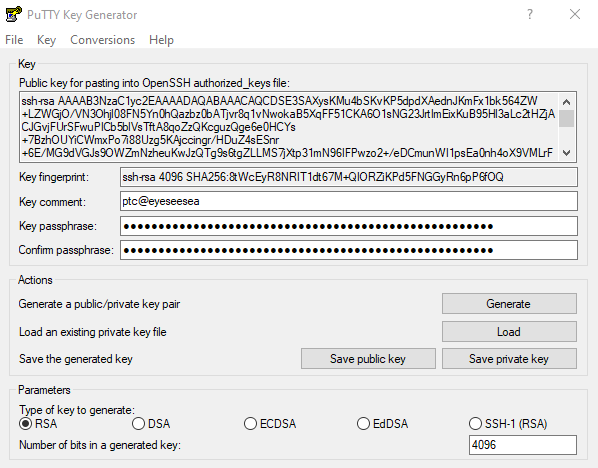
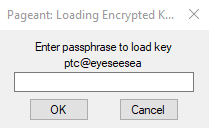
Change the “Key comment” field to something more memorable than the
automatically generated value. For instance, you could use your username
and the name of your computer, e.g. ptc@eyeseesea.
Choosing a passphrase to secure your key
In order to make your SSH key secure (i.e. say if someone steals your laptop, they won’t be able to connect to all of the computers you have access to via your SSH key) you should use a passphrase. To do do this enter a passphrase into the “Key passphrase” field in the “PuTTY Key Generator” dialog.
Note that this is a passphrase and not a password, so length and memorability for you is important here, rather than (say) complexity. One cool thing about passphrases is that spaces and normal punctuation characters are completely ok, so you can use a sentence (which is a lot easier to remember!). For instance, you can use lyrics from your favourite song, or a poem or whatever. A classic example is:
Mary had a little lamb, its fleece was white as snow.
where all of the text, including spaces, comma and full stop are part of the passphrase. Please don’t use this example as your passphrase though! Use your own passphrase!
Once you’ve entered your passphrase in the “Key passphrase” field, enter it again in the “Confirm passphrase” field to make sure you didn’t mistype something in your passphrase.
Passphrases are awesome: you only have to type them in at the beginning of a session (e.g. when you start SourceTree, or in some use cases when you start your computer); then all of your SSH communication is secure and easy. This is in contrast to passwords, where you have to enter them each time you want to make a connection. By using a passphrase the initial setup is a little bit harder (you have to enter more text) but the long-term benefits are better (you only have to enter the text the once).
Saving the private SSH key
Now click on “Save private key” to save the private SSH key (this is also
needed for the connection to GitLab). A “Save file” dialog will open and
you will be asked to specify a filename for your private key. Since this is
for the connection to GitLab, you could use a name like “gitlab” here. If
you wish to use this SSH key for other connections you might like to give it
a more general name, such as id_rsa.
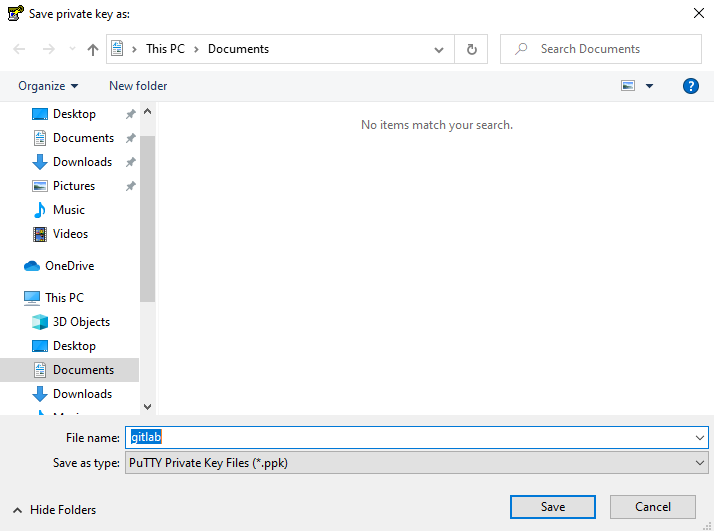
Click on “Save” to save your private key.
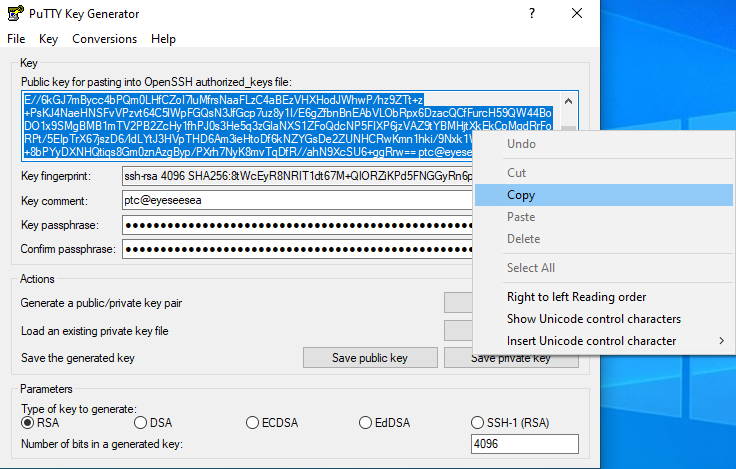
Note that it’s not necessary to save the public key, because this is a PuTTY public key which we don’t use when connecting to the GitLab server. However, the OpenSSH public key shown in the “Key” field is used for the GitLab connection and this is what we’ll set up in the next section.
Adding the SSH key to GitLab
Now that we have an SSH key set up in SourceTree, we need to add the OpenSSH public key part of it to GitLab so that we can clone repositories as well as pull from and push to repositories.
Select all of the text in the “Key” field and copy it to the clipboard by using Ctrl-C, or by right-clicking on the text field and selecting “Copy” from the context menu.
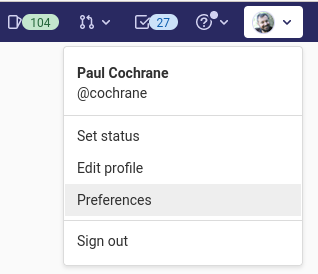
Now log in to the GitLab server via the web interface, and go to your “User Settings” area by clicking on your avatar in the top right-hand corner and selecting the “Preferences” option.
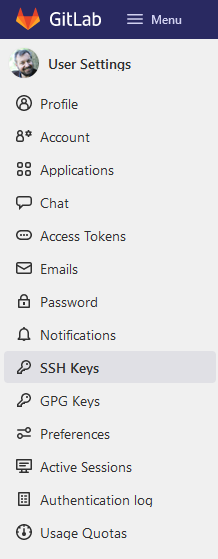
Now select the “SSH Keys” option from the navigation bar at the left.
You should now see the “SSH Keys” user settings window along with a field where you can enter your SSH Key (i.e. the OpenSSH public key copied from SourceTree/PuTTY).
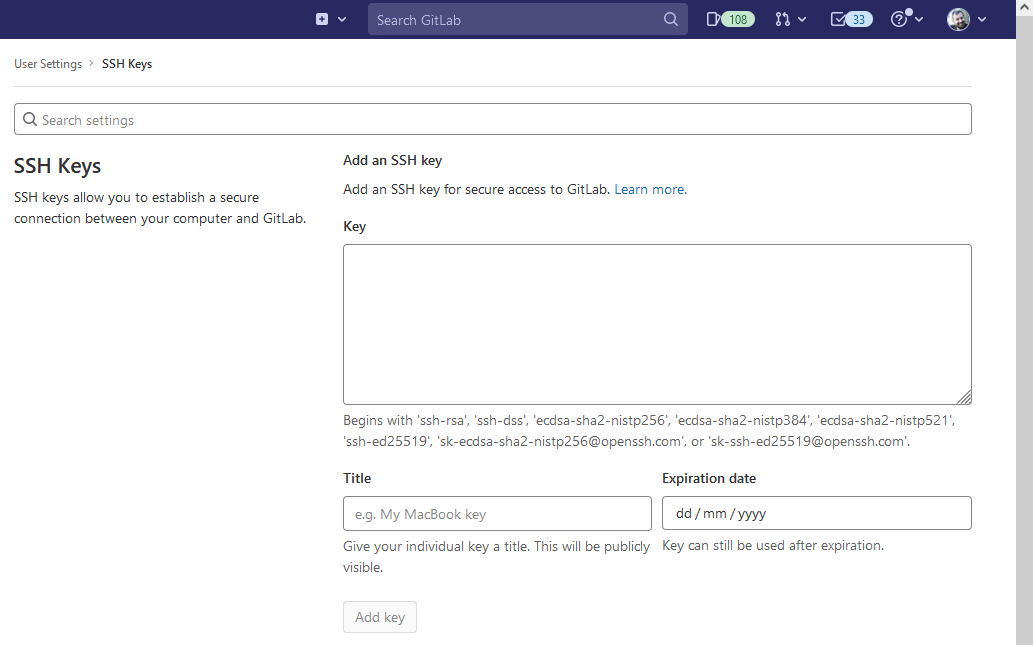
Paste the OpenSSH public key copied earlier into the “Key” field and click on the “Add key” button to add your key.
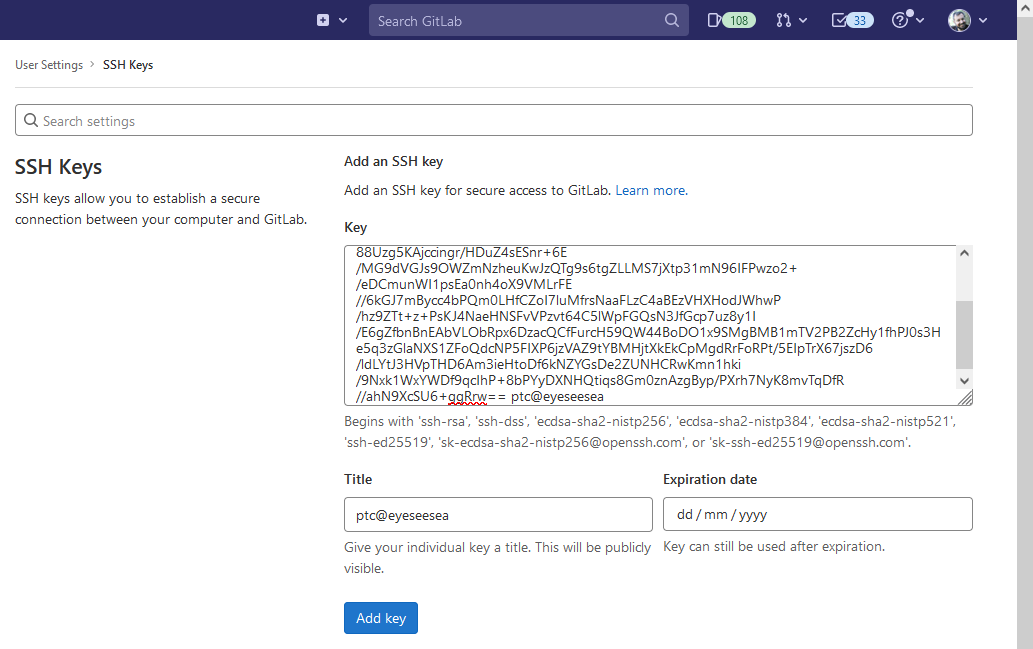
Note that the “Title” field was automatically filled out to use the key comment we entered into the “PuTTY Key Generator” tool, which is one reason why we put the effort in to give the key a useful name.
Now that the SSH key has been added to your account, you’re ready to access repositories on the GitLab server!
Note that whenever you start SourceTree you will be asked to enter your passphrase, however you won’t need to enter it again once SourceTree has started. For instance:
Close the “PuTTY Key Generator” window (by clicking on the large X in the
top right-hand corner of the window) and return to SourceTree.
Before learning how to clone a repository and make changes to it, let’s take a quick detour to work around an issue that crops up with SourceTree when making its first ever connection to a Git server.
Accepting the GitLab server’s host key
The first time a new Git server is contacted when using SSH it’s usually necessary to accept the server’s host key. Normally, a dialog box will appear where you can accept or reject this key; accepting a key then caches it on your local computer and where it will be used for later connections, hence why this only happens the first time a new Git server is contacted.
Unfortunately, SourceTree doesn’t present you with such a dialog box when a host key needs to be accepted; it just gives an error that the connection wasn’t possible. Fortunately, there will be a “Details…” button which appears in such cases and here it’s possible to work out what went wrong. If you run into this situation, clicking on the “Details…” button will present you with this information:
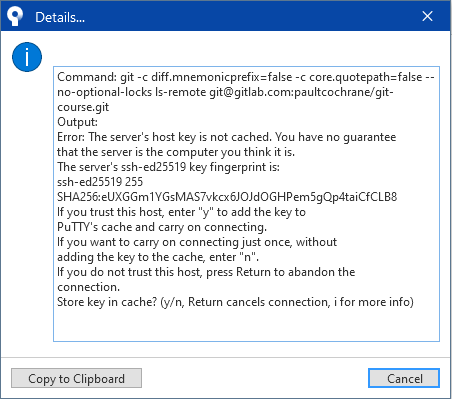
Although this looks to be fairly cryptic, if you look carefully you’ll see
the text The server's host key is not cached which just means that your
computer and the Git server haven’t communicated before and the Git server’s
host key just needs to be stored on your computer (note the question at the
bottom of the “Details…” box: Store key in cache?. This is the SSH
system trying to ask for your feedback to store this key so that it can
continue. From what I’ve been able to find out, SourceTree used to handle
this situation and would present this question to you as a dialog box to
either accept or reject, however it doesn’t seem to do this automatically
anymore, therefore we need to do this by hand ourselves.
Click on cancel to close the dialog box. Let’s work work around this issue so that we can start actually using SourceTree to interact with Git repositories.
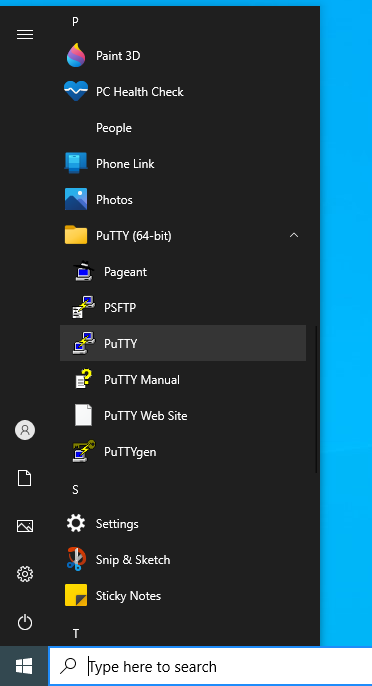
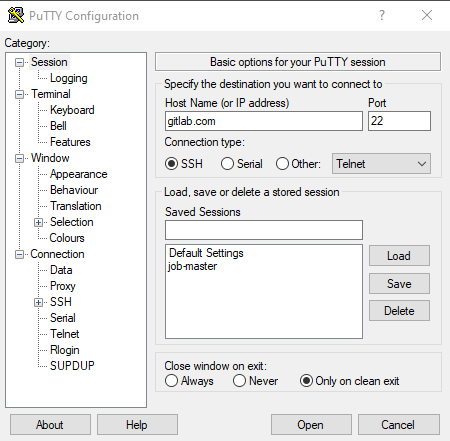
To work around this issue we need to use PuTTY program. Open the Windows
start menu select the “PuTTY (64-bit)” option and then the “PuTTY” suboption
to start the PuTTY program.
You will see a window with the title “PuTTY Configuration”.
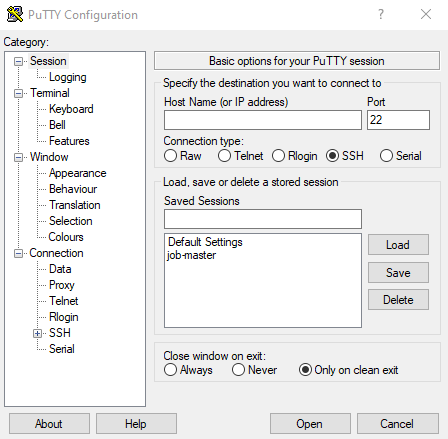
Enter gitlab.com (the address of the GitLab server) into the “Host Name”
field.
Now click on the “Open” button at the bottom of the window. You be presented with a “PuTTY Security Alert” dialog box asking you if we trust the host we’re connecting to.
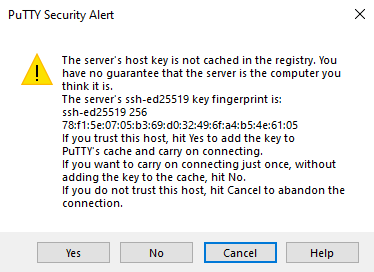
In this case we know that we trust the host we’re connecting to, so click “Yes”.
Now simply close the PuTTY window(s) because we’ve now worked around the
problem. We will now be able to perform Git operations that (often) require
a network connection such as cloning a repository, pulling from a repository
or pushing to a repository.
Cloning a repository
Now that we’ve set up the connection to the GitLab server, we’re ready to start working with Git repositories. A common first step when working with a Git repository is to clone a repository from a Git server (such as GitLab or GitHub).
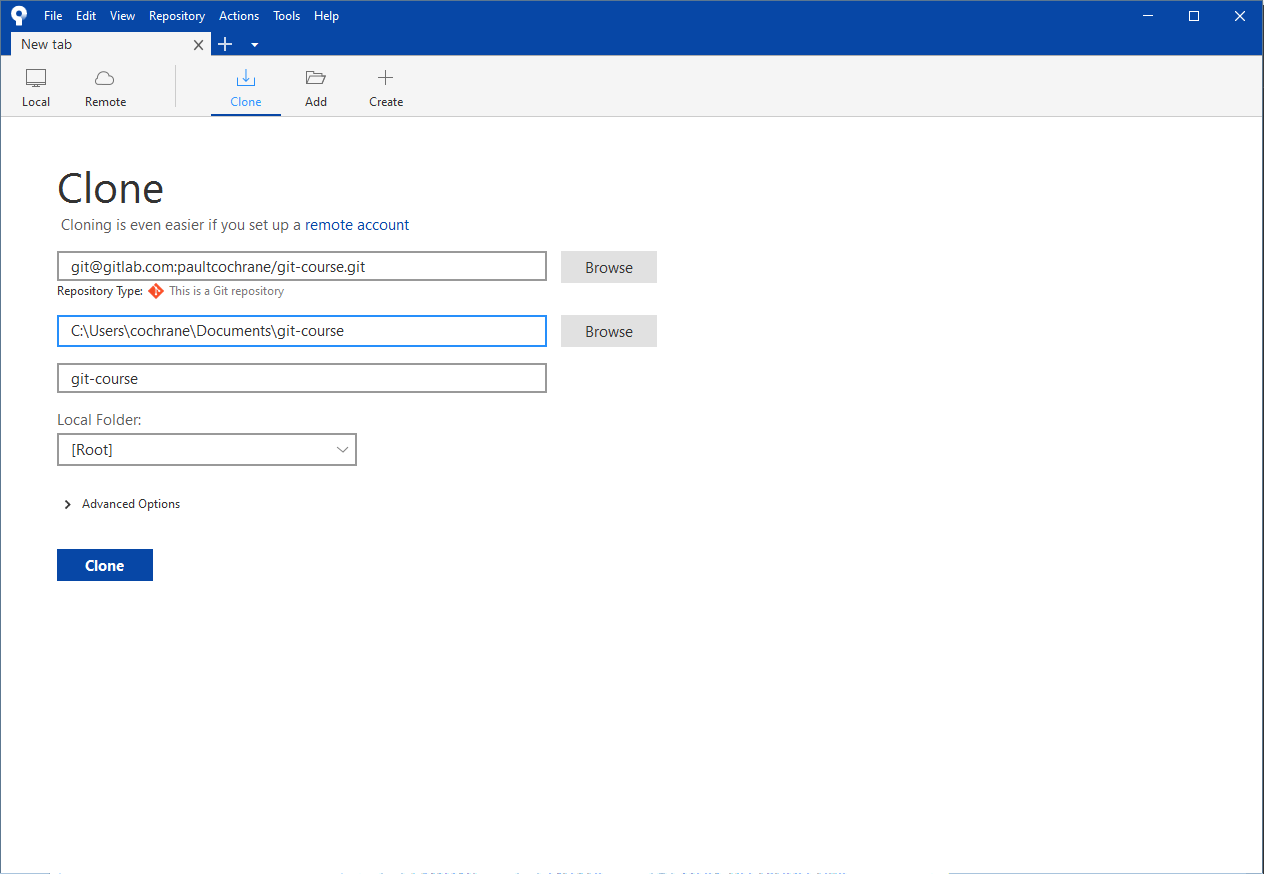
To clone a repository, click on the “Clone” button in the SourceTree menu. You will now be presented with the SourceTree clone page:

Let’s use the “Git Course” repository from my GitLab account as an example
project to clone2. Visit the git-course repository in
GitLab with a web browser.
After logging in (if necessary) you should see this page:
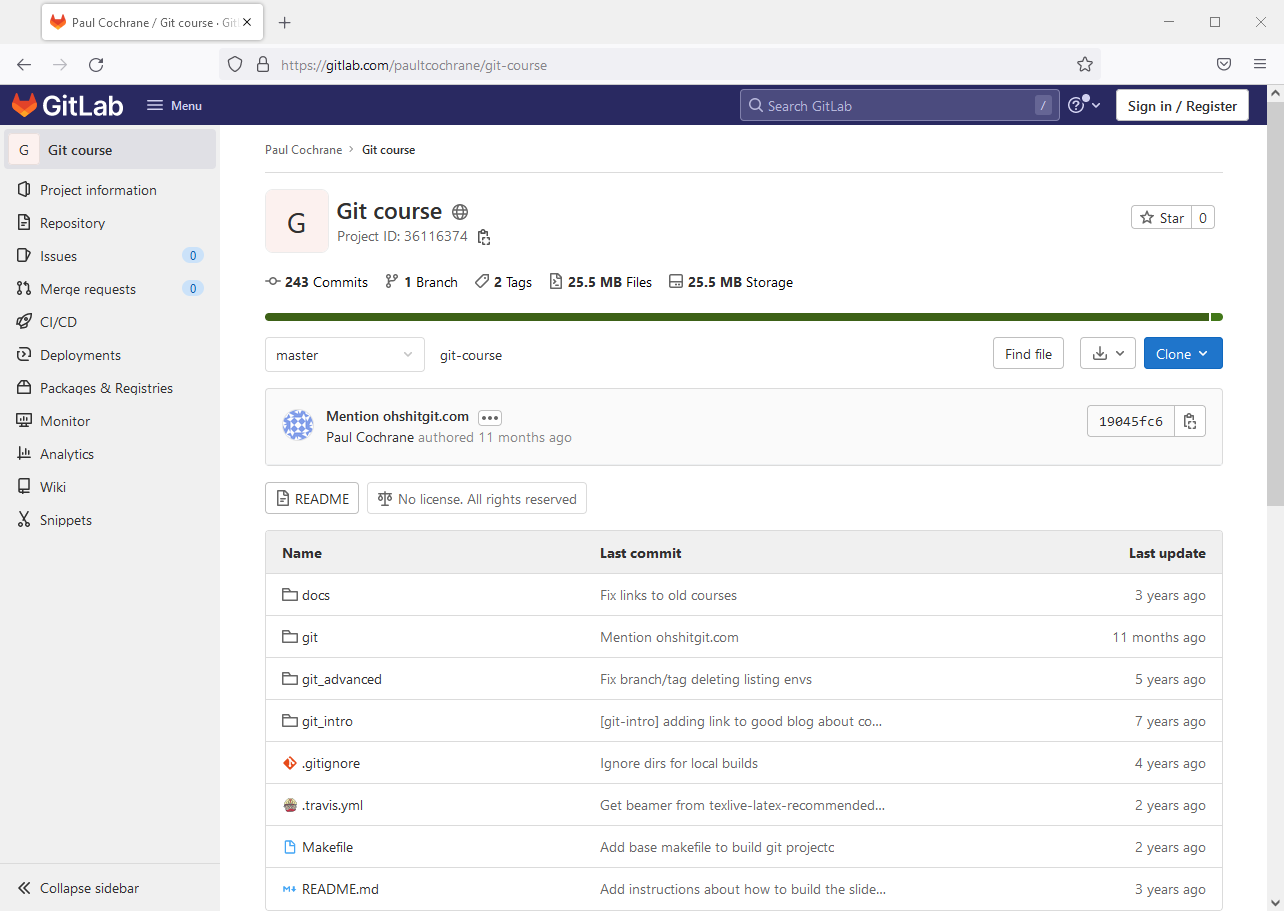
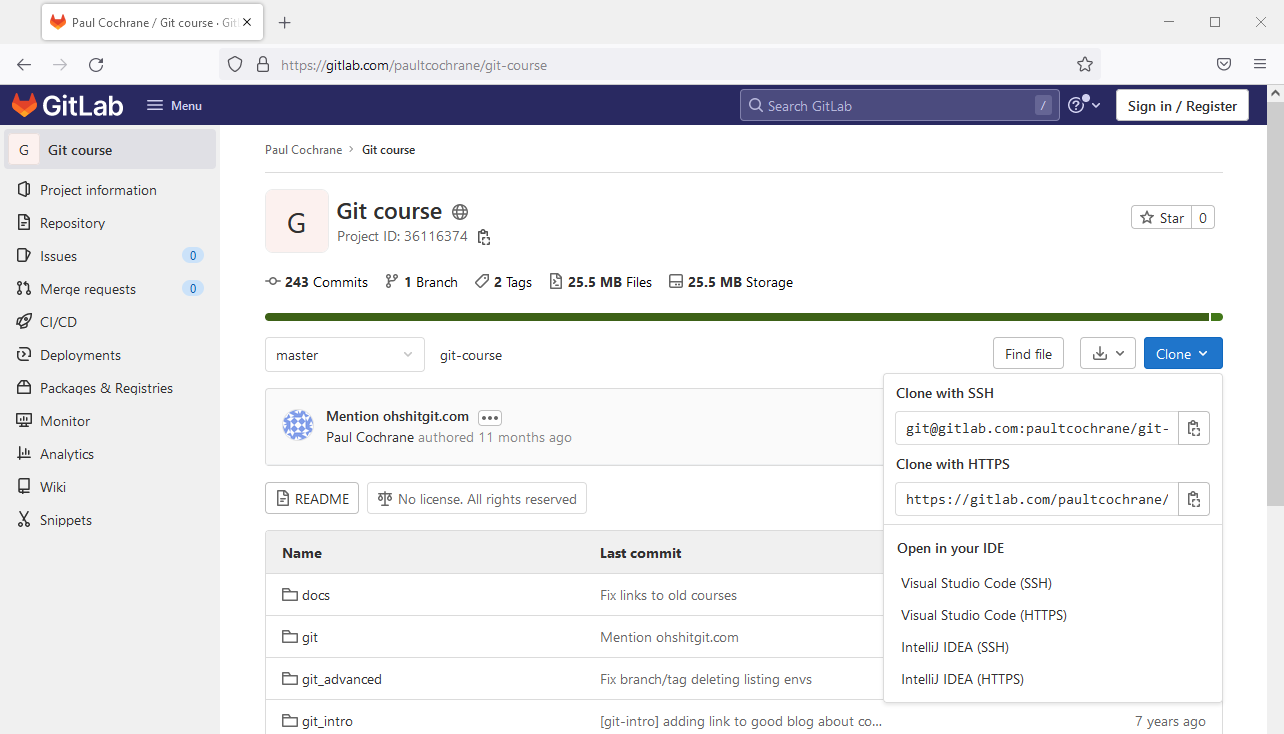
We need to find out the address (i.e. URL) of the repository so that we can clone it, therefore click on the “Clone” button at the right-hand side of the page and copy the value within the “Clone with SSH” field.
Now return to SourceTree and paste this value into the “Source Path / URL” field in the Clone window. In order for SourceTree to work out that you’ve entered something into this field, simply click in the “Destination Path:” field. You’ll now see that the other fields are automatically filled and SourceTree should tell you that this repository is definitely a Git repository.
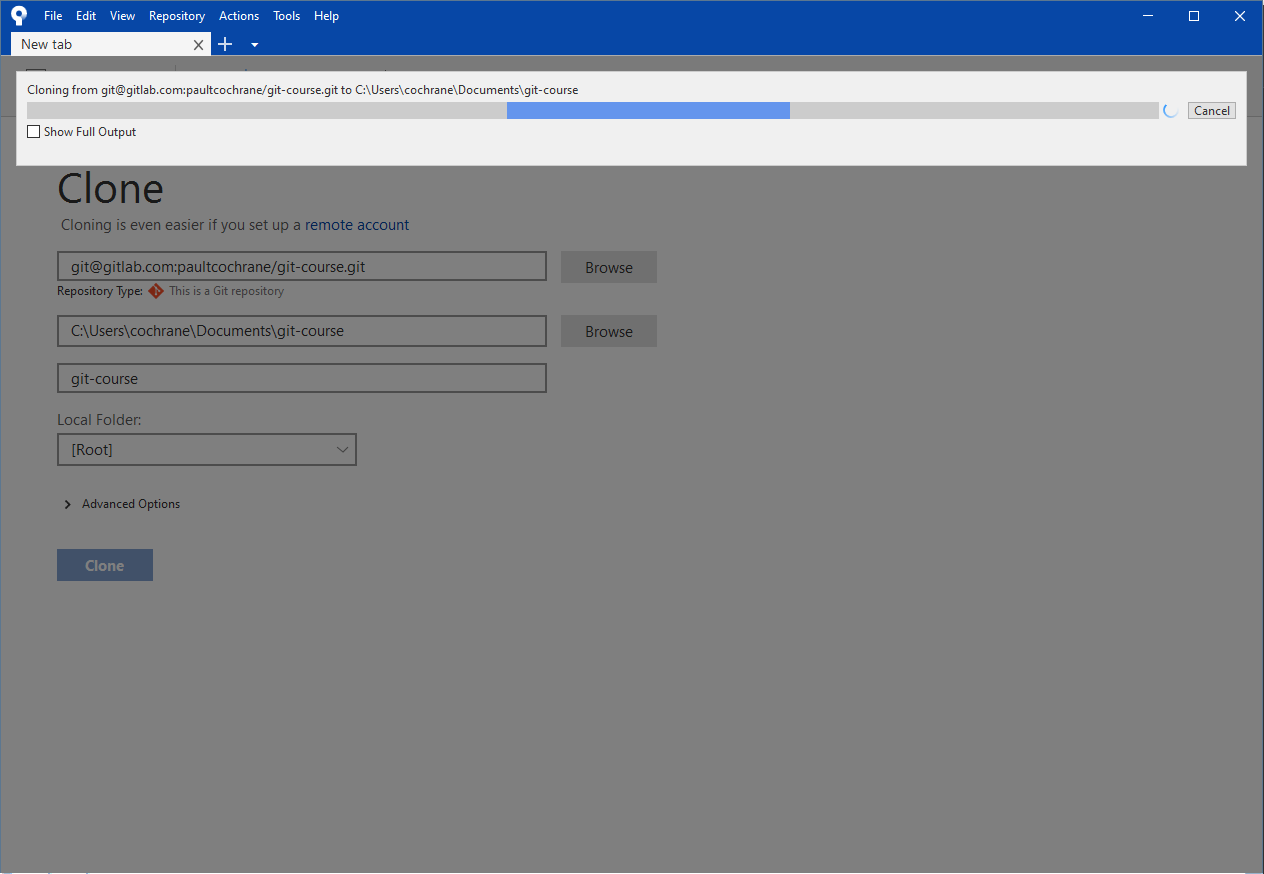
Click on the “Clone” button to clone the repository from the remote server (i.e. the GitLab server) to your local computer.
You will see a bar showing you that the clone is in progress. This might take a while depending upon your internet connection.
Once cloned, you should see a window showing all recent commits on the main
(also called master) branch (in the upper box of the window); the most
recent commit will be highlighted along with its commit message (in the
lower left box) and the changes made within that commit (also called the
diff) in the lower right box.
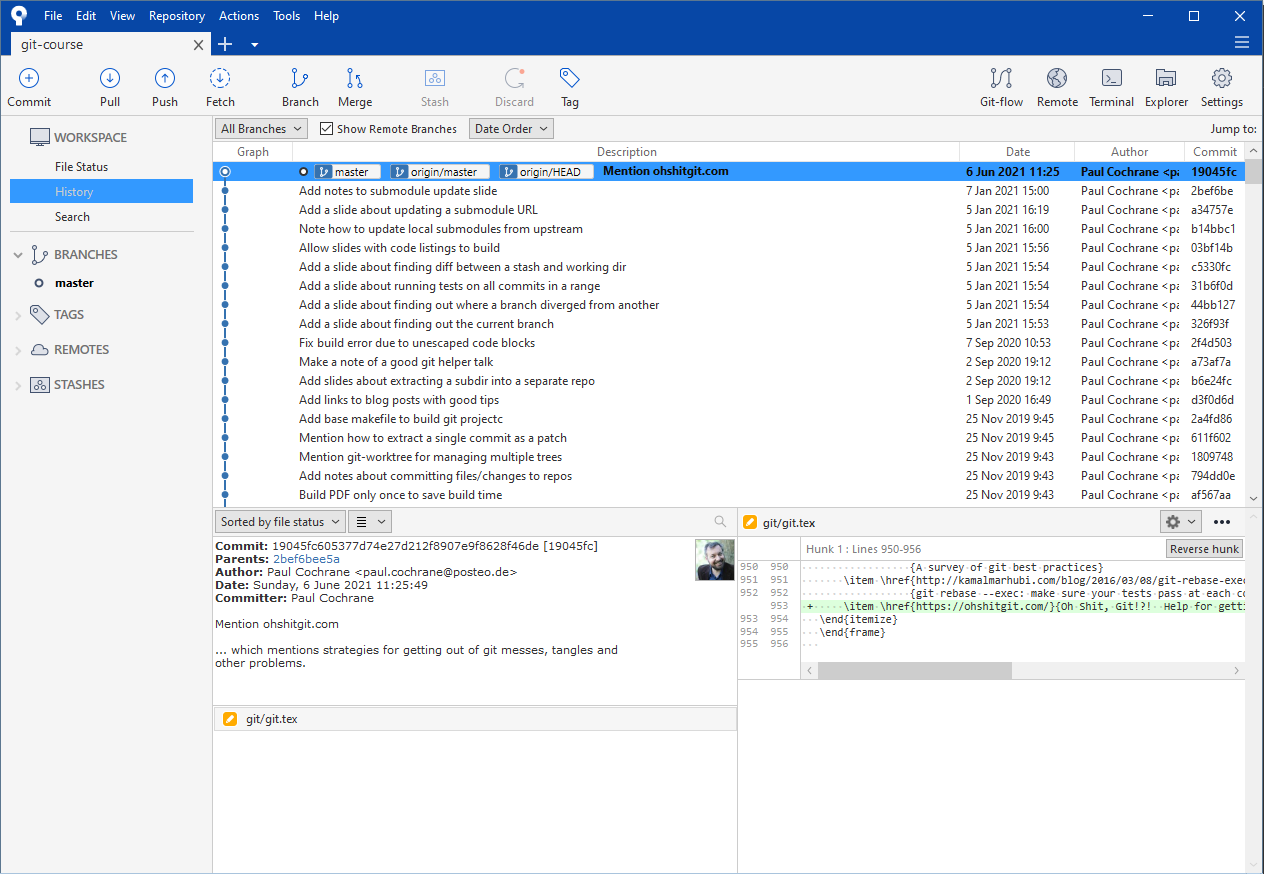
The cloned repository will have been saved into the “git-course” folder within the “Documents” folder of your home directory.
With a clone of the upstream repository (i.e. the one from the GitLab server) on our local computer, we can add files, delete them, change them, move them around and keep track of these changes with the help of Git (through the SourceTree GUI interface).
Making changes to the repository
Very roughly speaking, the most common changes one makes to a repository are modifying files, adding files, and deleting files. These operations are discussed in detail in the following sections.
Modifying a file
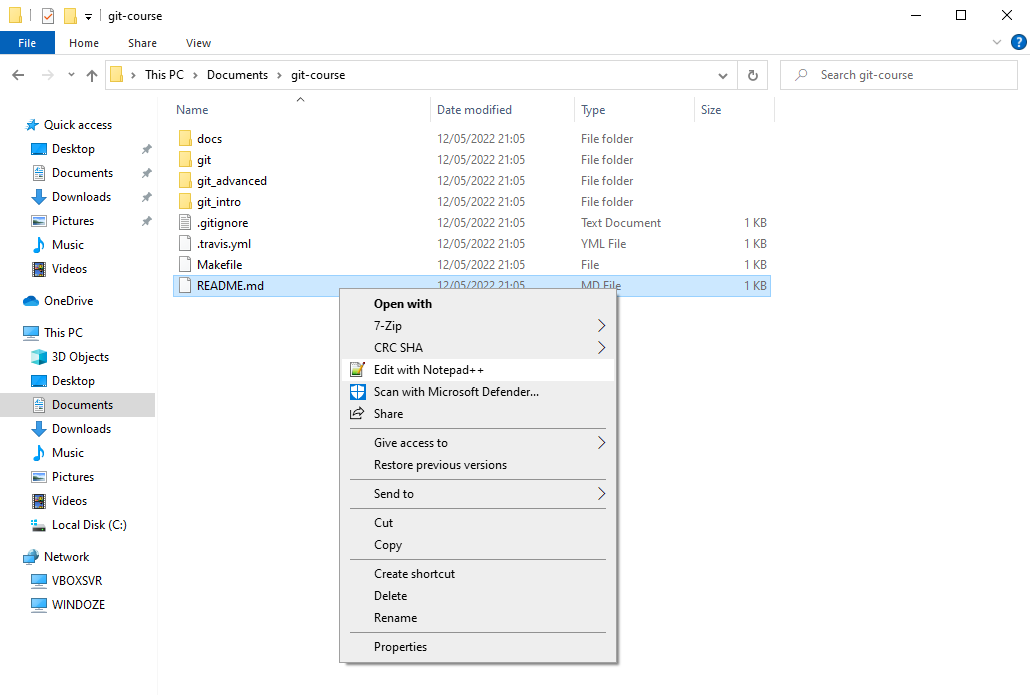
Open the Windows File Explorer and open the “Documents” folder and then the
“git-course” folder (i.e. where SourceTree cloned the git-course project
folder to). Let’s change a file to show what happens in SourceTree when
we’ve made changes to project files. Open the file README.md with your
favourite text editor (Notepad++ in this
case).
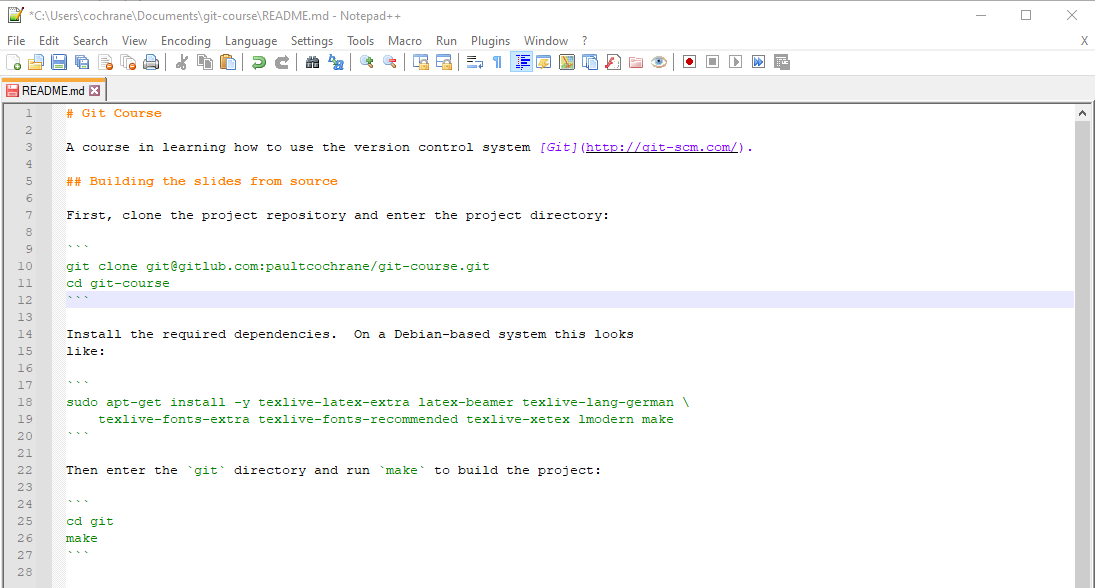
If you look at lines 10 and 11, you’ll notice that the clone URL and the cloned directory name are incorrect: the URL should point to the GitLab server where this project is hosted, and the directory name should use a hyphen instead of an underscore.
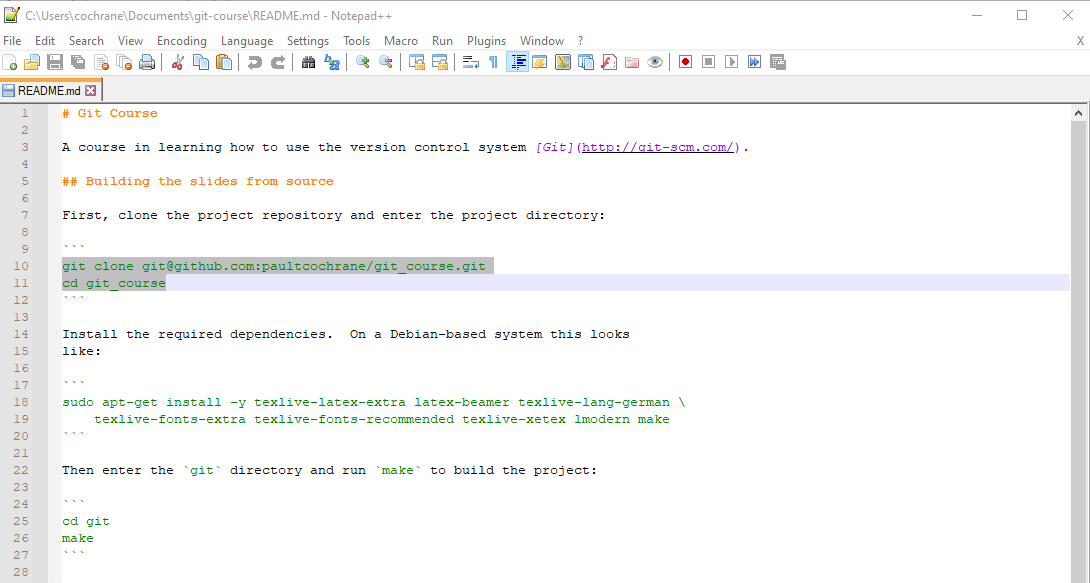
Let’s change these lines to:
git clone git@gitlub.com:paultcochrane/git-course.git
cd git-course
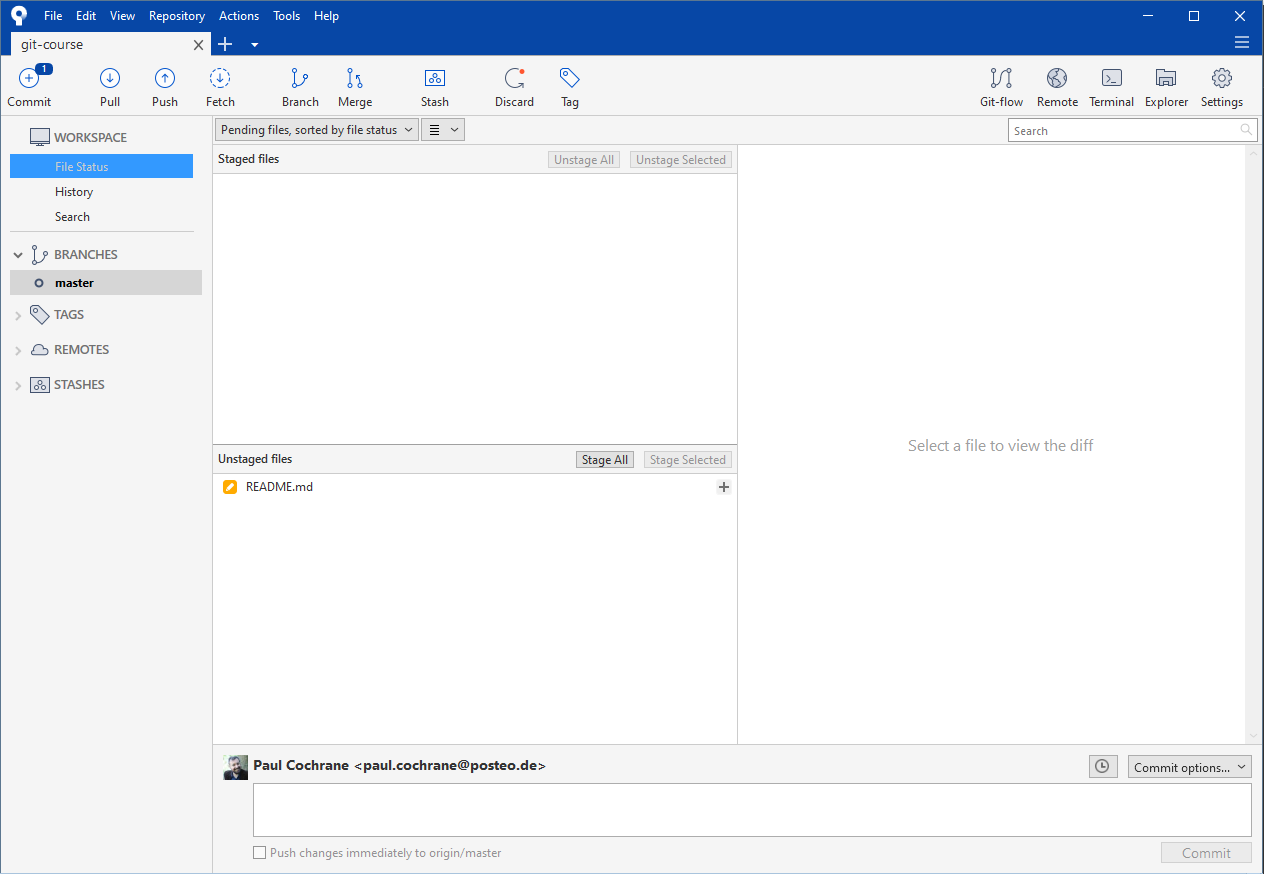
Saving the file and returning to SourceTree, we find that we now have what are called “Uncommitted changes”:
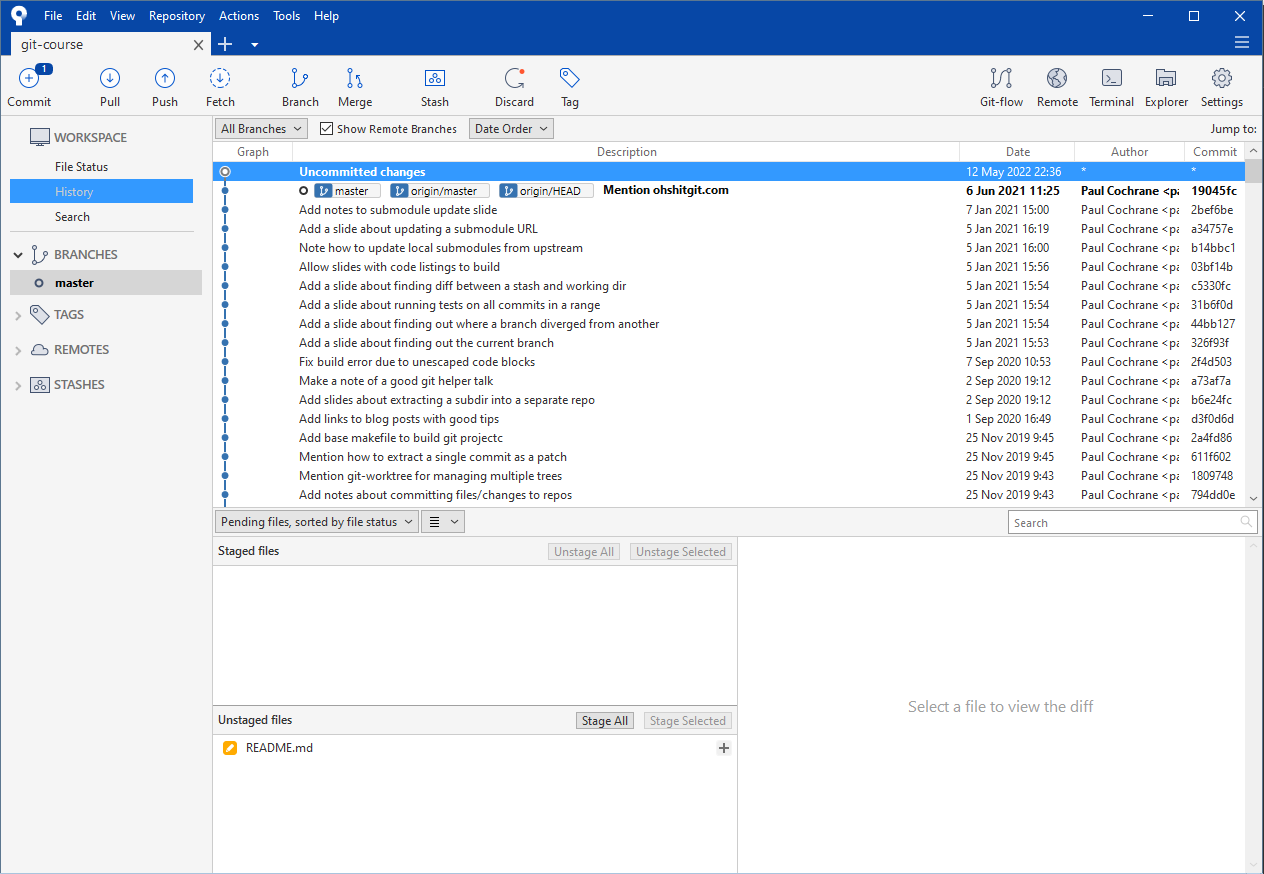
which basically means that we changed stuff and haven’t told Git about it yet.
Note that SourceTree shows us in the bottom-left window which files are unstaged (which means that Git knows about them, but the changes to them haven’t been committed yet). It’s possible to have multiple files which are in the unstaged state; in this case there’s only one file.
Note also that the “Commit” button in the top left-hand corner now has a blue highlighted “1” in its corner. This is also SourceTree’s way of telling us that there are changes that need to be committed.
To see how to commit this change, continue to the section Committing files.
Adding a file
Git is focussed on tracking changes to files in a repository; adding a new file or files is therefore also a kind of change. The important difference to the example above of changing an existing file is that we have to inform Git that we want it to track the new file’s changes in the future.
Open an editor (for example, Notepad++ as used earlier) and enter the following text into a new file:
default:
    image: debian:buster

stages:
    - build

build:
    stage: build
    script:
    - apt-get -y update
    - apt-get install -y texlive-latex-extra texlive-latex-recommended texlive-lang-german texlive-fonts-extra texlive-fonts-recommended texlive-xetex lmodern build-essential
    - cd git
    - make
It should look something like this:
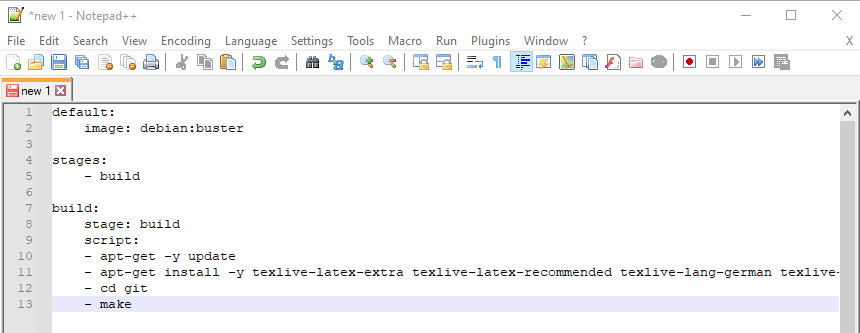
Save the file in the git-course base directory with the name
.gitlab-ci.yml.
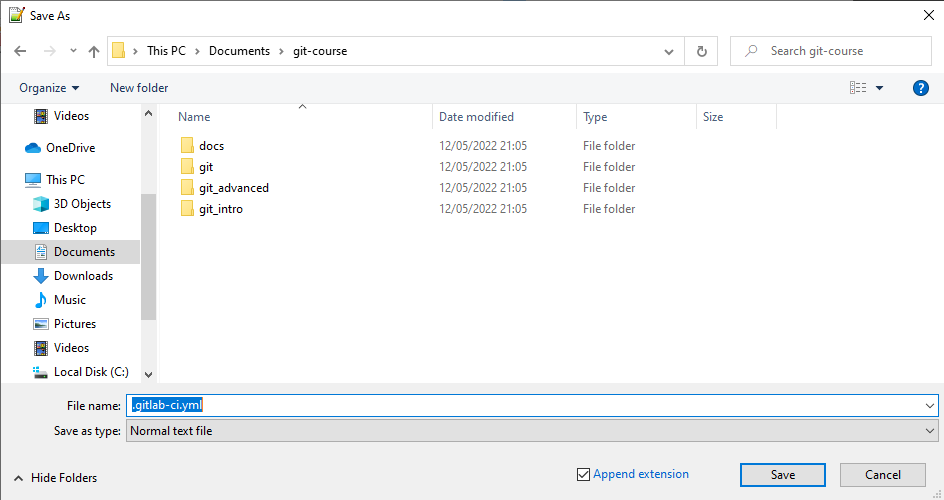
The contents of this file aren’t really important, so if you don’t understand what the text says, don’t worry. What it does is set up the configuration file used to run the GitLab Continuous Integration service so that we can build the course slides and hence check that everything builds as we expect it to.
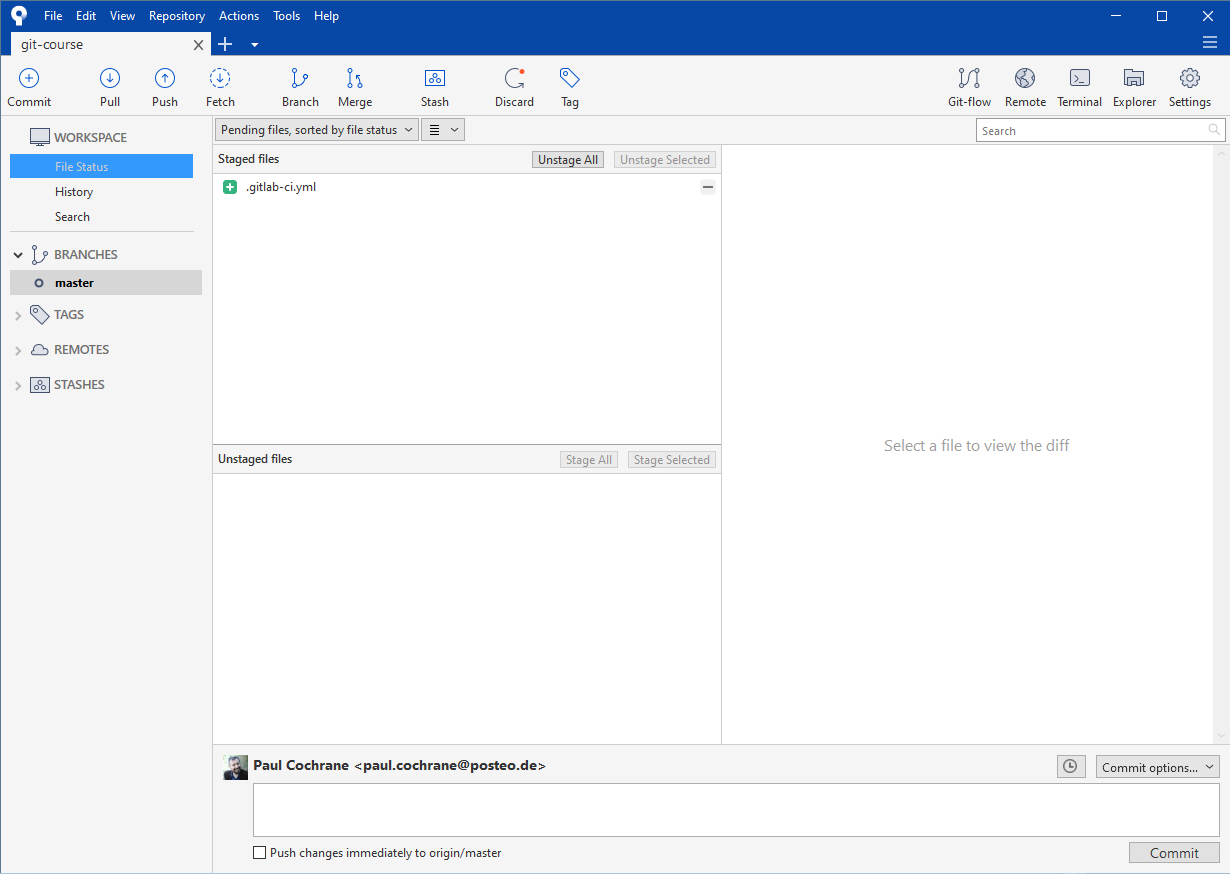
Now that we have added a new file to the git-course directory, SourceTree
detects this and shows us that we have “Uncommitted changes” in our working
directory.
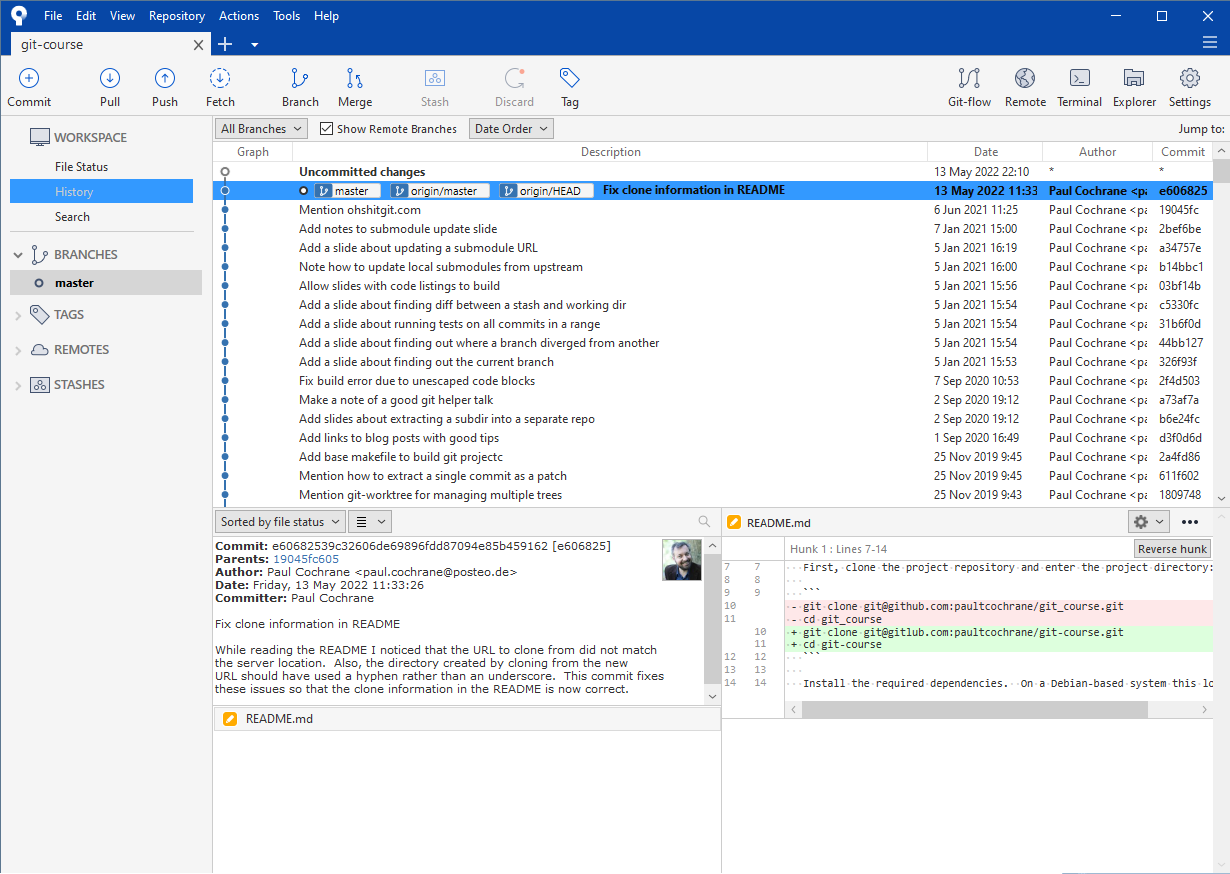
Clicking on the line “Uncommitted changes” shows us which files are uncommitted in the “Unstaged files” box in the lower left-hand corner of the repository view.
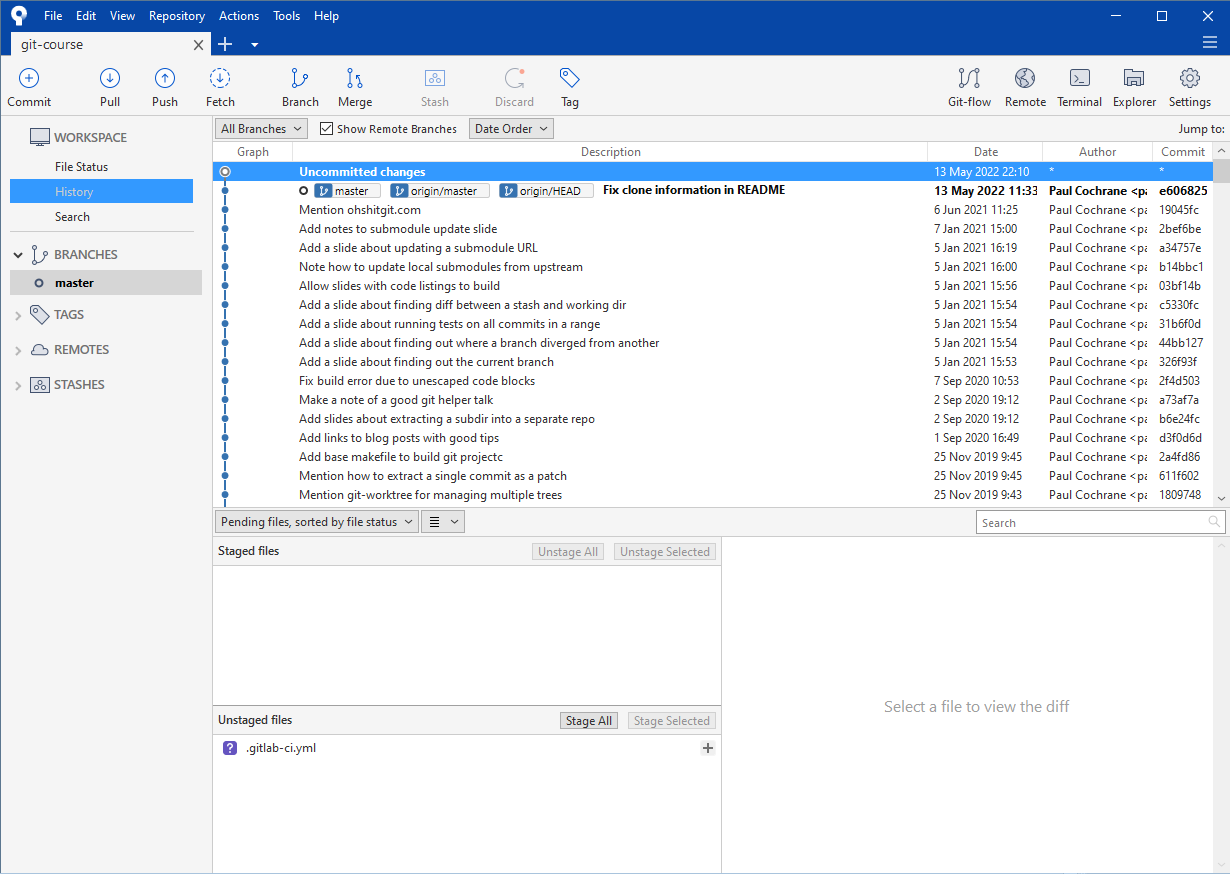
This is a similar situation to that which we had above when changing a file. However this time, the icon next to the file in the “Unstaged files” box is a question mark, meaning that Git doesn’t (yet) know about this file.
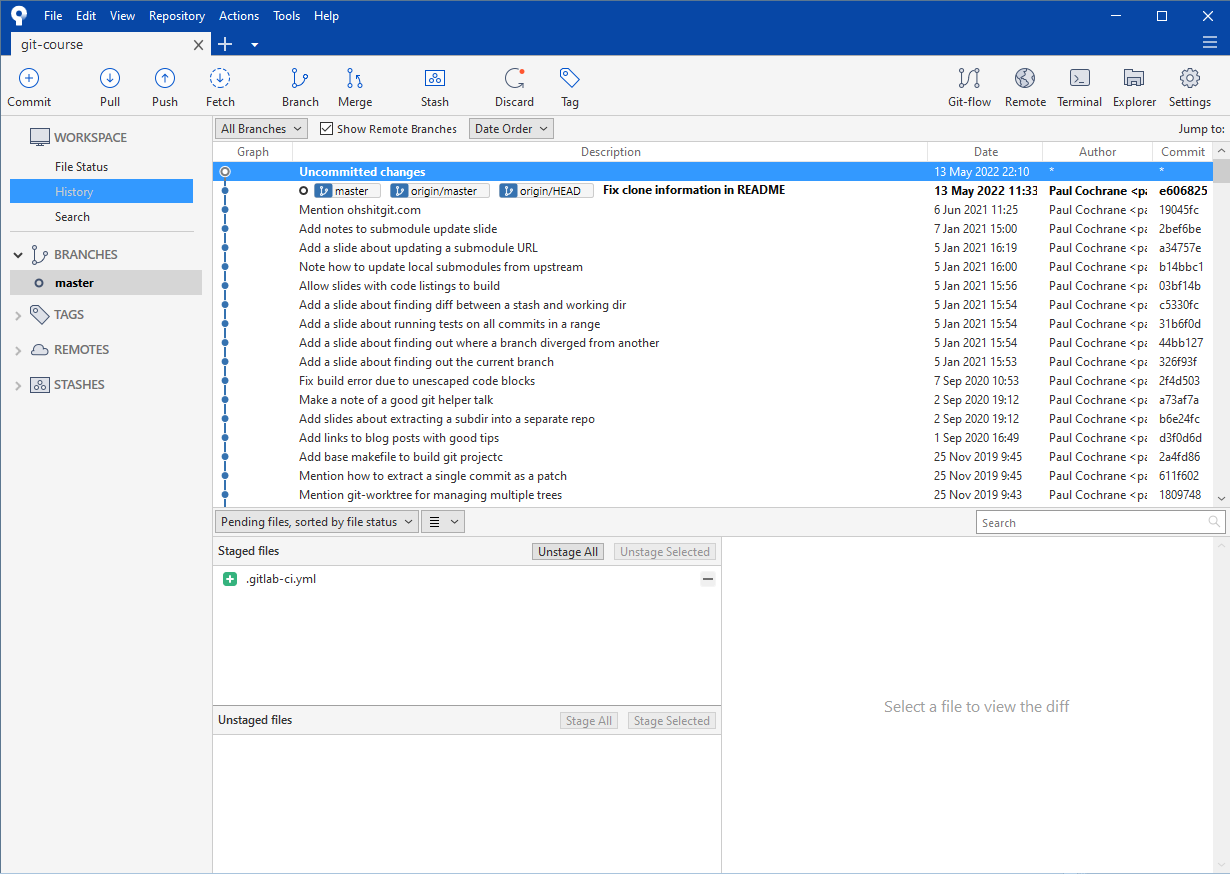
If we drag the file from the “Unstaged files” box up into the “Staged files” box above it, you will notice that the icon next to the file’s name becomes a green plus symbol. This means the file has been added to the staging area and is hence ready to be added to the repository as part of the next commit.
To finish adding this file, we need to commit this change to the repository by clicking on the “Commit” button in the top left-hand corner of the SourceTree window.
As in the Committing files section, we now enter a commit message describing the change and click the “Commit” button in the bottom right-hand corner to complete the commit process.

The commit containing the addition of the new file will now appear in the SourceTree window for the “Git course” repository.
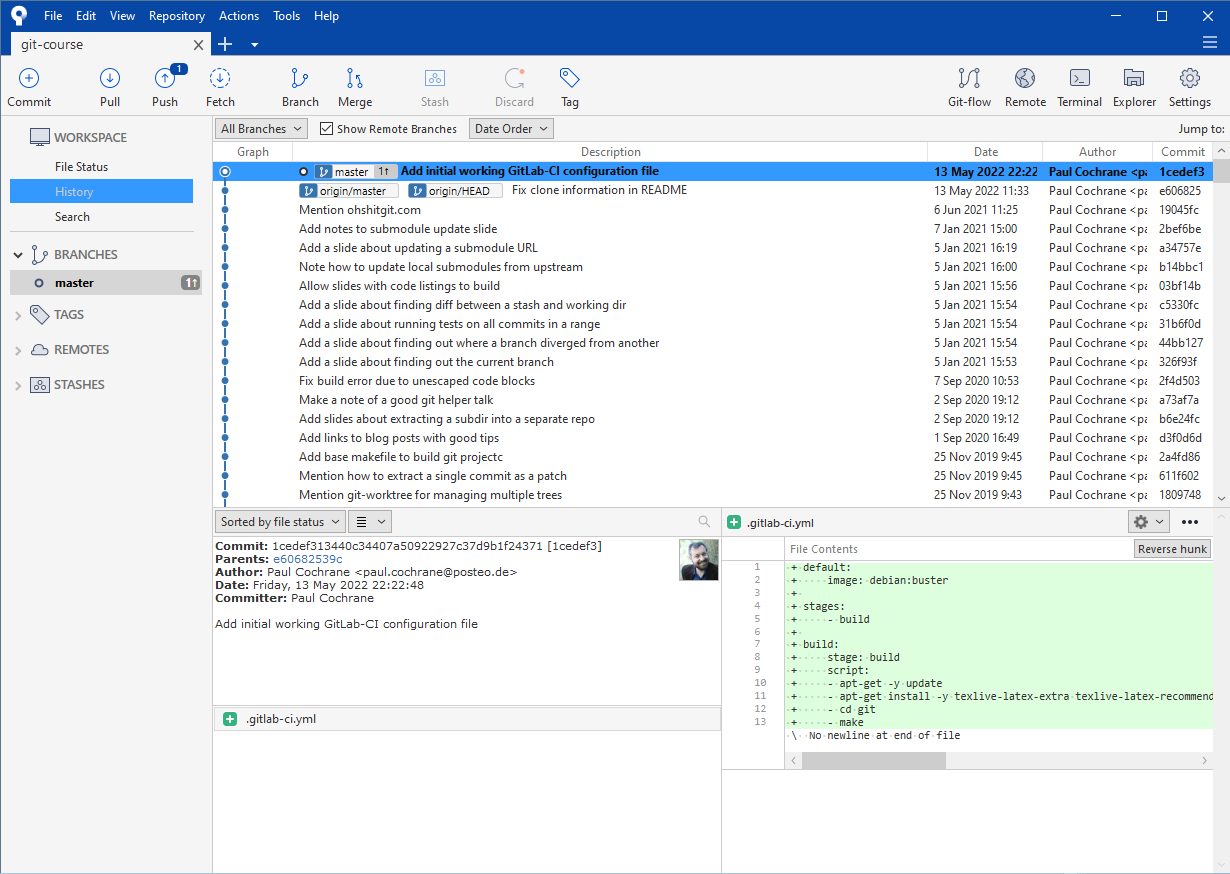
And that’s it! The new file has been successfully added to the repository. You could push this change upstream now if you wish; for details on how to do that, see the section on pushing changes upstream.
Deleting a file
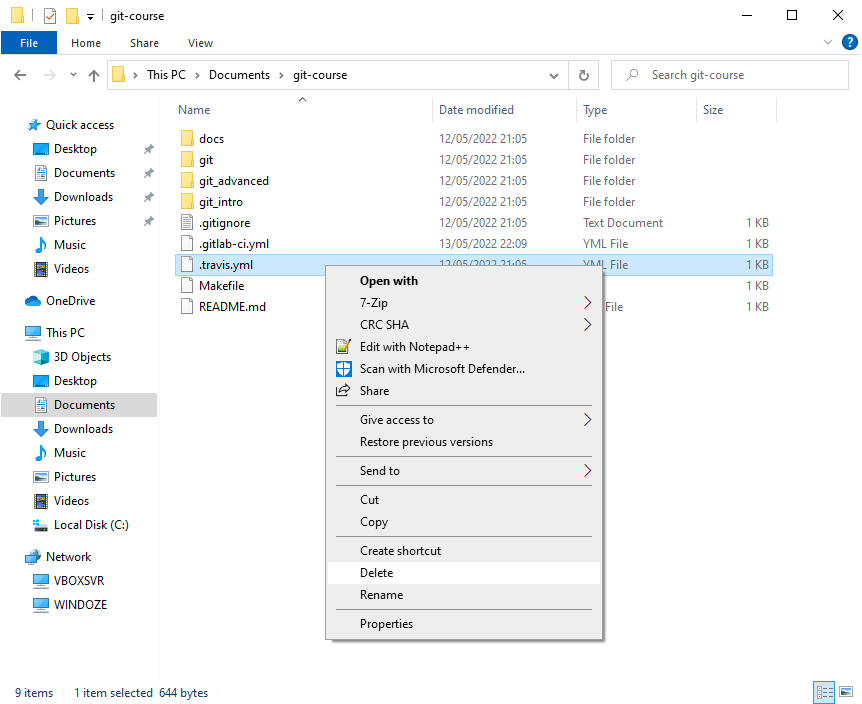
Another common kind of change one can make to a repository is to delete a
file. If we consider the git-course directory, we see a file called
.travis.yml. This file configures building the Git course slides on the
Travis CI system, which we don’t use here because we have direct access to
GitLab’s own CI system. Therefore, we no longer need this file and can
delete it.
Go to the git-course folder, right-click on the .travis.yml file and
select “Delete” from the context menu that appears.
Click on “Yes” in the dialog box that appears which asks you if you really
want to delete the file and now the file will have disappeared from the
git-course folder.
As with the case of adding a file discussed in the last section, SourceTree detects that the file has been deleted and shows us that we have unstaged changes again. This time, the file appearing in the “Unstaged files” box has a grey minus sign icon next to it to highlight the fact that this file has been deleted.
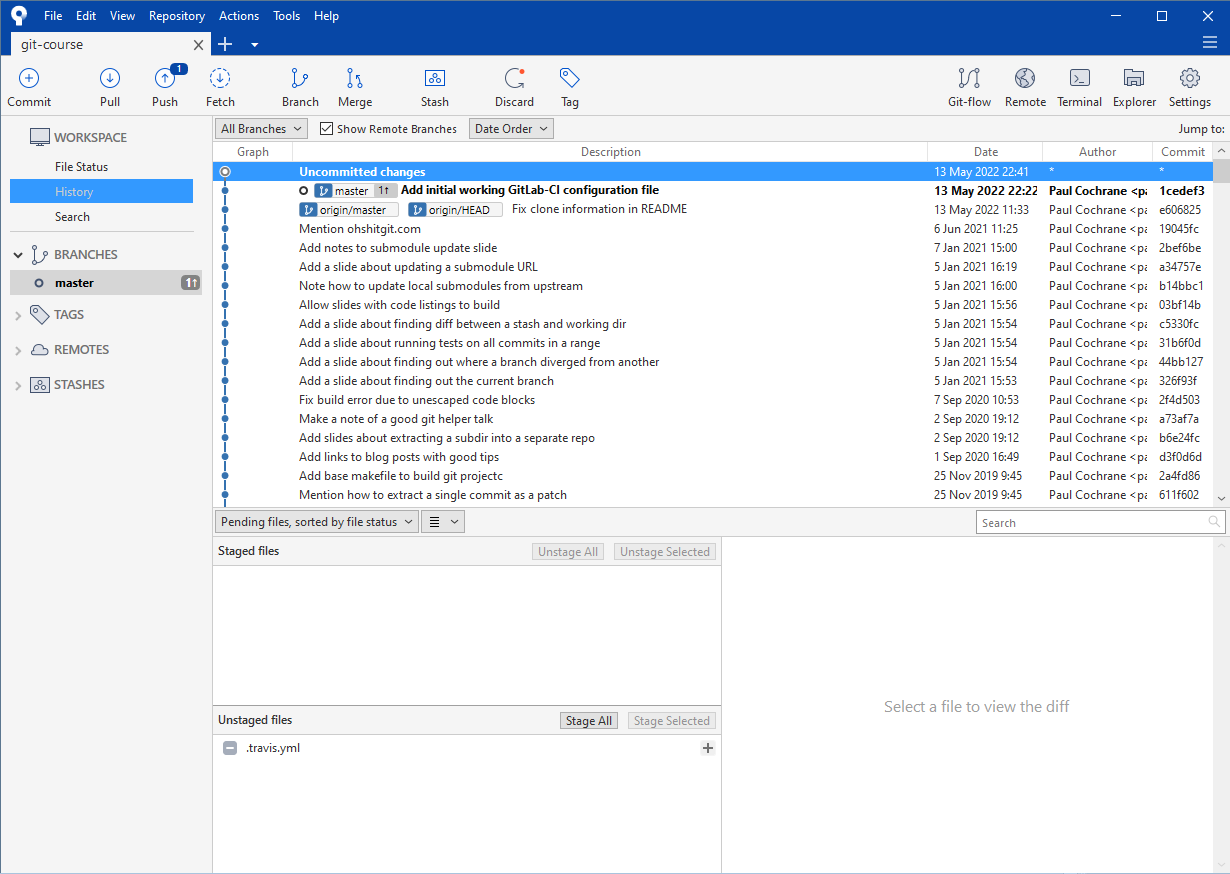
Drag and drop the file from the “Unstaged files” box into the “Staged files” box above it to stage the deletion of this file.
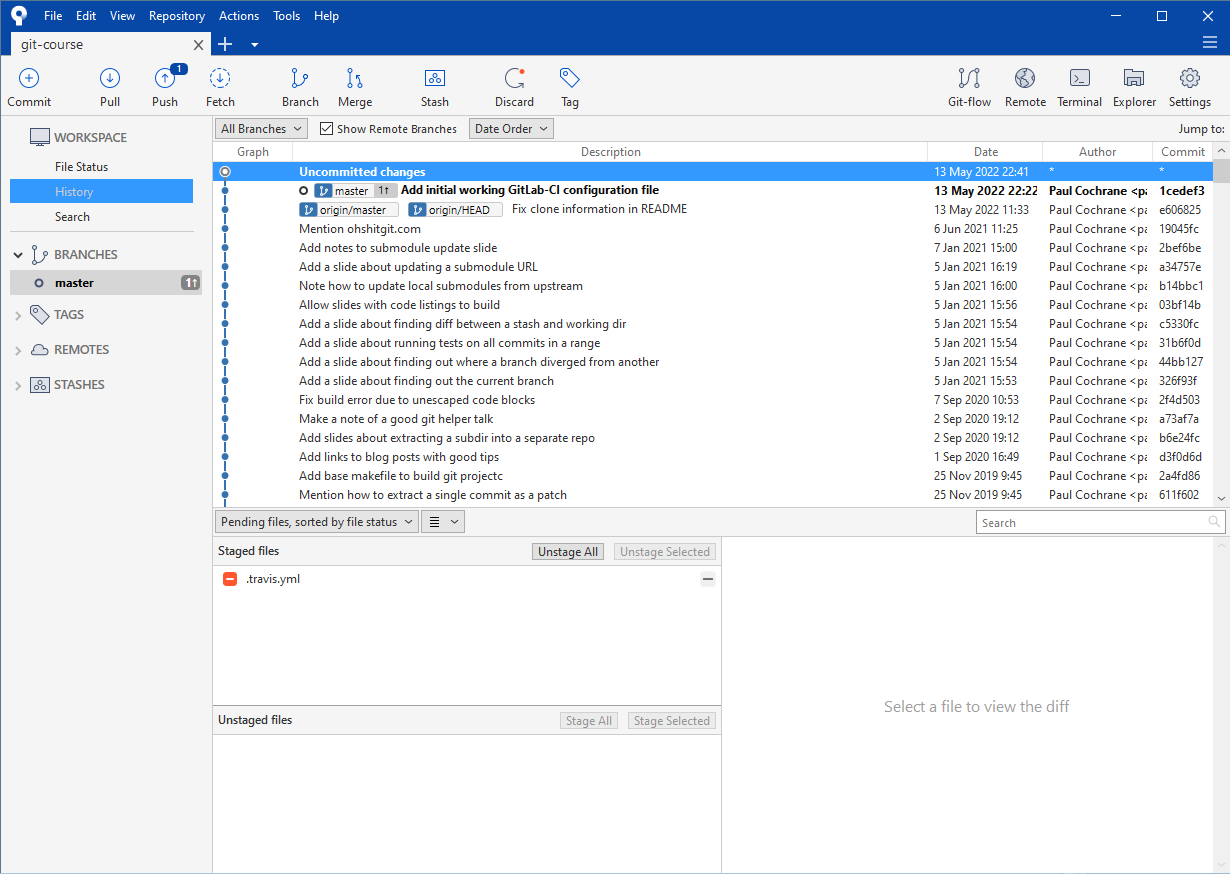
Now the file has a red minus sign icon next to it. This means that the file will be deleted as part of the next commit. Following a similar path to that discussed in the committing files section we click on the “Commit” button in the top left-hand corner and write a descriptive commit message

and finally click on the “Commit” button in the bottom right-hand corner to complete the commit. We again see that the commit is at the top of the list of all commits shown in the SourceTree repository window.
The file has now been successfully removed from the repository. As with changing a file or adding a file, you could–if you wish–push the changes upstream.
Committing files
Consider the change we made to the README.md file above. Let’s now commit
these changes and hence record the changes in the repository.
Click on the “Commit” button. The SourceTree window will change to show the staged files (files ready to be committed), unstaged files (files not yet ready to be committed) as well as a diff of the files with respect to the current state of the repository (on the right-hand side, currently empty). At the very bottom of the window you will see a text area where you can enter a message explaining the changes made in this commit.
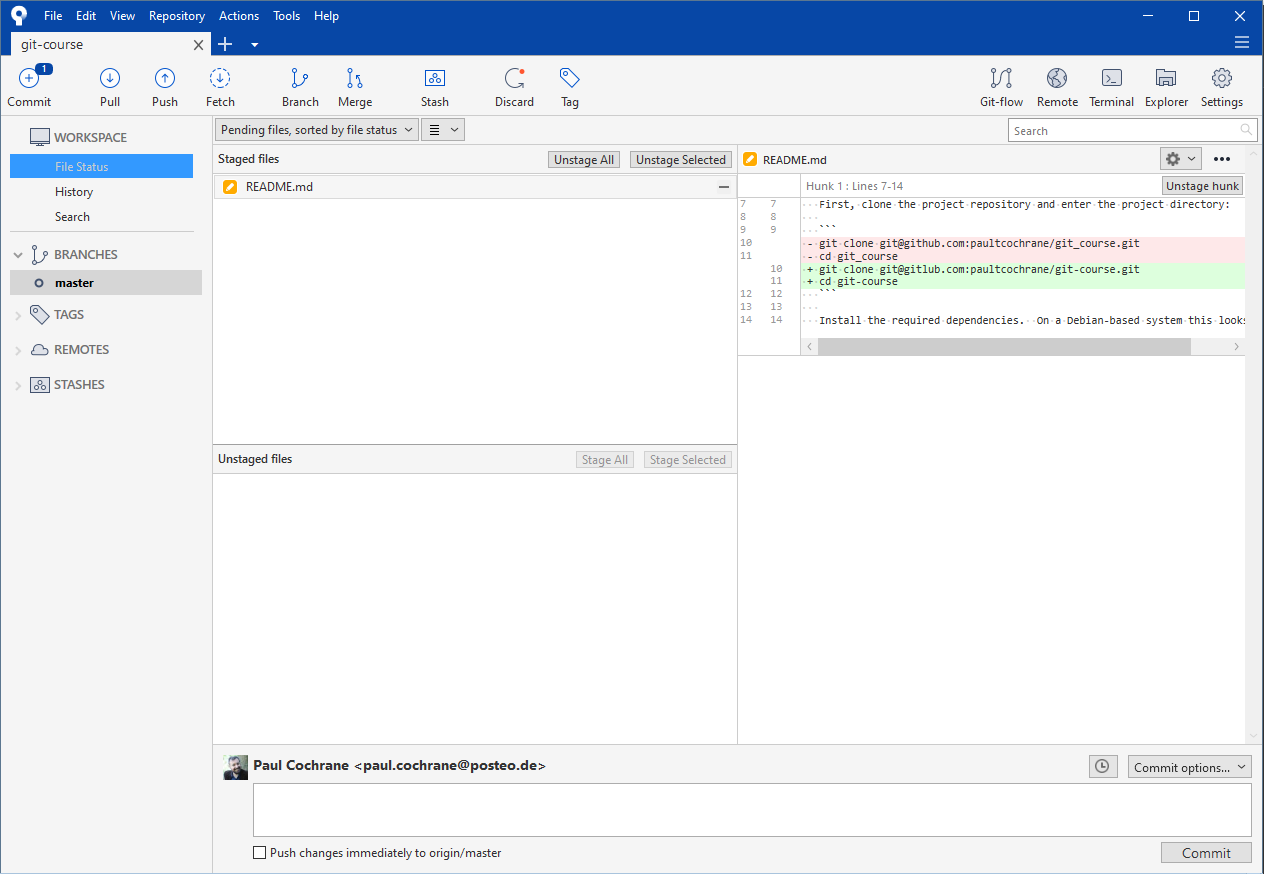
Drag the README.md file from the “Unstaged files” window at the bottom to
the “Staged files” window at the top. If you then click on the README.md
file, you will also see the differences between the state of this file and
the state of the repository in the right-hand window.
Now click in the text area at the bottom of the window and your commit message. The first line should be a short (roughly 50 character) description of what changed. The remaining text should mention why this change was necessary and any other relevant information. In this case the change is quite simple, so let’s add this text:
Fix clone information in README

While reading the README I noticed that the URL to clone from did not match
the server location.  Also, the directory created by cloning from the new
URL should have used a hyphen rather than an underscore.  This commit fixes
these issues so that the clone information in the README is now correct.

Now click on the “Commit” button at the bottom right-hand corner to commit
these changes. The window will change to show that your local master
branch has progressed one commit in comparison to the repository on the
GitLab server (called origin/master).
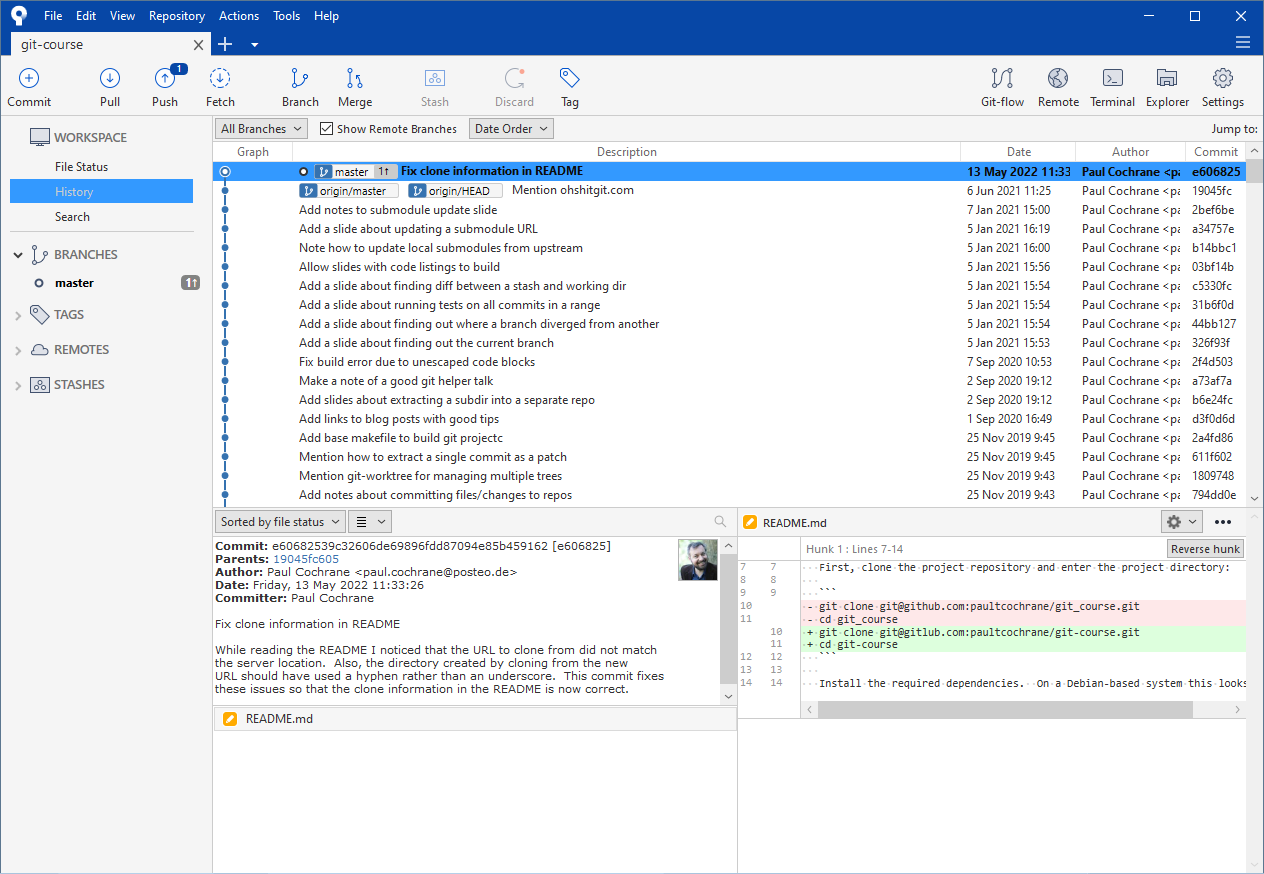
Note that now there is a blue 1 on the “Push” button in the SourceTree
window. This means that these changes are now ready to be pushed to the
GitLab server if you so wish.
Pushing changes upstream
After changes have been committed (this might be a single commit or several), one can then push these changes upstream (one considers the GitLab server to be “upstream” from the local computer, which in turn is considered “downstream” from the GitLab server). When you are ready to push changes just click on the “Push” button in the SourceTree window. You should now see a confirmation window containing further preferences you can set when pushing upstream.
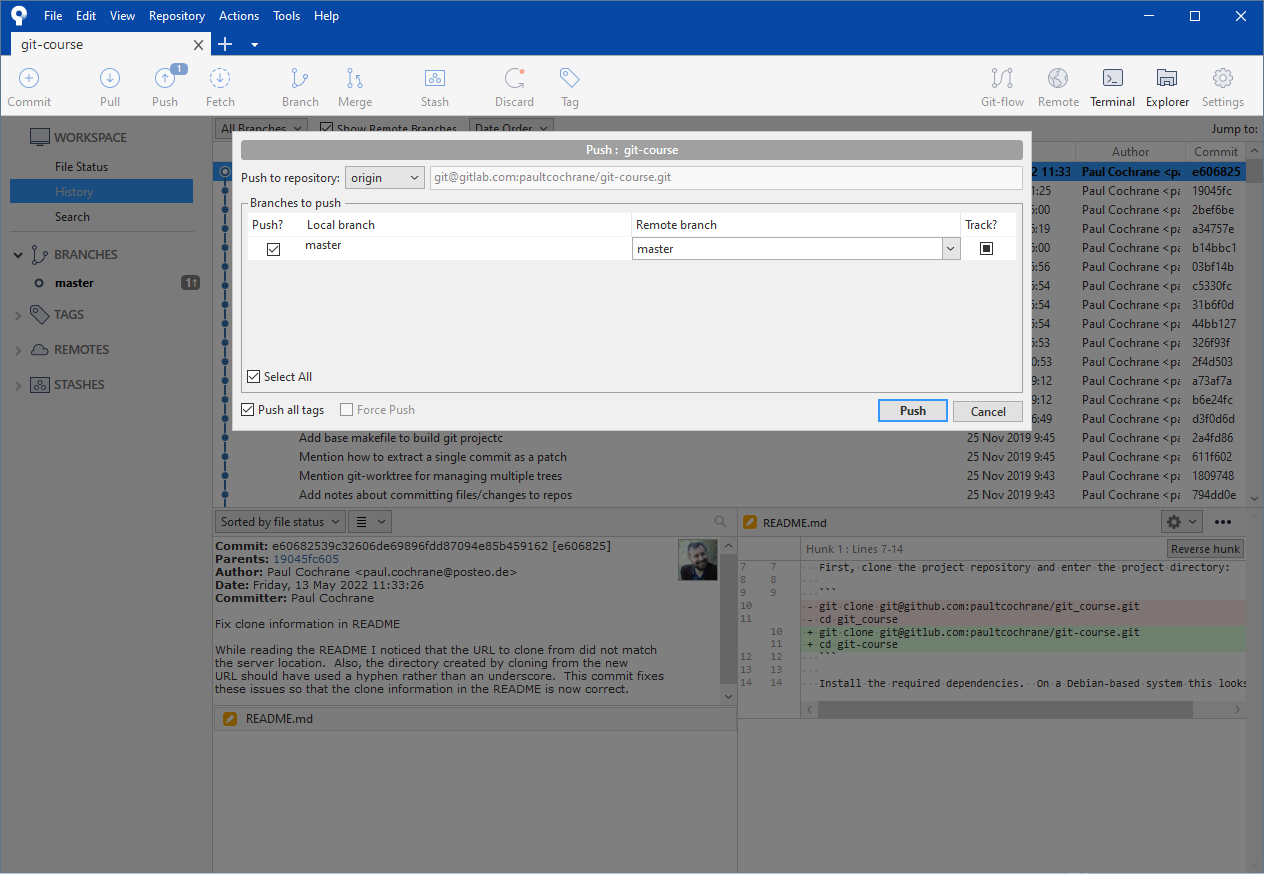
In most cases the settings are correct (once you learn more about Git you will have a better idea of what to change in this dialog box if you need to). Therefore, just click on the “Push” button to push your changes to the GitLab server.
Again, you will be presented with the SourceTree window showing the current state of the repository.
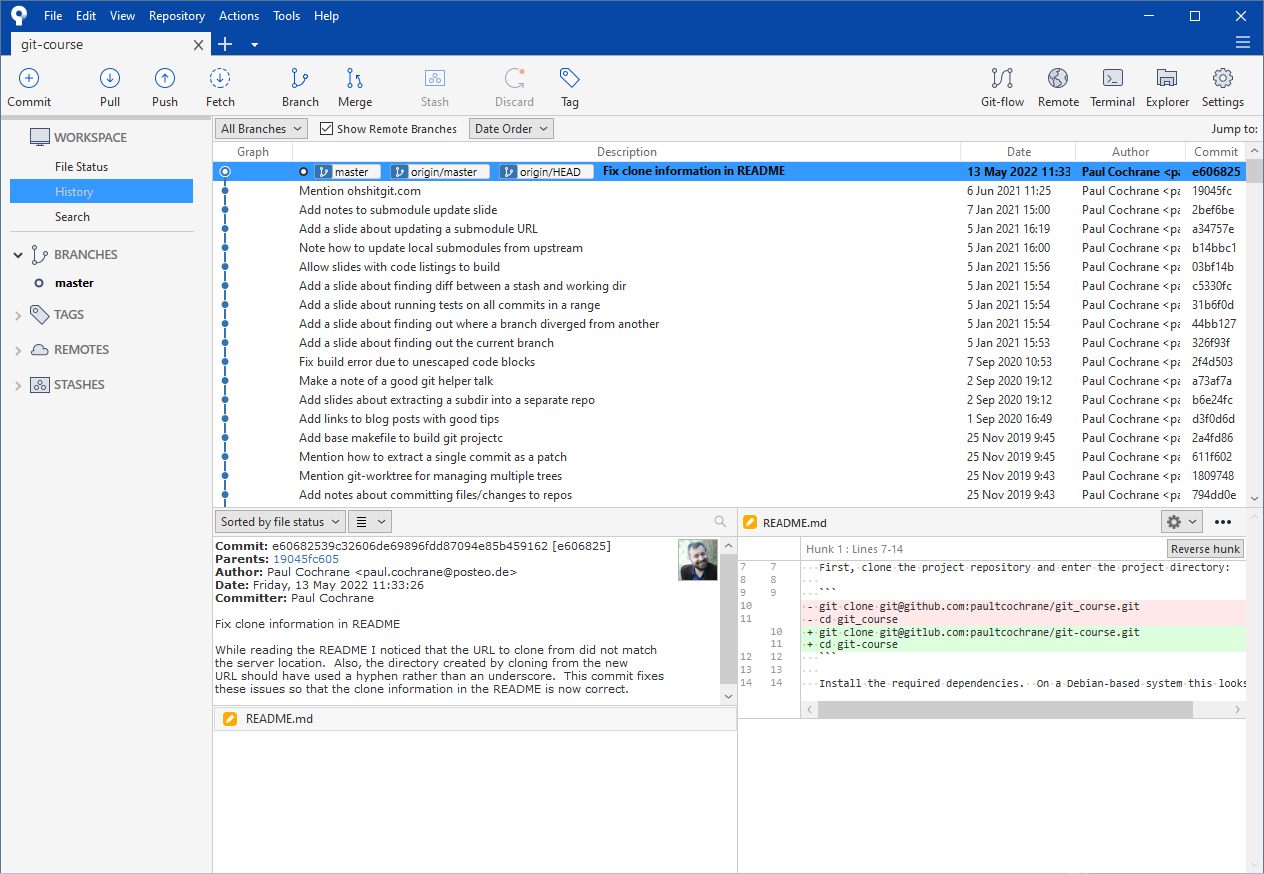
Now you will see that master and origin/master are at the same state (on
the same line) and that your commit is at the top of the list of commits.
Summary
Now that you’ve installed SourceTree and have seen the basics of adding, deleting and changing files as well as how to commit sets of changes and push these changes to the remote GitLab server, you’re well on your way to being able to use Git via SourceTree in your daily work. Most of the time you will be staging either single files or sets of files which you then commit to the repository; the trick is to see adding, deleting or modifying files as all being a change to the repository’s contents. And once one has understood that, then one can get an inkling as to why Git is referred to as a stupid content tracker.
I hope that this HOWTO was helpful! If you have any comments, questions or feedback, feel free to ping me on Mastodon or drop me a line via email.
-
The reason we don’t use one of the Microsoft applications is because these are usually so tightly coupled with the operating system that they don’t have a link to the Start Menu items folder and hence right-clicking on these items won’t help us find out what we want to know. ↩
-
This is an evolution of a course I gave several years ago about version control with Subversion und Git. It hasn’t yet been completely finished, hence why many of the files haven’t been touched in many years. ↩
Support
If you liked this post and want to see more like this, please buy me a coffee!